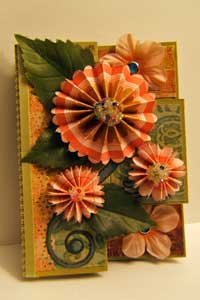
Tri-Shutter Card

by Bonnie Szwalkiewicz

Special occasions call for special cards. This one will fit the bill!

Supplies
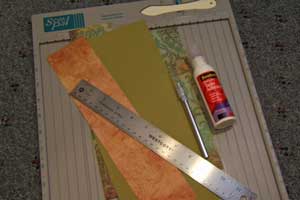
  • One 5 1/2" x 12" piece of Cardstock
  • Scor-Pal™ or other scoring tool
  • Paper Cutter
  • Patterned Paper
  • Bone Folder
  • Craft Knife
  • Ruler
  • Adhesive

Step-by-Step

  1. Step 1

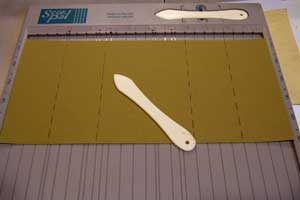
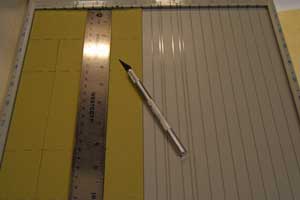
    Place 5 ½” x 12" piece of cardstock horizontally in your Scor-Pal.

    Score at 2”, 4”, 8” and 10”.
  2. Step 2

    Turn cardstock a ¼ turn.

    Along the long edge, measure in 1 ½” .

    Make a slit with a craft knife between the score marks at 2” and 10”. Repeat on the other long side.
  3. Step 3

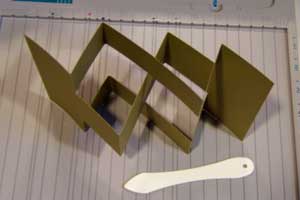
    Fold card as pictured.

  4. Step 4

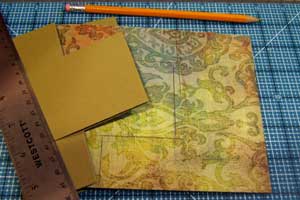
    Using card base as a template, trace the section with the T-shaped fold onto patterned paper.

    Cut two of this shape.
  5. Step 5

    Trim 1/16” from all sides of patterned paper.
  6. Step 6

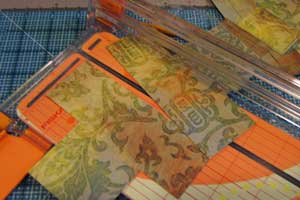
    Cut 4 pieces of patterned paper 1-3/8" x 1-7/8" .

    Cut 2 pieces of patterned paper 1 3/8” x 3 7/8”.

    Cut 1 piece of patterned paper 2 3/8” x 3 7/8”.

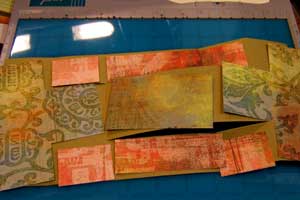
    Dry fit all of the pieces, then adhere to card base.
  7. Step 7

    Now that the basic Tri-Shutter card is complete, go forth! Embellish & decorate.

    If you are interested on how the Fan Fold Flowers were created, check this tutorial.
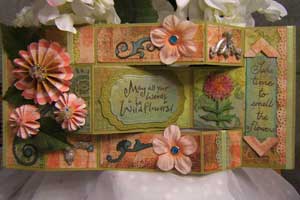
  8. View of the card closed.

Video!

Variations

    To use 8 1/2" x 11" cardstock:
    Trim cardstock to 5" x 10 1/2".
    Score at 1 3/4", 3 1/2", 7" and 8 3/4". Cut your lines horizontally at 1 1/2" and 3 1/2" from the first to the last score line.You will end up with a card that measures 3 1/2″ × 5″.

Your Turn

You've seen the tutorial, now you try it! We've got a section of the gallery set aside for Tri-Shutter Card. Try this technique, then upload your artwork to the gallery. Show us your creations!

***Please note - Internet Explorer/Edge is not a supported browser, and will not allow you to see the videos. Please use Chrome, Firefox or Safari to view our tutorial videos.

Questions and Comments

We'd love to get your feedback or questions. Leave your comment below.

SONO INTERESSATA ALLE card con il cartoncino

nel tutorial non riesco a capire le dimensioni.

Potete dirmi qualcosa?.

Tutorial bello e interessante.

EVA. Bacioni
EVA  |  Wed Feb 2, 2011 at 3:50 PM
Ciao Eva - le misurazioni sono vicino alle foto. Inoltre, questo link vi d� qualche informazione in pi�. smile http://craftiblog.wordpress.com/2009/05/05/2009-05-05-tri-shutter-card-tutorial-full-card-front/
lydia  |  Wed Feb 2, 2011 at 4:04 PM
I love your tri-shutter card! I know I will be making those for my favorite people. Your instructional video was very helpful. Thank you so much for sharing your talent!
Cindy  |  Sun Feb 20, 2011 at 1:51 PM
Love the card. It is beautiful. The video was awesome, so easy to follow along and understand. Thanks
Pamela Sanders  |  Tue Feb 22, 2011 at 2:07 PM
Thank you thank you thank you. Very clear, helpful instructions.
Kerry  |  Thu Mar 3, 2011 at 5:14 AM
I just stumbled upon your Freckle Face Printworks site and love the tri fold card "Viva Margarita". Would love to make a special b-day card for a friend using the margarita glass with the chihuahua. I would be more than happy to pay for that embellishment if you could make it for me. Any chance that this could be done? Thank you. Great cards on your sit.

Carol
Carol Newman  |  Thu Apr 28, 2011 at 5:01 PM
Could someone tell me what dies were used in the video? I want an oval and the scalloped border to go with it. That size would be good to start with.
Lori  |  Thu May 12, 2011 at 8:41 PM
Hi Lori,
I used Oval Nestabilities for the sample in the video.
Hugs and smiles
Beate  |  Fri May 13, 2011 at 5:03 AM
Obrigada Bonnie, ja fazia um tempo que queria um Pap desse cart�o para fazer um album. Muita gentileza sua em disponibiliza-lo.
Adorei o seu blog. Parabens pelos trabalhos
maravilhosos
Abra�os
Mariza/ Brasil
Mariza  |  Sun Oct 9, 2011 at 7:17 PM
Hi Bonnie, I love your tri shutter tutorial, I would like to know where to get the decorations that you used for your tutorial
Could you send me more about it? Thank you, I love your page.
Susan Irais Hudson  |  Fri Mar 2, 2012 at 10:19 PM
Amazing and easy to make
Cutie pie  |  Sun Mar 25, 2012 at 5:33 PM
This is a great card and thank you so much for sharing
Ellen Haydon  |  Thu Apr 5, 2012 at 3:07 PM
Thanks so much for the tutorial. So nice to see a card shape that keeps as much interest even after it is opened.
Robyn L COBURN  |  Tue Apr 10, 2012 at 7:49 PM
I don't know why I go to other blogs for instructions when you guys have the same info and alot more easier to understand....now from looking at my sample of the tri-shutter fold card, I don't see that the end pieces need to be scored all the way down..the one at 2" and 10" just to the cut line is sufficient!! Thank you for a great tutorial.
Carolyn M. Smith  |  Thu May 3, 2012 at 8:40 AM
Great card. Thanks so much .
Linda  |  Tue Jun 26, 2012 at 7:02 PM
Thank you so very much for this tutorial! This is one of the most beautiful cards I've seen and you made it look easy to accomplish... it is the very next card I will try. The tutorial alone was easy to understand but the video was amazing and worth it. THANKS!
Maja  |  Tue Jul 31, 2012 at 10:16 AM
I see so many gorgeous cards using this folding technique and wondered how in the world did they get all those cuts right. So, thank you for this wonderful tutorial Beate! I can't wait to jump in and make one myself!
Dottie  |  Mon Mar 18, 2013 at 3:02 PM
I don't have the time to go through all the comments, and so I'm not sure if this has been addressed: There is an error in the measurements in Step 6. The 4 pieces should be cut to 1-3/8" x 1-7/8" (and not 1-3/8" square). Could this be fixed in the tutorial itself? Other than this little mistake, both the tutorial and the video are great! Thank you very much!
Joyce Spear  |  Sun Dec 8, 2013 at 4:26 AM
I just made this card, it was easier than i thought it would be. Your instructions were very clear and easy to follow. Thank you.
Diana S  |  Fri May 23, 2014 at 3:07 PM
can't wait to try this~ thanks.
Karen Reynolds  |  Fri Mar 27, 2015 at 4:35 PM

Page 6 of 7 pages « First  <  4 5 6 7 >

You need to be logged in to comment

GET OUR NEWSLETTER


Splitcoaststampers's privacy policy