Triple Layer Pop-Up Card
by Kim Score
Learn how to create a triple layer pop-up card.
Supplies
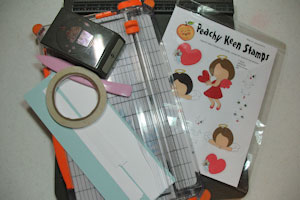
- Paper Cutter
- Scoring tool and Bone Folder
- Strong Adhesive
- Stamps, Ink, Embellishments
- One 4 1/4" x 11" piece of cardstock for the card base
- One 3/4" x 9 3/4" cardstock strip for the middle layer pop-up strip
- One 3/4" x 8 3/4" cardstock strip for the front layer pop-up strip
- Four 1/2" x 3 1/2" strips of cardstock for pop-up support tabs
Step-by-Step
-
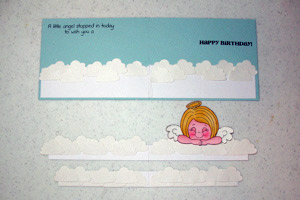
Step 1
Fold 4 1/4" x 11" piece in half for card base. Decorate inside with stamps, paper, etc. Fold 3/4" x 9 3/4" and 3/4" x 8 3/4" pieces in half. Attach stamped and punched pieces to strips.
-
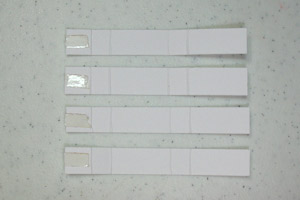
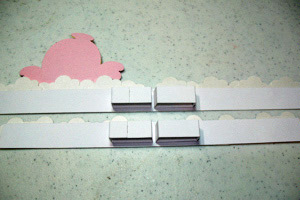
Step 2
Score 1/2" x 3 1/2" pieces at 1 1/8", 1 1/2", 2 5/8" and 3" for pop up support tabs. Add adhesive to ends.
-
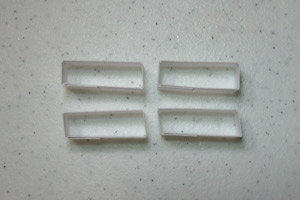
Step 3
Adhere ends of support tabs to form box shaped rings.
-
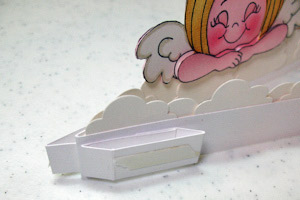
Step 4
Attach rings to middle and front strips on each side of center score lines.
-
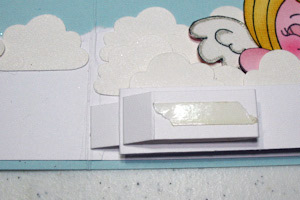
Step 5
Fold middle layer strip in half, right sides together. Push rear support tab to the left and front tab to the right. Add strong adhesive to top of each tab.
-
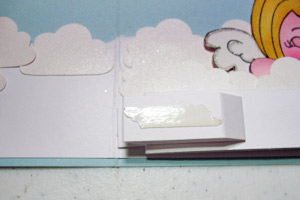
Step 6
Attach to card base on right side of center score line.
-
Step 7
Push tab in front towards center score line. Remove backing off tape and fold left side of card towards right, adhering to tab.
-
Step 8
Open card back up. Fold front layer strip in half, right sides together. Push rear support tab to the left and front tab to the right. Add strong adhesive to top of each tab. Attach to middle strip on right side of center score line.
-
Step 9
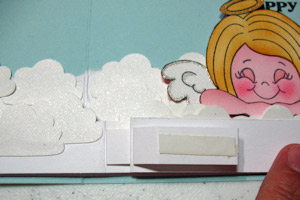
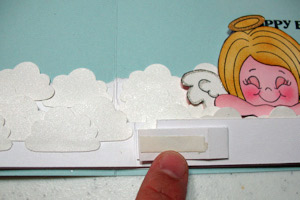
Push tab in front towards center score line. Remove backing off tape and fold left side of card towards right, adhering to tab.
-
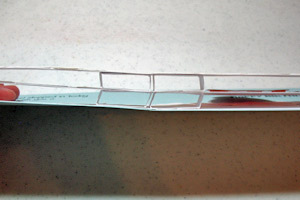
Bottom center of card looks like this:
-
Step 10
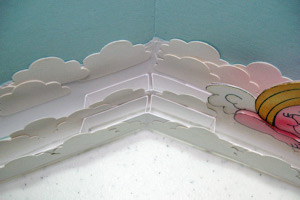
Top center of card looks like this:
-
Note:
The finished card will be bulky. Wrap a belly band or ribbon around card to keep closed.
Video!
Variations
Portrait Style Card
For a portait style card, cut the following pieces:
5 1/2" x 8 1/2" for card base
3/4" x 7 1/2' for middle layer pop out strip
3/4" x 6 1/2" for front layer pop out strip
4 pieces 1/2" x 3 1/2" for pop out support tabs
Your Turn
You've seen the tutorial, now you try it! We've got a section of the gallery set aside for Triple Layer Pop-Up Card. Try this technique, then upload your artwork to the gallery. Show us your creations!
***Please note - Internet Explorer/Edge is not a supported browser, and will not allow you to see the videos. Please use Chrome, Firefox or Safari to view our tutorial videos.

Questions and Comments
We'd love to get your feedback or questions. Leave your comment below.
Page 2 of 2 pages < 1 2