Treat Bag Cover
by Beate Johns
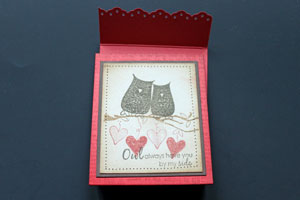
Decorate your cello bags with a cardstock cover.
Supplies
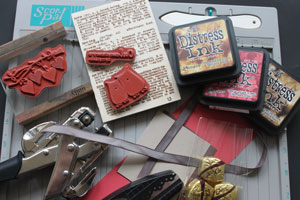
- One 3 3/8" x 10 1/2" piece of cardstock for treat bag cover
- Scor-Pal™, or other scoring tool
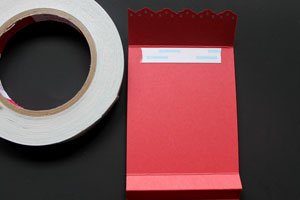
- Scor-Tape™, or other strong adhesive (optional)
- Border Punch (optional)
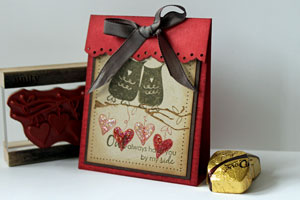
- Stamps, Unity's Believe in Fairytales used here
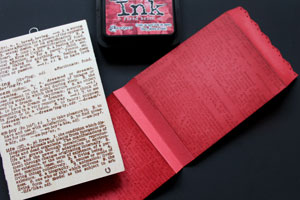
- Ink
- Ribbon
- Crop-a-dile™, or other hole punch
- 3" x 5" Cello Bag
- Candy to fill your cello bag
Step-by-Step
-
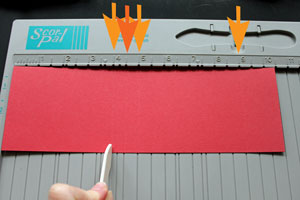
Step 1
Score the cardstock at 4", 4 1/2", 5" and 9".
-
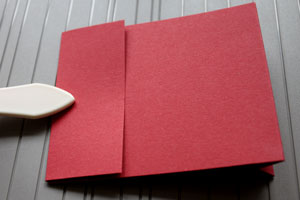
Step 2
Fold cardstock in half at the 4 1/2" score line.
-
Now fold the 4" and 5" score line in the opposite direction to create the bottom of the treat bag cover.

-
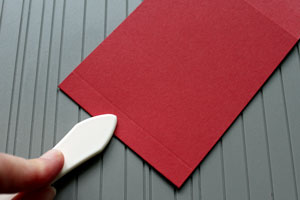
Step 3
Fold the top flap down.
-
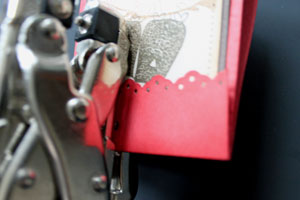
Step 4 (Optional)
Decorate the edge of the flap with a border punch.

-
Step 5
Stamp the cardstock.
-
Step 6
Decorate the front of your treat bag cover.
-
Step 7
Add a strip of Scor-Tape™ on the score line under the flap.
-
Place the candy filled cello bag on the cardstock.
Line the bottom of the cello bag up with the edge of the first score line, centering over the cardstock.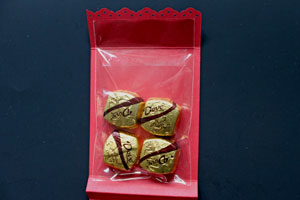
-
Step 8
Fold the part of the cello bag that extends over the score line of the flap down.
Now fold up the cover front.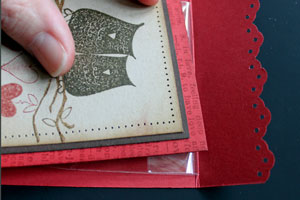
-
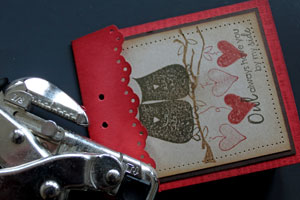
Step 9
Fold your flap down and punch a hole close to the center of the flap.
-
Punch a second hole close to the first one.
-
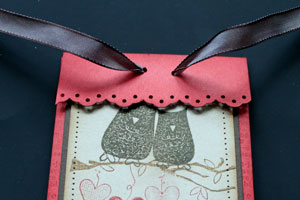
Step 19
Thread a piece of ribbon through the holes.
-
Tie a bow in the front. Your treat bag is done.
Video!
Variations
-
No stamping
Use patterned paper instead of stamping your cardstock.
Peek-a-Boo
Add a window to the panel furthest away from the front flap.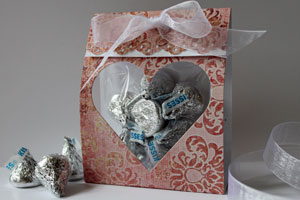
Your Turn
You've seen the tutorial, now you try it! We've got a section of the gallery set aside for Treat Bag Cover. Try this technique, then upload your artwork to the gallery. Show us your creations!
***Please note - Internet Explorer/Edge is not a supported browser, and will not allow you to see the videos. Please use Chrome, Firefox or Safari to view our tutorial videos.
 *
*
Questions and Comments
We'd love to get your feedback or questions. Leave your comment below.
Is the decorative punch used on this project SU?
You can find Distress inks in many local and online stores.
Frannie,
Leave your treat bag cover unfolded and then use a Nestabilities die to cut your window.
Lori,
The punch I used for this sample is Stampin' Up!'s Eyelet Border punch.
Hugs and smiles
CM
I really like the bottom fold, seems like it would stand up very well, great idea!
~krismom
Super economicas y faciles de realizar!!
Page 2 of 2 pages < 1 2