Tea Bag Stamping

by Tina Wardell

Upcycle a used tea bag by stamping on the filter paper.

Supplies

  • Used tea bag (hot or cold brew, any brand, dried completely)
  • Scissors
  • Toothpick or tweezers
  • Stamps (Stampin' Up!® Very Versailles stamp set used here)
  • Ink (SU Shaded Spruce and Early Espresso used here)
  • Adhesive (SU Snail and Foam Dimensionals used here - any double-sided tape adhesive can be used)
  • Stamp positioning tool (optional - SU Stamparatus used here)
  • Coloring medium (SU markers used here in Shaded Spruce, Early Espresso; acrylic paints, alcohol markers and watercolors will also work)
  • Other supplies as needed to complete the project

Step-by-Step

  1. Step 1

    Steep the tea and set the used bag(s) aside in a dish to dry overnight.

    NOTE:
    To speed the drying process a heat tool can be gently used on the tea bag.

  2. Step 2

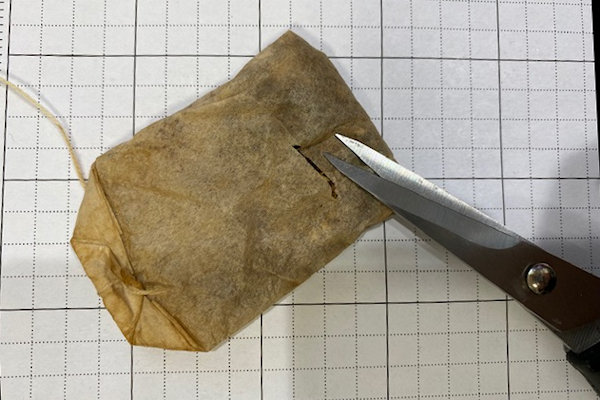
    Remove tea leaves from the tea bag.

    For whole bag use:
    On the backside of the tea bag (folded side), cut a small slit 3/4 way down to bottom of the bag approximately 3/4” across. Be careful to only cut a single layer of the bag. Gently rub the bag to remove all of the tea.

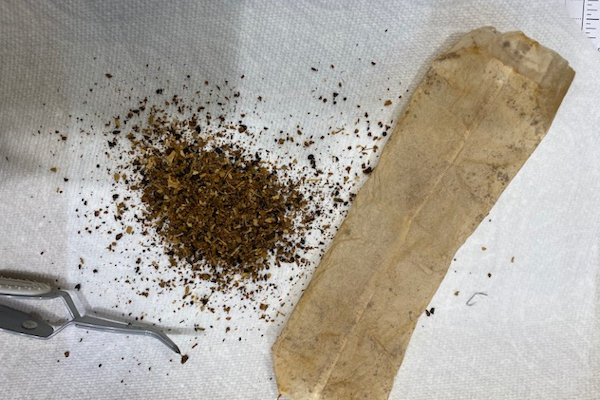
  3. For unfolded full sheet:
    Gently remove the staple that holds the bag closed. (The tip of your paper snips or a toothpick works good for this.) Unfold and gently rub the bag tube to remove the tea. Gently pull apart at the seam and remove any additional tea that may be present.

    NOTE:
    If you have trouble pulling the seam apart, you can spritz a small amount of water on the seam and then pull it apart. Be sure to lightly dry the bag with a heat tool before proceeding to the stamping.
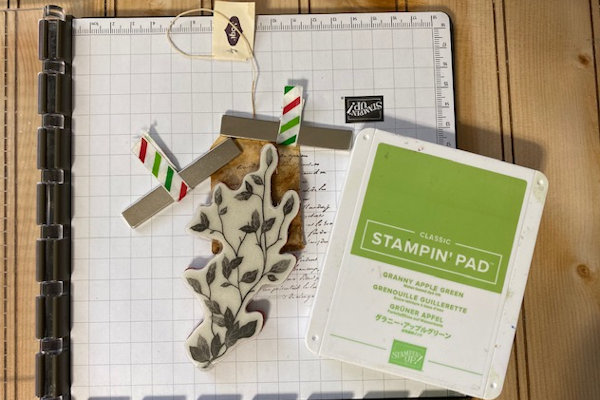
  4. Step 3

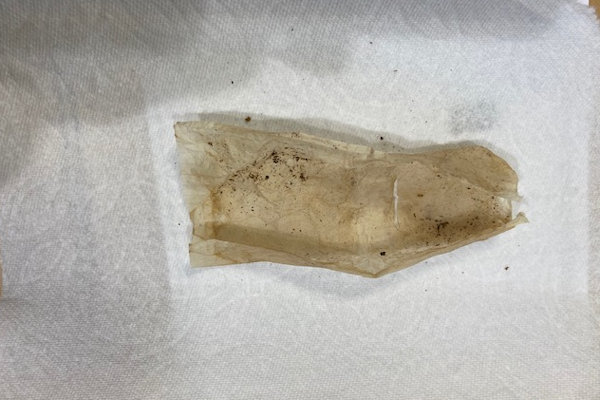
    Gently smooth the bag with your finger and put into stamp positioning tool if desired.

    NOTE:
    Due to color and texture of the bag, it may be necessary to stamp the image more than once, and using the positioning tool makes it easy to re-stamp.

  5. Step 4

    Stamp desired image(s).

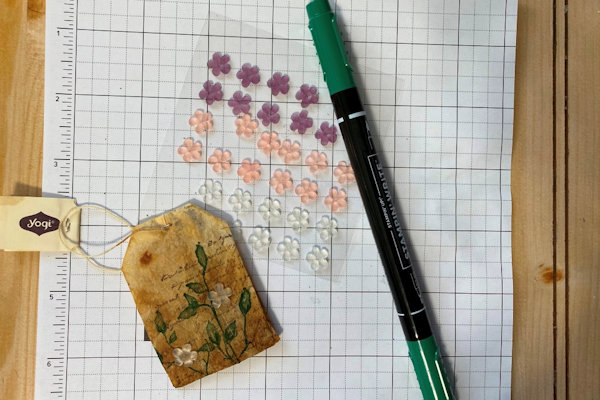
  6. Color with markers or other medium if desired or needed. Embellishments may also be added as desired.
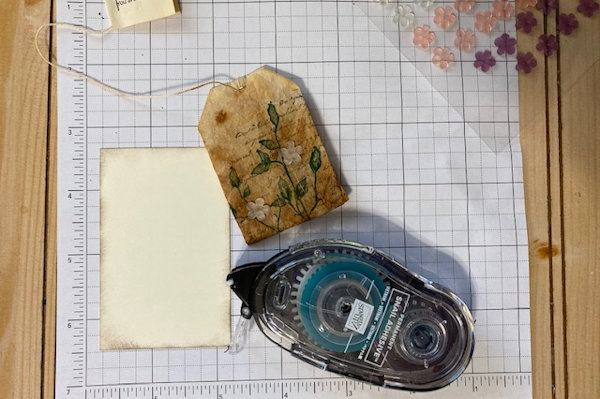
  7. Step 5

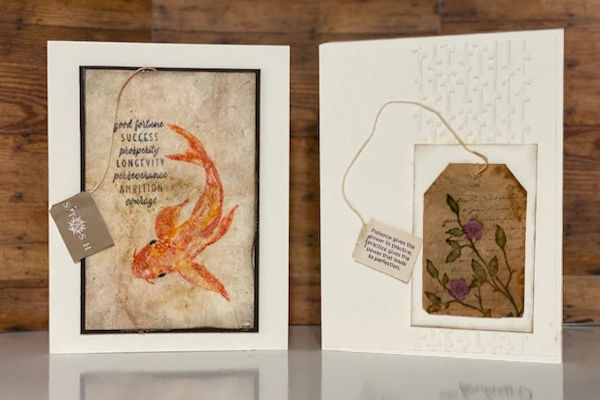
    Attach tea bag to a cardstock mat and assemble card or project.

    NOTE:
    A lighter color cardstock allows the stamped image to show better since the majority of the tea bags are semi-transparent, especially when opened up.

  8. Step 6

    Complete the project.

Video!

Your Turn

You've seen the tutorial, now you try it! We've got a section of the gallery set aside for Tea Bag Stamping. Try this technique, then upload your artwork to the gallery. Show us your creations!

***Please note - Internet Explorer/Edge is not a supported browser, and will not allow you to see the videos. Please use Chrome, Firefox or Safari to view our tutorial videos.

Questions and Comments

We'd love to get your feedback or questions. Leave your comment below.

Interesting tutorial. I hadn’t thought to do this before but I love all the character that the staining gives to the card. I wish my tea bags had sayings on them.
Experimental  |  Wed May 20, 2020 at 3:50 AM
What a creative and unique idea...love it! TFS
jmhoffmann  |  Wed May 20, 2020 at 5:09 AM
Morning, Saw your FB post that you are being featured on SCS this week! Thx for sharing this great technique with us Tina!! Will have to give it a try as it looks sooo cool!!! smile
cveverka  |  Wed May 20, 2020 at 5:39 AM
Love this technique! Thanks for your tutorial.
Debbie Koch  |  Wed May 20, 2020 at 6:03 AM
Absolutely love this! Excellent tutorial, thanks!
Tabby47  |  Wed May 20, 2020 at 7:13 AM
This is excellent! Thanks for sharing smile
dhaus  |  Wed May 20, 2020 at 7:52 AM
FUN!!! wink<3
TLady  |  Wed May 20, 2020 at 8:10 AM
that is so neat, love it!
Conniecrafter  |  Wed May 20, 2020 at 8:57 AM
I enjoyed this video and technique. Anxious to try it. I don't see the measurements of the two pieces to adhere the tea bag to. Thanks for sharing your talent.
marie0112  |  Wed May 20, 2020 at 9:59 AM
Very cool idea - always looking for more "texture" for my cards. Thank you!
stamperbairb  |  Wed May 20, 2020 at 11:15 AM
Delightful technique. Another wonderful tutorial.Thanks for sharing.
pink shoes  |  Wed May 20, 2020 at 11:16 AM
What a great idea! Thanks for such a thorough tutorial, can't wait to try it.
VickieLeigh  |  Wed May 20, 2020 at 11:27 AM
marie0112, they may all be just a little different in size.
dina  |  Wed May 20, 2020 at 11:39 AM
WOW, what a wonderful tip to really use the whole tea bag. Who would have thought. I'm going to steep some tea, & come tomorrow I shall use a tea bag in a project. TYFS
tiffanyrose  |  Wed May 20, 2020 at 12:08 PM
This is a great technique. Wondering how you got the whole front of the card covered with the tea bag instead of just the tea bag shape.
graceforever12  |  Wed May 20, 2020 at 1:05 PM
graceforever12 check out the video - Tina shows how she opened up the tea bag to have the full stamping surface. I did the same on mine, and used a dry adhesive sheet to adhere it to my card front.
dina  |  Wed May 20, 2020 at 1:37 PM
love this, I am a tea drinker and never thought of this! I will have some fun with this technique, THANKS. and thanks for your service in the Navy. my best to you, Teresa
aztk  |  Wed May 20, 2020 at 2:27 PM
Love the brightly colored fish! May I ask what colors/inks you used? Brilliant technique! Thank you!
RileyRuxpin  |  Fri May 22, 2020 at 8:11 AM
This is a wonderful tutorial and idea for recycling used tea bags. My question is what did you use to attach the tea bag to the paper?
Thank you very much.
Emma434  |  Fri Oct 15, 2021 at 11:09 PM

Page 1 of 1 pages

You need to be logged in to comment

GET OUR NEWSLETTER


Splitcoaststampers's privacy policy