Tea Bag Dispenser Box
by Heidi Baks
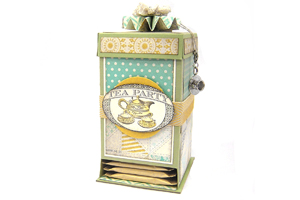
Create a box that holds and dispenses tea bags.
Supplies
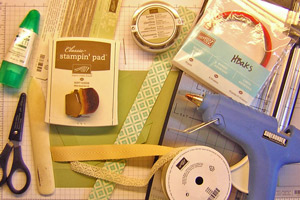
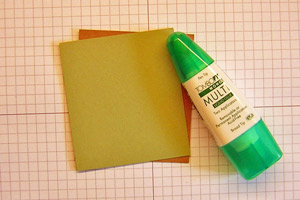
- Cardstock
- Patterned Paper, to decorate
- Scoring Tool
- Scissors
- Adhesive, Sticky Strip and Tombow Liquid adhesive used here
- Tea Bags
- Embellishments, to decorate
Step-by-Step
-
Step 1
Score a 6" x 12" piece of cardstock at 1" parallel to the long edge, score at 3 1/16", 5 3/4", 8 13/16", 11 1/2" parallel to the short edge. Score 3/4" above the 1" score line in the SECOND SEGMENT ONLY.
Tea Bag Dispenser Template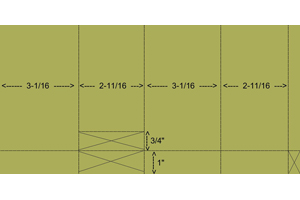
-
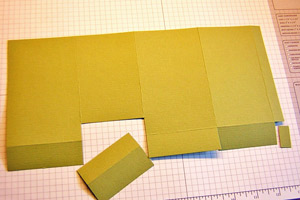
Step 2
Cut out the 1 3/4 x 2 3/4" piece from the bottom of the second segment and 1/2 x 1" corner piece. Cut between the remaining 1" flaps.
-
Step 3
To create the lid, score a 4 1/4" x 4 5/8" piece of cardstock at 3/4" on all sides. Cut and taper the corners.
-
Step 4
Decorate the side panels as well as the top of the box lid.
Patterned Paper needed:
One 2 1/2" x 2 7/8" for lid top; two 1/2" x 2 1/2", two 1/2" x 2 7/8" patterned paper pieces for lid edges
Patterned Paper for upper side panels: two 2 5/8" x 2 5/16", two 2 1/4" x 2 5/16"
Patterned Paper for lower side panels: two 2 5/8" x 2 5/16", 2 1/4" x 2 5/16", 2 1/4" x 1 9/16"
Neutral cardstock needed:
Side Panels: two 2 3/4" x 4 3/4", 2 3/8" x 4 3/4", 2 3/8 x 4"
BEFORE you start adhering panels, lay out all pieces to see where each piece fits. Sponge all edges with medium brown distressing ink, if antiqued look is desired. Attach panels to unassembled box and lid.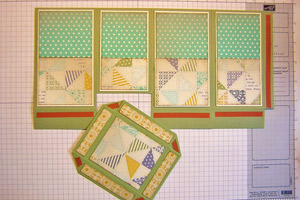
-
Step 5
:To create the base, attach a 3" x 3 3/8" cardstock to chipboard piece in the same size with Sticky Strip or Tombo multipurpose adhesive.
-
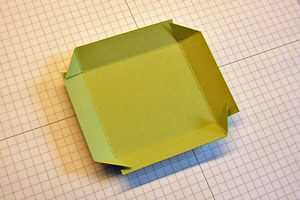
Step 6
Assemble the box and lid, using Sticky Strip. Attach box to the base, and add a 2 3/4" x 3-1/8" patterned paper piece on the inside bottom of the box for a finished look.
-
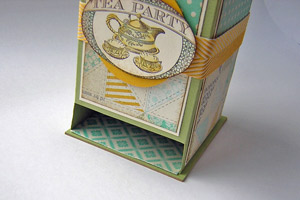
Step 7
Decorate as desired.
-
Step 8
To create an accordion flower embellishment, score 1" x 12" strip of Patterned Paper every 1/2" , then fold with mountain/valley folds. Use the glue gun to assemble the flower.
Check HERE for a step by step tutorial with video.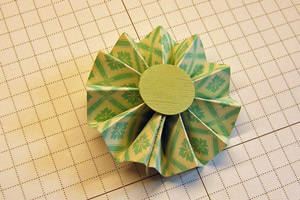
-
Step 10
For the lacy ribbon flower, use a running stitch along the edge of the lace with. Insert a brad through the center of the lace ribbon flower, and assemble the whole embellishment on the lid with a glue gun.
For a step by step tutorial with video check HERE.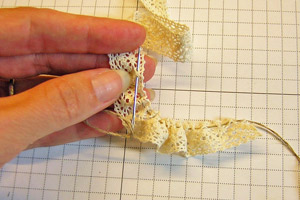
Video!
Your Turn
You've seen the tutorial, now you try it! We've got a section of the gallery set aside for Tea Bag Dispenser Box. Try this technique, then upload your artwork to the gallery. Show us your creations!
***Please note - Internet Explorer/Edge is not a supported browser, and will not allow you to see the videos. Please use Chrome, Firefox or Safari to view our tutorial videos.

Questions and Comments
We'd love to get your feedback or questions. Leave your comment below.
Thanks for sharing Heidi.
Your tea dispenser is just gorgeous and I enjoyed so much your tutorial. I have already maid one dispenser, but want to make more for gifts to my girlfriends.
Where did you purchase the tea trinket?
Thanks.
Page 1 of 2 pages 1 2 >