Tag Punch Star
by Donna Moore
Make a stellar focal point for any paper project with a few tools.
Supplies
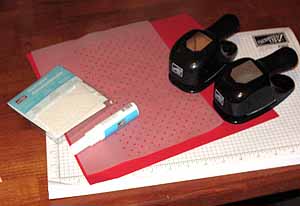
- Large Tag Punch
- Small Tag Punch
- 2-way Glue Pen
- Dimensionals
- Cardstock for frame
- Mulberry, Vellum or other light-weight paper for inner parts of the starburst
- Detail Scissors
Step-by-Step
-
Step 1
Punch 16 small tags out of cardstock, leaving about 1/4" between each one.
Using the large tag punch, go back over the holes made by the small punch.
Line up the punch so that you can see an evenly spaced frame around each hole. Punch out 16 frames.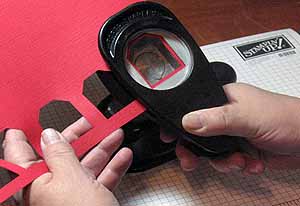
-
Step 2
Each layer of the star will consist of 4 frames. Apply two-way glue evenly over the back of a few frames at a time.
Put the sheet of lighter weight paper face-side up and carefully apply your frames in a cross-shaped pattern.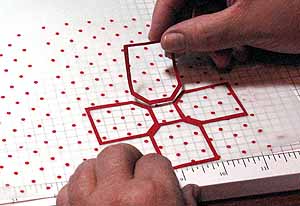
-
Step 3
Follow the same process for attaching the next layer of 4 frames to the base layer.
The second layer is attached to fill in the empty areas of the first cross-shaped layer.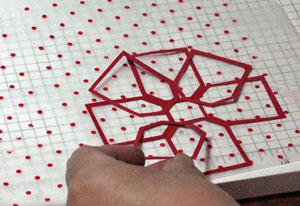
-
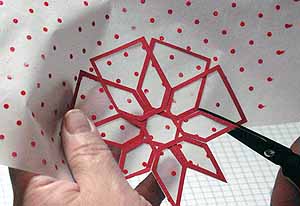
Step 4
The points of the star will be visible when the second layer is attached. Use paper snips to trim away the excess.
-
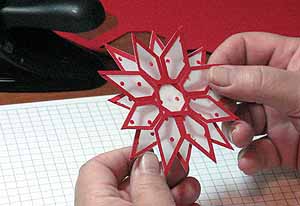
Step 5
Repeat Steps 2-5 to make another star. Use dimensionals to adhere the two stars.
-
Step 6
Finish your project.

Variations
Turn it into an ornament.
Use blue cardstock to turn it into a snowflake.
Use yellow toned cardstock to make stars.
Your Turn
You've seen the tutorial, now you try it! We've got a section of the gallery set aside for Tag Punch Star. Try this technique, then upload your artwork to the gallery. Show us your creations!
***Please note - Internet Explorer/Edge is not a supported browser, and will not allow you to see the videos. Please use Chrome, Firefox or Safari to view our tutorial videos.

Questions and Comments
We'd love to get your feedback or questions. Leave your comment below.
Thanks
I just used versamark and the dotted background stamp from Stampin' Up! Then I took an embossing pen (like a versamarker) and added a few dots. The red dots are just red embossing powder.
Also, both punches are from Stampin' Up!
This is ingenious. I love it. What a creative mind. I will try my hand it. Very lovely.
Thank you so much for the clear, simple to follow instructions and the inspiration.
Thanks again!!!!
Page 3 of 4 pages < 1 2 3 4 >