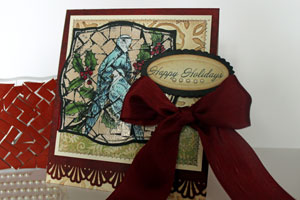
Stained Mosaic

by Beate Johns

Create a mosaic look with a homemade background stamp.

Supplies
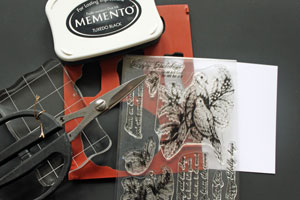
  • Acrylic stamp handle

  • Rubber trimmings (here, adhesive-backed)

  • Rubber Scissors

  • Neutral colored Cardstock

  • Outline Stamp, Flourishes Dove and Holly used here

  • Black Ink

  • Versamark™ ink pad, or other clear embossing ink (not shown)

  • Clear Embossing Powder (not shown)
  • Heat Gun (not shown)

Step-by-Step

  1. Step 1

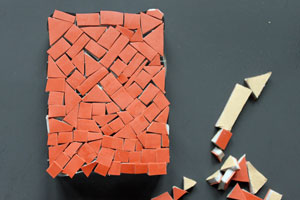
    Cut your rubber trimmings into small pieces.
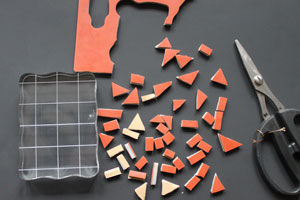
  2. Step 2

    Adhere the rubber pieces to an acrylic block.
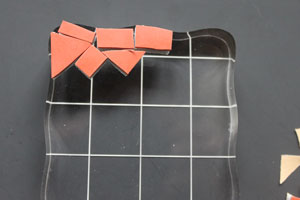
  3. Adhere the pieces close together and fill your entire acrylic block.
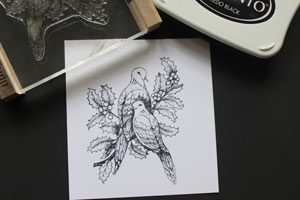
  4. Step 3

    Stamp an image with black ink on neutral cardstock.
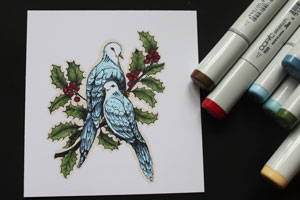
  5. Step 4

    Color your image with vibrant colors.

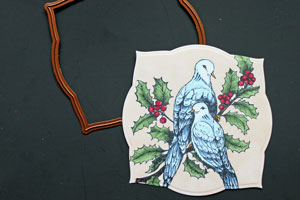
  6. Step 5

    Cut your image to the desired finished shape and size. (Label 4 Nestabilities used here.)
  7. Step 6

    Ink mosaic stamp with Versamark™ ink and stamp it over your colored image.
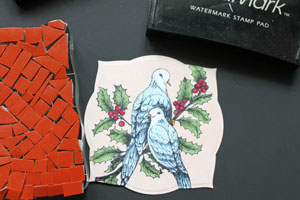
  8. Step 7

    Add clear embossing powder over your image. Tap off excess.
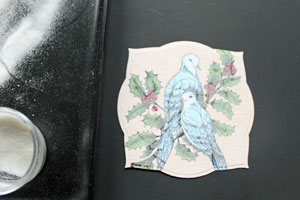
  9. Heat embossing powder with heat gun until it's completely melted.
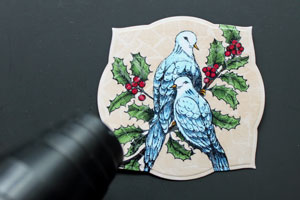
  10. Step 8

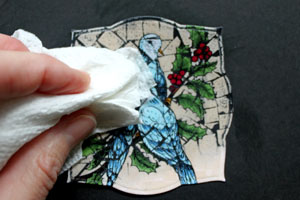
    Rub your black ink pad over the image.
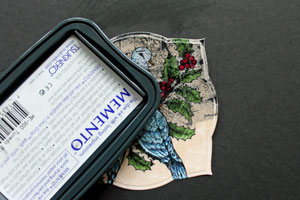
  11. Buff image with paper towel to take black ink off the embossed parts of your image.
  12. Step 9

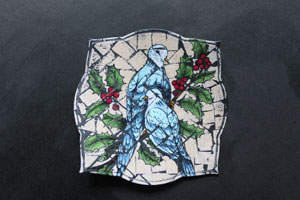
    Repeat step 8 if neccessary. Your stained mosaic piece is done.
  13. Step 10

    Finish your card.

Video!

Your Turn

You've seen the tutorial, now you try it! We've got a section of the gallery set aside for Stained Mosaic. Try this technique, then upload your artwork to the gallery. Show us your creations!

***Please note - Internet Explorer/Edge is not a supported browser, and will not allow you to see the videos. Please use Chrome, Firefox or Safari to view our tutorial videos.

Questions and Comments

We'd love to get your feedback or questions. Leave your comment below.

This is absolutely exquisite!!!!!
Cathy  |  Thu Dec 17, 2009 at 2:39 PM
I'm speechless...wow...
Diane  |  Thu Dec 17, 2009 at 6:58 PM
hummmm....i need to search up a wood block or an acrylic block the size of a background stamp that I can permanently attach these pieces to and i will have a mosiac block to work with all the time without having to build it each time. What a great idea Beate!
kerry3k  |  Sat Dec 19, 2009 at 9:12 AM
WAY COOL!! Love this effect! GReat tutorial!
jami  |  Sat Dec 19, 2009 at 9:51 AM
Great technique and tutorial! I tried it and love it however, I'm not loving my card.

BTY I used Rich Cocoa ink from Memento and love the brown vs. the black.
Joseline  |  Sat Dec 19, 2009 at 5:19 PM
Great inspiration for those who need a new style for their cards. Good clean instructions and product created is top rate. Thanks for sharing.
Nancy Doppler  |  Sat Dec 19, 2009 at 6:04 PM
Awesome, now to get some new sets to get the extra rubber hehe..
Christine  |  Mon Dec 28, 2009 at 4:31 PM
Wow. That is so cool! Way to be green!! I can't believe this brilliance comes from people. (As I have not found it in my genes.)

I'm so glad you share! Thank you!
Jen  |  Wed Dec 30, 2009 at 2:13 PM
I knew I kept my excess rubber for a reason. Of course, I could make dozens if I hade enough blocks, lol! I do have a few larger demounted wood blocks perfect for this! smile Awesome!
ckbythesea  |  Wed Dec 30, 2009 at 9:58 PM
I am looking for the stained glass look also.
but instead of flat pieces that are cut out, I am looking for a stamp that has the LINES like stained glass lines.
that I can stamp directly on to my painting.
Has anyone seen this type of stamp? There's got to be a stamp to do this. thanks so much.
Linda  |  Wed Dec 30, 2009 at 11:02 PM
Beate, I love this technique so much. I'm thinking of ordering more stamps just so I can have some extra rubber to make this.
Cyndi Watkins  |  Thu Dec 31, 2009 at 5:36 PM
Beate, you are truly talented.......I've just found this and was blown away......thank you for sharing with us your awesome ideas and your many talents.......sincerely.........
Gloria Westerman  |  Fri Jan 8, 2010 at 2:39 PM
This is probably the coolest technique I've every seen! I love it, thank you so much for sharing! It's funny, I've always wished I could find a use for those scraps.
Maaike Rawcliffe  |  Fri Jan 22, 2010 at 2:40 PM
A good idea, which could be made even better. Save those rubber scraps (make sure they are the same thickness) and then mount them on a sheet of cling mount�one large enough to cover a card front�that way, you have a permanent "mosaic" to use with various images, and you don't have to build it again and again. As a stained glass artist, this tutorial really appealed to me!
Shawn Fyksen  |  Wed Jan 27, 2010 at 8:50 AM
Create a permanent "mosaic-maker" by collecting your (same thickness) rubber trimmings, and mounting them onto a large piece of cling mount. That way, you only have to do it once. As a stained glass artist, this tutorial really appealed to me.
Shawn Fyksen  |  Wed Jan 27, 2010 at 8:53 AM
I knew there would be a good reason for saving all those scrap pieces. (being the saver that I am).
Kathy Siegersma  |  Wed Jan 27, 2010 at 11:44 AM
I cut up my pieces and put it on the thin E-Z mount. It turned out perfect and I can use it over and over. You did a wonderful job on your tutorial and thanks for the inspiration.
Wendy Moore  |  Wed Jan 27, 2010 at 1:38 PM
Acrylic blocks can only be really cleaned with rubbing alcohol. I love this technique but a word of caution- do not use a picture (rubber stamp) of a human face- it does not look good done with mosaic! At least mine didn't.
Joan Gentry  |  Thu Jan 28, 2010 at 12:55 PM
Excellent idea - have been saving my off cuts since a friend of mine mentioned it... and now I'm going to have a go! Also...my first experience of that 'You Tube' thing...handy!
Charmaine  |  Sat Jan 30, 2010 at 12:49 AM
Great Tutorial. thanks for sharing.
Mary Strauser  |  Sat Jan 30, 2010 at 9:10 AM

Page 3 of 4 pages  <  1 2 3 4 >

You need to be logged in to comment

GET OUR NEWSLETTER


Splitcoaststampers's privacy policy