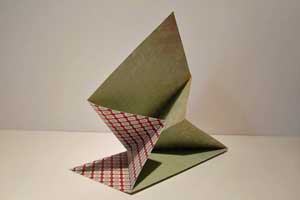
Spring Card

by Sandy Hulsart

Proudly display a beautiful scene or meaningful sentiment on this fancy-fold card.

Supplies
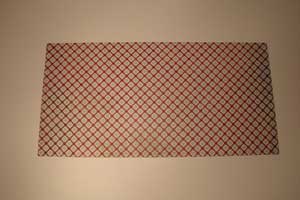
  • One piece of cardstock 5 ¼" x 10 ½"

  • Scoring tool

  • Pencil

  • Ruler

  • Scissors

Step-by-Step

  1. Step 1

    Fold paper in half, patterned sides together to make a 5 ¼" square.
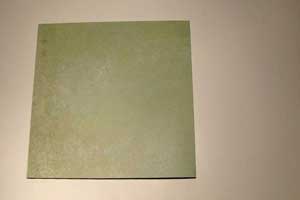
  2. Step 2

    Open the paper and with the patterned side up, fold the right side back to the center, creating a quarter fold on the right end.
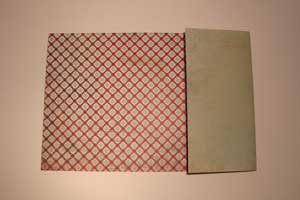
  3. Step 3

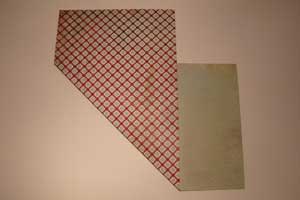
    Open the paper again, but with the patterned side down.

    Grab the lower left hand corner, pull it up and over until the lower edge is even with the score created in Step 2. Crease.
  4. Step 4

    Open the paper again, still patterned side down.

    Grab the top left hand corner, pull it down and over until the upper edge is even with the score created in Step 2. Crease.

  5. Step 5

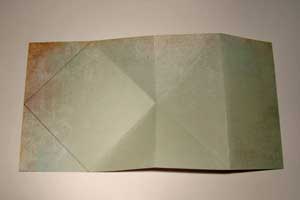
    Open the paper, patterned side down to see the score lines.

    Mark the center of the left hand edge and draw a line from that point to the score marks a quareter of the way to the right, top and bottom.

    These are the cutting lines.
  6. Step 6

    Cut along the pencil lines to create a point at the top of the card.

    If everything was creased in the correct direction, it should fold up perfectly. This is what it looks like from the back. A little bit of adhesive was added under the front point on the bottom to get it to stay upright.
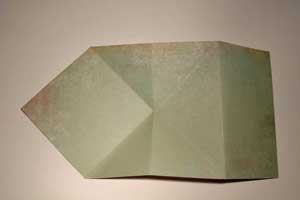
  7. And a side view.

  8. Step 7

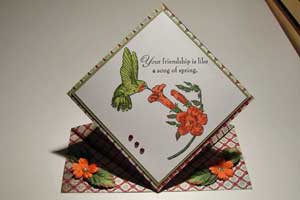
    Finished card folds flat and is 5 1/4 " square. When taken out of the envelope, it will "spring" up, thus the name. For mailing, use a 5 1/2 square envelope.
Video!

Your Turn

You've seen the tutorial, now you try it! We've got a section of the gallery set aside for Spring Card. Try this technique, then upload your artwork to the gallery. Show us your creations!

***Please note - Internet Explorer/Edge is not a supported browser, and will not allow you to see the videos. Please use Chrome, Firefox or Safari to view our tutorial videos.

Questions and Comments

We'd love to get your feedback or questions. Leave your comment below.

The instructions were so easy to follow. I am a visual learner, and this was fun to make.
The color photo was a plus.
Thank you so much.
gail  |  Fri Jul 4, 2008 at 7:36 PM
Beautiful, Sandy! Nice, clear, step-by-step pictures --- they make all the difference! Love this kind of origami that isn't too intricate or SMALL...even I can do them!

Hugs,
Betsy
MSBetsyZ  |  Sat Jul 5, 2008 at 10:11 AM
Ok, i made it! Super cute and lots of fun. I also scaled it down and made it 4 1/4" square one, just so I could get it to go in the 'standard' invitation envelope. My only question is where do you sign it? I was thinking on the lower left corner or the back?
chicagogirl  |  Sat Jul 5, 2008 at 10:34 AM
do you have to score the paper first?
heartsong47  |  Sat Jul 5, 2008 at 8:22 PM
great tutorial...just what I needed for my next stamp club meeting!
Stacey  |  Sat Jul 5, 2008 at 10:22 PM
No, this is just simple folding, you can use a bone folder to really crease the folds but it is not necessary. This can be done with a Scor-Pal or Scor-It but you would have to do the math. Much easier to just fold it following the directions. Thank for your all the great comments.
Sandy Hulsart  |  Sun Jul 6, 2008 at 1:23 PM
Hi, Sandy,
You can see the card I made from your fabulous tutorial here: http://maricopastamper.blogspot.com/.
Thanks for sharing!!!
Marge  |  Sun Jul 6, 2008 at 5:15 PM
Totally awesome card!!!!!!!! Wonder if I can actually do it......hum. Well I gotta at least try as I get tired of the same cards all the time. This is unique and SO well done. Congrats on a great work of art Sandy. evette
evette  |  Mon Jul 7, 2008 at 7:31 AM
Loved the card. Should the card stay up all the time, I put a piece of tape at the point but it seems to tilt back. Everything seems to be lined up correctly.
Peggy Fox  |  Mon Jul 7, 2008 at 8:10 AM
Wow Sandy, you have gone BIG TIME. And to think I too knew you when, and have been a guest stamper in your home. You go girl!
Barbara  |  Mon Jul 7, 2008 at 8:15 AM
The card is really awesome, I made about 4 different ones with different papers. How do you ever think up such great ideas? I showed it to my girlfriend and she just loved it. Keep on with the great work and the ideas.
Peggy Fox  |  Mon Jul 7, 2008 at 8:21 AM
This is super. I love making cards that are unique.
Kathy  |  Mon Jul 7, 2008 at 9:22 AM
How much it will stay standing depends on the weight of paper you use for the base. I usually use card stock rather than designer paper unless it is 2 sided. It really needs the extra weight. Also, really crease those folds, the help of a bone folder makes a lot of difference as to how it stands. After it has been in an envelope for extended periods of time, it will not want to stand anymore. And remember, you can make this any size as long as the length is twice the width. Thank you all for the nice comments.
Sandy Hulsart  |  Mon Jul 7, 2008 at 12:37 PM
I love to make cards the move and I will make this card.

I never try to make the pattern but this time I just had to try it right a way.

Thank you so much the card and the pattern is the best.
Gloria  |  Tue Jul 8, 2008 at 7:02 AM
This card is beautiful, clever and fresh. Quite the inspiration. Your instructions are clear and direct. I tried it and it is so simple. Thanks for the tutorial and sharing.
Mary Jo  |  Tue Jul 8, 2008 at 7:32 PM
I love this!
Where did you get that stamp?? I absolutely love hummingbirds!
This card is perfect for some graduation annoucements!
TFS!
Tracee619  |  Wed Jul 9, 2008 at 4:22 PM
Fantastic tutorial, Sandy!! Your card is very beautiful, and I love this unique design!!
Rose Ann  |  Wed Jul 9, 2008 at 10:07 PM
Wonderful card - I am going to try it in the morning! Thanks.
Lenoria  |  Sat Jul 12, 2008 at 7:23 PM
This card is awesome! It is easy, creative, and just the inspiration I needed!
Pam  |  Sun Jul 13, 2008 at 8:23 AM
I was told about this website at a card class I attended..as soon as I got home I made this card and your directions were so easy to follow. Thank You
trish  |  Tue Jul 15, 2008 at 7:12 PM

Page 3 of 5 pages  <  1 2 3 4 5 >

You need to be logged in to comment

GET OUR NEWSLETTER


Splitcoaststampers's privacy policy