Spotlight Stamping
by Lindsay Adreon
Use a stamp positioner for this two-toned spotlight technique.
Supplies
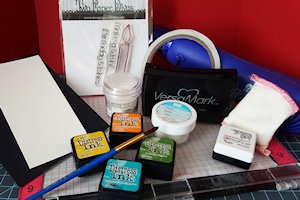
- Stamps (Two Paper Divas "Make a Wish" used here)
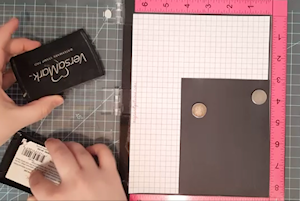
- Black ink , compatible with your coloring medium (Versafine Onyx Black used here)
- Embossing ink
- White embossing powder
- Embossing Buddy (antistatic bag)
- White cardstock , 2 1/2" x 5 1/2" (watercolor paper used here)
- Dark cardstock for card base, 4 1/4" x 5 1/2" (Black cardstock used here)
- Heat tool
- Stamp positioner (MISTI used here)
- Coloring medium of choice (used here: Distress Inks in Peacock Feathers, Mowed Lawn, Spiced Marmalade, & Mustard Seed to do a loose watercolor wash)
- Adhesive
- Other supplies as needed to complete the card
Step-by-Step
-
Step 1
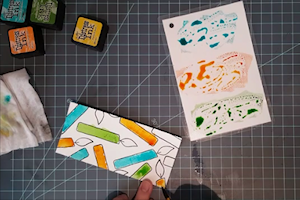
Repeatedly stamp an image onto the white cardstock using black ink, making sure to have several impressions that hang off the edges.
-
Heat emboss the entire panel with clear embossing powder if desired.
-
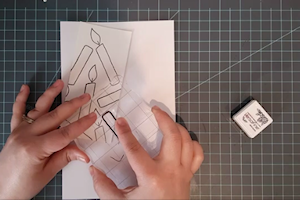
Step 2
Place the dark cardstock into the MISTI. Line up the stamped white cardstock panel on the dark cardstock panel, exactly where you want it to end up on the finished card. Line up the clear/acrylic stamp with a stamped image on the white panel that "hangs off" the edge.
NOTE:
Once the image is stamped onto the dark cardstock you will not be able to play with the placement of the white panel, so make sure it is exactly where you want it on the finished project.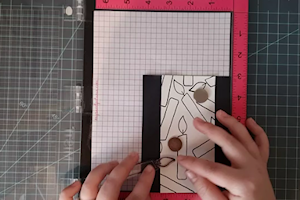
-
Step 3
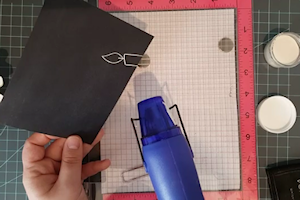
Close the lid of the MISTI to pick up the stamp. Carefully remove the white stamped panel. Prep the dark cardstock with your antistatic tool, and ink the image stamp with embossing ink. Stamp down by closing the lid of the MISTI.
-
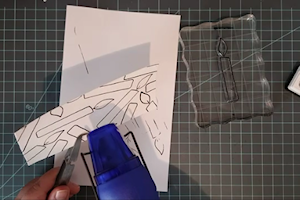
Step 4
Remove the dark cardstock and coat the stamped image with white embossing powder. Heat set with a heat tool, making sure the powder is completely melted.
-
Step 5
Place the dark cardstock back into the MISTI and carefully align the white panel with the heat embossed stamped image, making sure the image lines up perfectly. It should now appear as if the image is continued onto the dark cardstock.
Choose another image that "hangs off" the edge and repeat the process until all of the images extend onto the dark cardstock.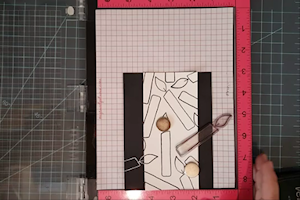
-
Step 6
Fill in any empty spaces on the dark cardstock by randomly stamping the same image and heat embossing.
-
Step 7
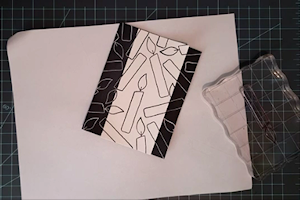
Color in the images on the white panel (a loose watercolor wash with Distress Inks was done here).
-
Step 8
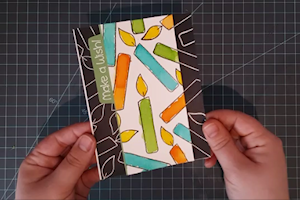
Assemble the card as desired making sure to line up all of the stamped images carefully to complete the illusion of a two toned image.
-
Step 9
Complete the project.

Video!
Your Turn
You've seen the tutorial, now you try it! We've got a section of the gallery set aside for Spotlight Stamping. Try this technique, then upload your artwork to the gallery. Show us your creations!
***Please note - Internet Explorer/Edge is not a supported browser, and will not allow you to see the videos. Please use Chrome, Firefox or Safari to view our tutorial videos.

 *
*
Questions and Comments
We'd love to get your feedback or questions. Leave your comment below.
Thanks for another great tutorial. I love that you do these with photos and explanations instead of only videos. Those of us with slow wifi appreciate this greatly!
Lori, I did all my stamping for my sample with the MISTI, but I was working with several stamps at once... I think because she was using a single stamp, it was easier to just go at it by hand than to reposition the stamp on the MISTI and clean the stamp to switch inks for every impression. Clear stamps are pretty easy to line up just by sight.
Lori, with these colors of cardstock you could most definitely stamp that way, however on others colors such as the vellum card I posted in the gallery one is stamped in memento to color with alcohol markers the other in Versamark and heat embossed in white. The vellum would show black ink and Versamark doesn't work with alcohol markers..also I too get a gap and without a mat it's very noticeable...HTH!!
And Dina answered the anti static tool question better than I ever could! Lol..I just use mine everytime I emboss or use glitter to cut down on stray powder and a cleaner/crisper embossed image.
Clearstampaddicts/
groups/ScrapbookDeals/
groups/1090253147653827/
Page 1 of 1 pages