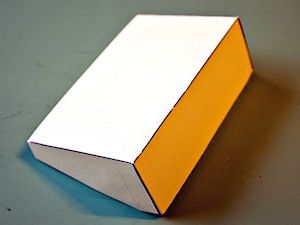
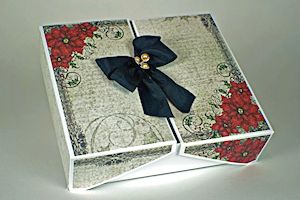
Split Top Box
by Joann Jamieson
Create a card sized box with a unique center opening.
Supplies
- Cardstock
- Paper trimmer
- Scoring board
- Bone folder
- Scissors
- Strong adhesive
- Wide ribbon
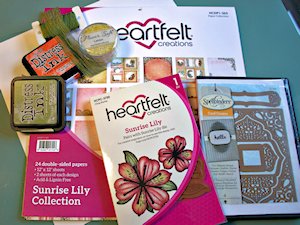
- Other supplies as needed to complete the box (used here: Heartfelt Creations Sunrise Lily Paper Collection, Cling Stamp Set and Die; Spellbinders A2 Tranquil Moments Die; Distressed Inks in Peeled Paint and Ripe Persimmon; Lemon Flower Soft)
Step-by-Step
-
Step 1
Cut cardstock to 8 1/2" x 7 1/4".
Score on all 4 edges at the 1 1/2" mark.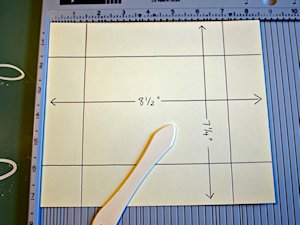
-
Step 2
Make relief cuts with scissors to create the tabs as shown.
Fold on the score lines and use a bone folder to get a nice sharp edge.
NOTE:
Trim a little extra off both edges of the tabs to allow the box edges to line up nicely.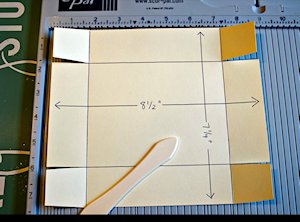
-
Step 3
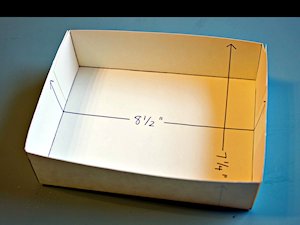
Glue the 4 tabs to the inside of the box, taking care to get each corner nice and straight. Place glue right to the edge of each tab for maximum adhesion.
-
Step 4
For the box top, cut cardstock to 7 3/8" x 4 1/4".
Score on 3 edges at the 1 1/2" mark as shown (both short sides and one long side).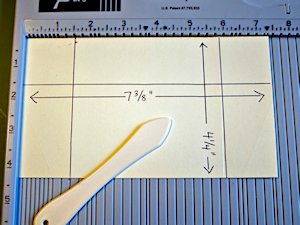
-
Step 5
Make relief cuts to create the tabs as shown.
Fold on the score lines and use a bone folder to get a nice sharp edge.
NOTE:
Trim a little extra off both edges of the tabs to allow the box edges to line up nicely.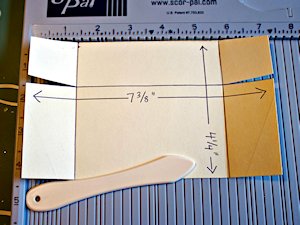
-
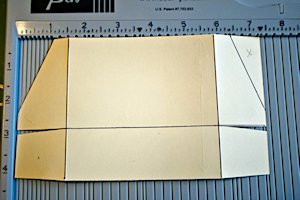
Step 6
Turn the piece over. Measure in 1/2" from each score line and make a small mark. Using a ruler, join the lines and cut off the angled piece as shown. Repeat for the other side of your piece. (The picture shows 1 piece removed and the other piece to be removed is identified by an "X".)
-
Step 7
Glue the tabs to the inside of the lid.
NOTE:
There will be a little piece of the tab that will extend beyond the angle that you just cut off. Once your glue has cured simply cut this off with a pair of scissors.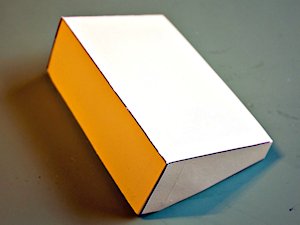
-
Step 8
Repeat Step 4 to step 7 again for the other side of the lid.
-
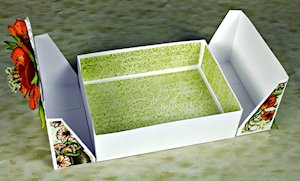
Step 9
Place the 2 lids upside down, and the base created in Steps 1 - 3 inside the lids. Using double-sided adhesive, glue a piece of ribbon to the bottom of the box and layer it over onto the edge of the lid, creating a hinge. Hold it in place until the adhesive has cured.
Add an additional layer of cardstock measuring 4 1/4" x 5 1/2" to the bottom to hide the ribbon and add strength.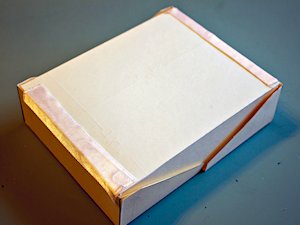
-
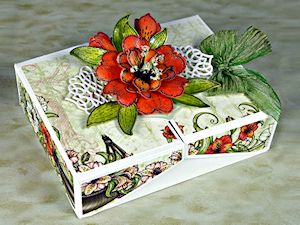
Step 10
Layer panels of your favorite designer paper over each section. Simply follow the pattern above, but cut instead of scoring, then trim each piece a little smaller.
-
Step 11
Complete the box. These measurements will accommodate a set of A2 cards.
Video!
Variations
-
This box can be made to fit almost any size card or gift.
The formula is the width of the box plus 2 times the height of the box by the length of the box plus 2 times the height .
For example, to make this box 5" x 7" and 1" deep, the base would be cut 7" x 9" and scored on all sizes at the 1" mark.
-
For the tops, the width would be the same as the box measurement plus 1/8”. The length would be 1/2 the base length plus the height of the box.
For the 5” x 7” box, each top piece would be 7 1/8" x 4 1/2", with score lines at 1”.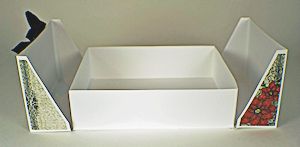
Your Turn
You've seen the tutorial, now you try it! We've got a section of the gallery set aside for Split Top Box. Try this technique, then upload your artwork to the gallery. Show us your creations!
***Please note - Internet Explorer/Edge is not a supported browser, and will not allow you to see the videos. Please use Chrome, Firefox or Safari to view our tutorial videos.

Questions and Comments
We'd love to get your feedback or questions. Leave your comment below.
So Glad you gave the measurements for the 5x7 size at the end - really usefull. No doubt I could likely
work out the measurements for an A5 size too.
Thank you so much for the FAB idea.
Don't forget to upload your version of the box to the gallery for everyone to see.
Have a great day!
But, the dimensions do not allow a 4 /14 x 5 1/2 card and envelope to fit in the box. The envelopes are bigger than the cards. The cards had to be pushed in because they are 4 1/4 x 5 1/2.
So sadly, the box is too small to accommodate A2 cards.
I never intended this box to hold the envelopes as well. This box was designed to hold card that does not fit into conventional envelopes. If you need the box to hold the envelopes as well, simply make the box larger. For example, an A2 envelope measures 4 3/8" x 5 3/4". In order for the box to hold both the card and envelope the bottom piece would measure at least 7 3/8" x 8 3/4". If I was making the box to hold the envelopes as well I would simply start by making the bottom 7 1/2" x 9". Hope this helps.
And I noticed the glue you're using. I used to use that glue, and I miss it. Are you still able to find it? If not, what are you using these days? I found a similar Scotch glue, but I hate the bottle. The opening is too big, and I don't like that I can't keep the bottle tip down when I'm working.
Thank you for the tutorial -- I think I'll try it soon!
Page 1 of 1 pages