Spinner Card
by Cambria Turnbow
Warning: Spinner cards are highly addictive. If you start to steal pennies from your child's piggy bank, or forget to pick them up because you are playing with your card.... it's time to move on to the next tutorial.
Thanks to Joleenieweenie for sharing the spinner card with Splitcoaststampers! And a big thanks to the tutorial queen of Splitcoaststampers, Beate Johns, for helping me with my first tutorial.
Supplies
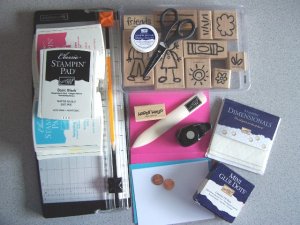
- Stamps
- Ink
- Mono Adhesive
- Stampin' Dimensionals
- Embellishments (you can always add Dazzling Diamonds)
- Mini Glue Dots
- Paper Snips
- Cutter
- Pencil
- 1/2" circle punch (optional)
- Two pennies
- 1/2 Sheet Cardstock folded and bone scored (SU! Pink Passion© in this example)
- Coordinating Cardstock cut to 5 3/8" x 4 1/8" (this will be adhered to your card later; SU! Tempting Turquoise© in this example)
- Coordinating Cardstock cut at 5 1/4" x 4" (this will be your top piece that your spinner will attach to; SU! US White© in this example)
Step-by-Step
-
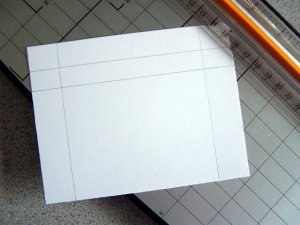
Step 1
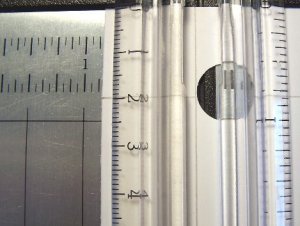
Take your top piece (US White) cardstock and trace (very lightly) where you want your slider to be on your card. The opening should be 1/4". Use your cutter arm as a guide.
-
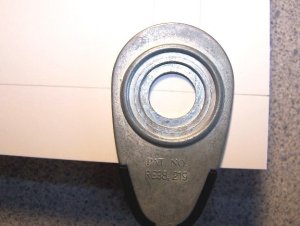
Step 2
Use the 1/2" circle punch (turn upside down so you can see your lines) and push it as far as it will go against the cardstock. Line it up with the lines you've drawn. Punch circles on each side (thanks to JanTInk for this great tip).
-
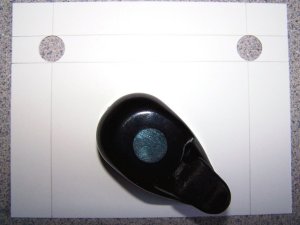
This is what the backside of your cardstock will look like after using the circle punch.
-
Step 3
You can cut out the slider notch with your cutter by lining up the arrows on the orange cutter and following the lines you drew. Place your cardstock on your cutter and line up the bottom of the circle with the cutting blade path. Lift the arm (holding your cardstock in place) and align the orange cutting blade in the center of the circle. Pull the cutter from one circle to the next being careful to stop in the center of each circle. Flip it around and do the top of the circle. You should have a perfect cut out!
-
Step 4
Stamp the front (US White), and align it over the background piece (Tempting Turquoise) of cardstock. Very lightly trace out where the notch will show through. Remove your stamped front piece and stamp your message. (Skip this step and just stamp random images if you don't want a message showing).
TIP: Mini glue dots sprinkled with DD glitter are perfect for flower centers.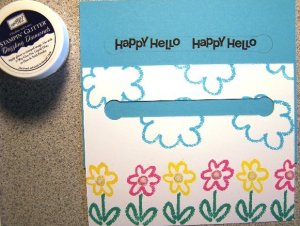
-
Step 5
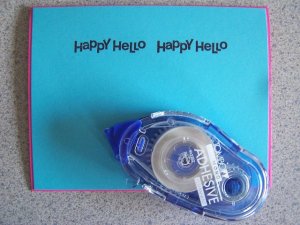
Erase the lines around your message and adhere the background (Tempting Turquoise) to your card (Pink Passion). Set aside.
-
Step 6
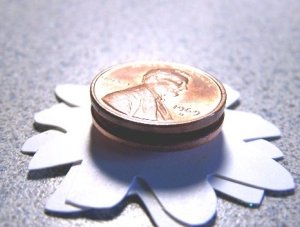
Stamp, embellish, and cut out the image you want to spin. Take one of your pennies and place a dimensional in the center (you want to get that dimensional in the center so that your image will spin correctly). Peel back sticker piece and place the second penny on the top (make a sandwich with the dimensional in the middle). Take a second dimensional and stick it to the center on top of your penny sandwich.
TIP: You can use metal edge tags, large buttons, or cardstock circles/squares made from bigger punches to adhere smaller images that don't otherwise cover the penny.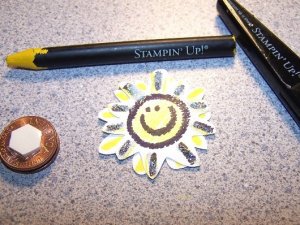
-
Step 7
Peel off the sticker piece from the top dimensional and stick it to the center of the back of the spinner.
-
Step 8
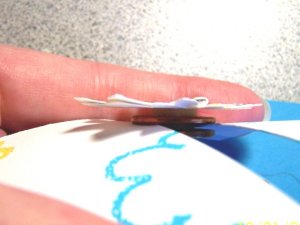
Place spinner into the cut out notch in the front of your card. Put the bottom in first and then gently lift the top piece into the top. The cardstock will fit between the "sandwich" part. Hold card front upright and make sure your spinner spins nicely when you tilt the cardstock from side to side. Spinner should spin easily from side to side when held upright.
-
Step 9
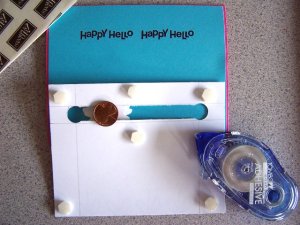
Place the FAT/THICK dimensionals on the back of the spinner piece like this. If you have the new SU! dimensionals that only come in one size, double them up on the back (one on top of each other). Peel off the sticker part and center the whole piece on the front of your card!
-
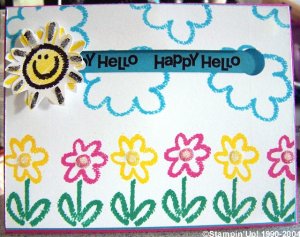
You have finished your spinner card! Hold your card upright (for maximum spinning action) and tilt. Watch while grown adults squeal with delight and marvel at your cleverness!
Variations
Get Creative
Experiment with different coin sizes or create slots in various shapes.
Your Turn
You've seen the tutorial, now you try it! We've got a section of the gallery set aside for Spinner Card. Try this technique, then upload your artwork to the gallery. Show us your creations!
***Please note - Internet Explorer/Edge is not a supported browser, and will not allow you to see the videos. Please use Chrome, Firefox or Safari to view our tutorial videos.

Questions and Comments
We'd love to get your feedback or questions. Leave your comment below.
I would like to thank you for your beautiful projects and comprehensive instructions.
Helen
Attached (hopefully) is a photo of a belated card using your mechanism with a boy cartwheeling to the post box. I'm planning a golf ball running down a course for a birthday and something going across a map for a leaving card.
Re Christine's query - if you make the bottom of the hidden coin heavier than the top it shouldn't spin.
thanks for the tutorial.
Can you give me the article number from the stampset?
Page 1 of 1 pages