Sparkly Stained Glass
by Beate Johns
Create a stained glass look by stamping on acetate and applying glitter on the back side of it.
Supplies
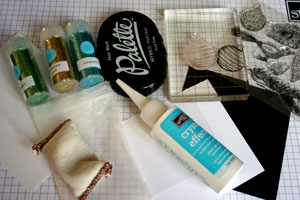
- Line Image Stamp, Flourishes All That Glitters used here
- Palette ink™ or other ink that stamps on plastic
- Glitter in several colors
- Crystal Effects™ or other clear drying glue
- Acetate
- Neutral colored cardstock
- Embossing Buddy
Step-by-Step
-
Step 1
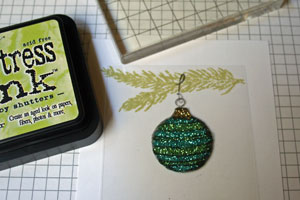
Stamp image with Palette ink on acetate.
Let dry or carefully heat set.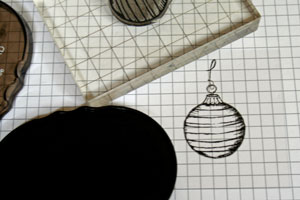
-
Step 2
Flip acetate over and rub Embossing Buddy all over the back side of the image.
This will help keep the glitter from sticking to unwanted parts of the acetate.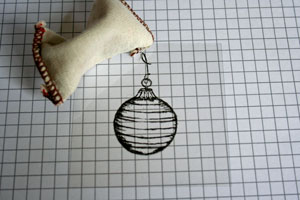
-
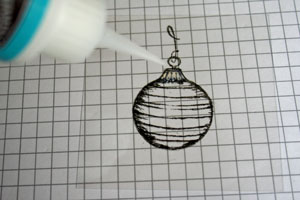
Step 3
Add Crystal Effects™ to all parts of the image that will be covered with the first glitter color.
-
Step 4
Pour glitter over the glue.
Martha Stewart Florentine Gold used here.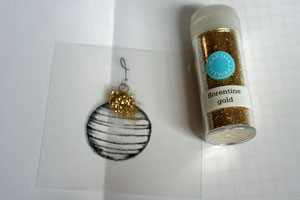
-
Step 5
Tap excess glitter off and add more Crystal Effect™ for the second glitter color.

-
Step 6
Pour second color glitter over the image.
Martha Stewart Turquoise used here.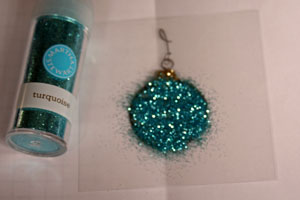
-
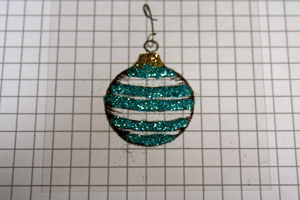
Tap off excess glitter.
-
Step 7
Add more glue and the third glitter color to fill image completely.
Martha Stewart Verdelite was used here.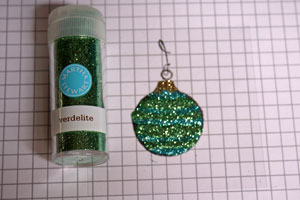
-
Step 8
Stamp neutral cardstock.
-
Step 9
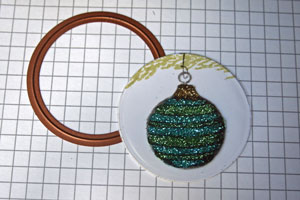
Cut both neutral cardstock and acetate if needed.
Flip the acetate so that the glitter side of it will face towards your cardstock. That will keep your glitter contained.
-
Step 10
Finish your project.
You can find a complete list of product used here.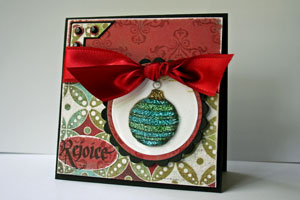
Video!
Variations
A different kind of sparkle
Substitute the glitter for Pearl Ex™ powders.
Instead of glue, use a Versamark™ pen, then add embossing powders instead of glitter. Make sure you have heat resistant acetate for this version.
Leave out the sparkle
After stamping your image on the acetate, turn it over and color with alcohol based markers.
Try mixing Crystal Effects™ with reinkers and coloring the back of the image with the mixture and a paintbrush.
Add even more shine
Emboss the image instead of stamping it in Palette ink.
Your Turn
You've seen the tutorial, now you try it! We've got a section of the gallery set aside for Sparkly Stained Glass. Try this technique, then upload your artwork to the gallery. Show us your creations!
***Please note - Internet Explorer/Edge is not a supported browser, and will not allow you to see the videos. Please use Chrome, Firefox or Safari to view our tutorial videos.
Questions and Comments
We'd love to get your feedback or questions. Leave your comment below.
Thanks so much for all your inspiration!
LaraB
My Stazon ink pad needed re-inking and I was too lazy to find my reinker. Yes, Stazon does dry faster, but Palette ink works just as well (if you are patient to let it dry).
Hugs and smiles
Did you let the Crystal Effects dry between colors??? I'm wondering if you don't will they run together??
I love all your tutorials, they are great. I am a little confused about this one though. Is the glitter part facing out or laying on the cardstock? and how did you attach the acetate to the neutral cardstock?
Thanks Jacquie
What else is it used for?
You don't have to let the Crystal Effect dry between colors. The first glitter covers it up.
Jacqui,
The glitter part is facing the cardstock. It helps to keep the glitter contained. I am all about that. LOL
I added adhesive (here I used snail adhesive) on the neutral cardstock, where the glittered image would be. That way it's hidden and the layers stay together.
Melissa,
If you stamp your image on white cardstock and then add glitter, the stamped lines inbetween might get lost.
Sarah,
Crystal Effect is a clear drying glue. You can also use it to add a shiny layer over your image. Or just use it as regular, strong glue.
Hugs and smiles
Beate
i am a little confused tho..as you stamped the pine bough , then cut it off..i'm not sure i understand that part..or just a senior moment for me???..lol..loves ya
You can buy Acetate at any office supply store as transparencies, or you can buy it at Flourishes.org as clear cardstock.
Gail,
I stamped the pine bow, so that my ornament isn't floating around, but hanging of something. I had to cut most of it off, so I would keep all of the ornament in my circle cut-out.
Hugs and smiles
Will Nesties cut chipboard? Thanks so much.
Vickie
1. Do you cut out the completed ornament closely to itself, or cut the whole acetate to circle size (that matches the size of the neutral cs)?
2. When you flip over the finished ornament (to contain the clitter), did you spray/brush anything on the glitter side to seal it as well?
thanks again
I cut out the acetate as well as the neutral cardstock with my Nestabilities.
I did not seal the glitter side of the acetate. Once the Crystal Effect is dry, it holds it in place pretty well. No sealing needed.
Hugs and smiles
Love it, love it, LLOOOVVEEE it!
How do you use the acrylic stamps. This is my first time trying them and I am not sure how to use them. Thanks for the input. I love this card
Acrylic stamps are easy to use. Pull the stamp off the sheet it comes on and stick it on an acrylic block. If it's the first time you are using that stamp, clean it first, then ink it up with ink and stamp. If the ink doesn't seem to stick right to the stamp, sand lightly over it then try again.
Hugs and smiles
Page 1 of 2 pages 1 2 >