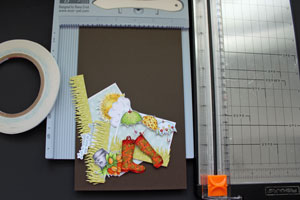
Side Step Card
by Beate Johns
Create a card that has step folds on one side.
Supplies
- One 5 1/2" x 8 1/2" piece of cardstock
- Scor-Buddy™, or other scoring tool
- Paper cutter
- Additional cardstock and embellishments to decorate the card
Step-by-Step
-
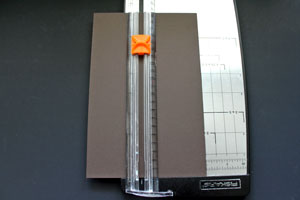
Step 1
Line up the short side of the cardstock at 3" in a paper cutter.
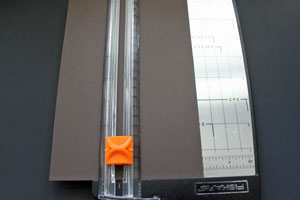
-
Start at 1" and cut all the way to 6 1/2".
-
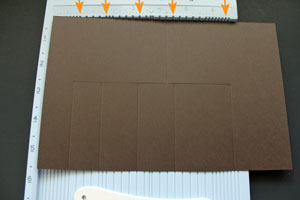
Step 2
Score the 2 1/2" wide section of the card at 4 1/4".

-
Step 3
Score the 3" wide section at 1", 2", 3 1/4", 4 1/2" and 6 1/2".
-
Step 4
Fold the score line at 4 1/4" down.
-
Step 5
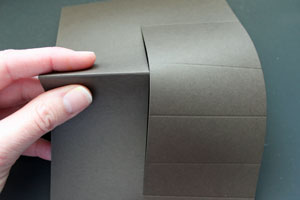
Fold the first score line on the right hand side of the card down (mountain fold),
-
fold the second fold up (valley fold).

-
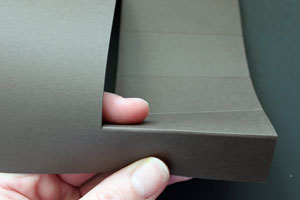
Step 6
Continue to fold the score lines mountain valley style.
-
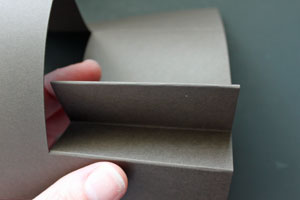
Step 7
Fold the last score line down to finish the card base.
-
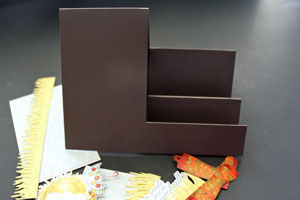
Step 8
Finish the card by decorating the long side as well as the steps.

Video!
Your Turn
You've seen the tutorial, now you try it! We've got a section of the gallery set aside for Side Step Card. Try this technique, then upload your artwork to the gallery. Show us your creations!
***Please note - Internet Explorer/Edge is not a supported browser, and will not allow you to see the videos. Please use Chrome, Firefox or Safari to view our tutorial videos.
 *
*
Questions and Comments
We'd love to get your feedback or questions. Leave your comment below.
Scroll back up to the top of the tutorial, then check the right hand side. You will see a box that says print this tutorial. Click on it and you will get the printable version of the directions.
Hugs and smiles
Check the first page of the comment section. I added a direct link to the stamp set in an earlier comment.
I love your card and your ideas. Thank you for sharing and your hard work! I have seen the side step card made with several different dimensions, however when I try to make them my card turns out uneven. Are there certain dimensions that you need to stick with to make sure your card is even with the folds and valleys? I hope this makes sense. Please help! Thank you
Thanks!!
Page 2 of 4 pages < 1 2 3 4 >