Side Spring Card
by Beate Johns
Create a unique card fold with a few score lines.
Supplies

- One 5 1/2" x 8 1/2" piece of cardstock
- Scor-Pal™ or other scoring tool
- Additional cardstock and/or patterned paper to decorate the card
- Stamps The Greeting Farm Build-a-Onesie Boy used here)
- Adhesive
- Embellishments
Step-by-Step
-
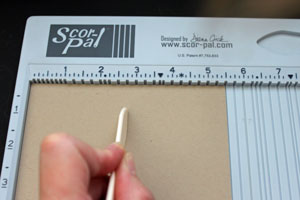
Step 1
Score cardstock at 2 3/4" on the short side.
-
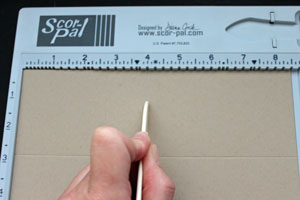
Step 2
Turn cardstock 90 degrees and score at 2 3/4"

-
and 4" on the long side.
-
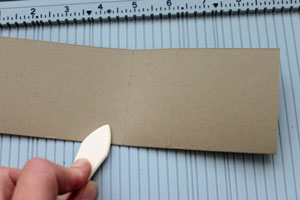
Step 3
Fold cardstock in half on the long score line.
-
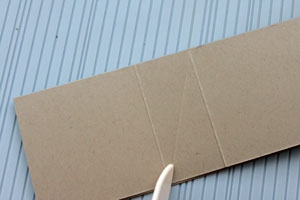
Step 4
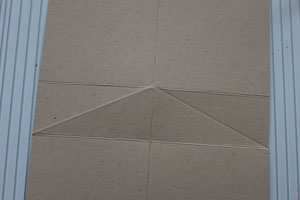
With the shorter panel to your left, line up the top of the second vertical score line with a Scor-Pal™ groove. Line up the bottom of the first (left) score line with the same groove and score a diagonal score.
-
Unfolded your cardstock should look like this.
-
Step 5
Pre-score both diagonal score lines mountain style.
-
-
Step 6
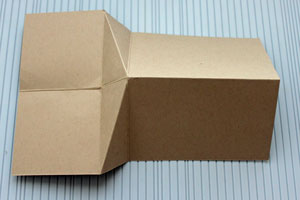
Pre-fold both vertical score lines valley style. Your cardstock should look like this.
-
Step 7
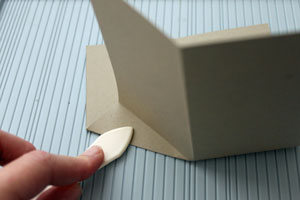
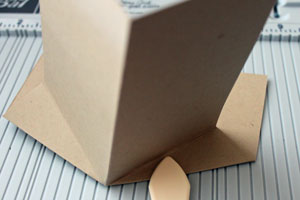
Fold the left panels up.
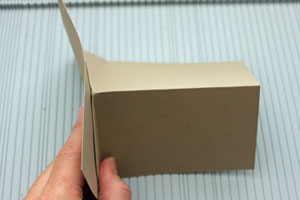
-
Now fold the left panel over the right side of your card base.
-
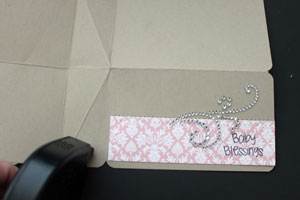
Step 8
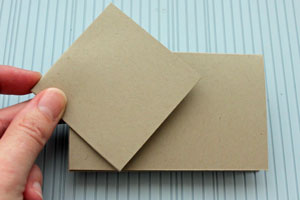
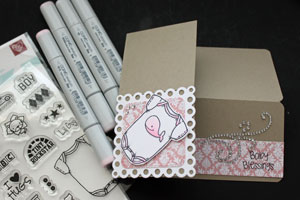
Decorate the front of you card.
-
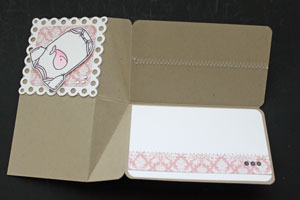
Step 9 (Optional)
Decorate the inside of the card.
-
Step 10 (Optional)
Unfold card and add adhesive to the lower right scored triangle. This will help to keep your image square right next to the card base.
-
Hint:
If you adhere the square to your card base, the card can only be opened partly. Try using re-positionable adhesive so this won't happen.
Or if using regular adhesive, make sure you write your message in card before adhering the square to the base.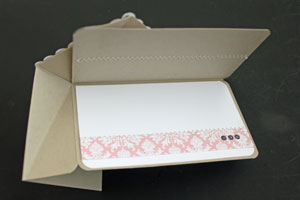
-
Step 11
Your card is finished.

Video!
Your Turn
You've seen the tutorial, now you try it! We've got a section of the gallery set aside for Side Spring Card. Try this technique, then upload your artwork to the gallery. Show us your creations!
***Please note - Internet Explorer/Edge is not a supported browser, and will not allow you to see the videos. Please use Chrome, Firefox or Safari to view our tutorial videos.
 *
*
Questions and Comments
We'd love to get your feedback or questions. Leave your comment below.
This card is very nice and simple to make
see you soon
this is amazing. Thanks a lot.
by
greetings,
niki
Thanks a bunch looks great!
Thanks for a great, 123 video.
Bonnie
Hugs;
Janette
Cut standard A5 card (15 x 21cm)
Score cardstock at 7.5cm on the short side.
Turn cardstock 90 degrees and score at 7.5 and 10.5cm on the long side
Then continue with the rest of Beate's excellent easy to follow directions.
Page 1 of 2 pages 1 2 >