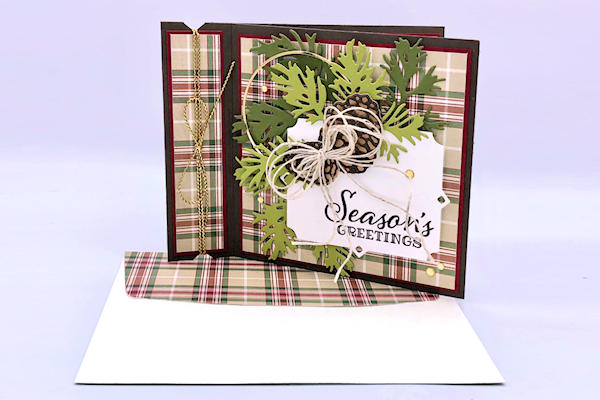
Side Fold Card
by Mary Deatherage
Enjoy this A2 layout with a built-in square panel.
Supplies
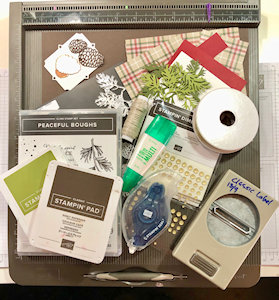
- Cardstock (Stampin’ Up!® cardstocks used here)
- Patterned paper for layering (SU Plaid Tidings DSP used here)
- Scoring tool
- Bone folder
- Adhesive
- Punch for notches (SU Classic Label Punch used here)
- Cord or trim
- Other supplies as needed to complete the project (SU products used here: Gold Hoop Embellishment, Linen Thread, scissors)
Step-by-Step
-
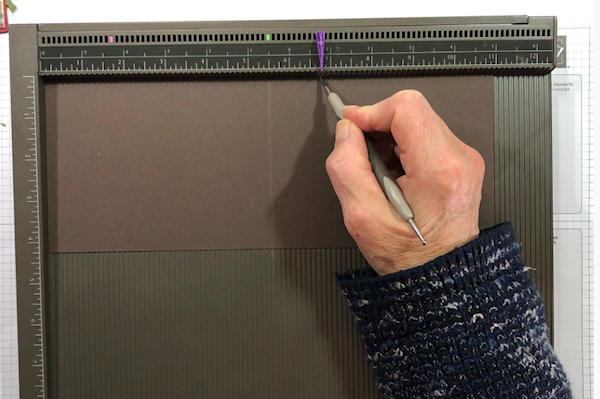
Step 1
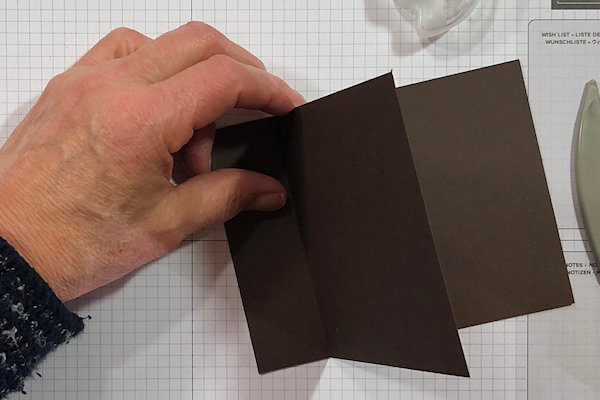
Score a 4 1/4” x 11” piece of base cardstock at 5 1/2” and 6 3/4” on the long side.
-
Step 2
Fold the 5 1/2” score as a valley (like a regular card). Then fold the 6 3/4” score the opposite direction.
-
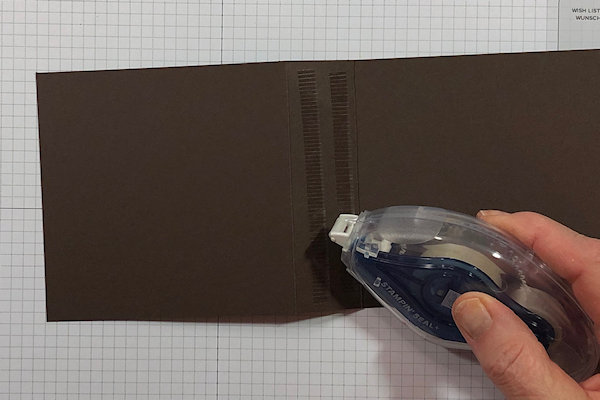
Step 3
Use the tape adhesive to add adhesive between the two scores lines.
-
Press the card front to the back – this adheres them together and creates the side-fold.
-
Step 4
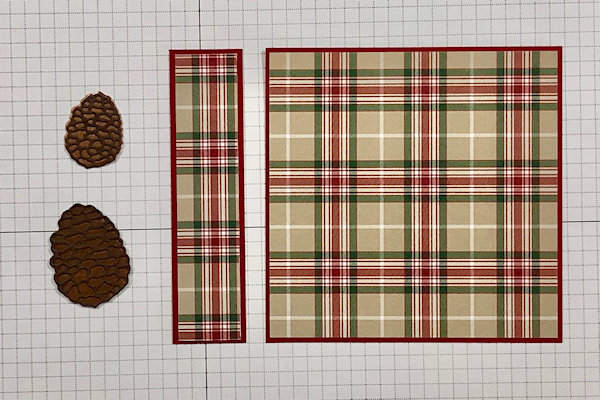
Prepare layering panels for the card front. For the sample, layering panels are cut at 1” x 4” and 7/8” x 3 7/8” for the adhered section and 4” x 4” and 3 7/8” x 3 7/8” for the square section.
-
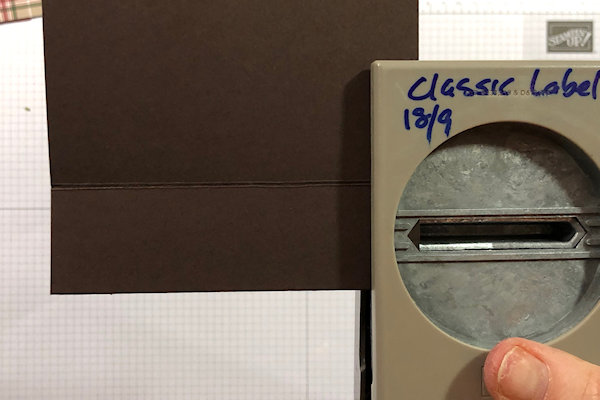
Step 5
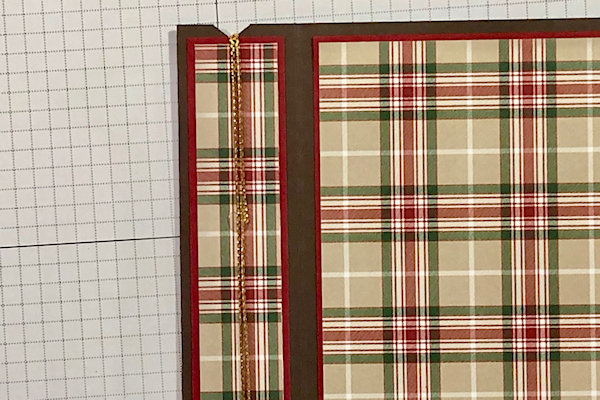
Use a small punch to punch a notch in the center of the small panel (the section that is adhered together).
TIP:
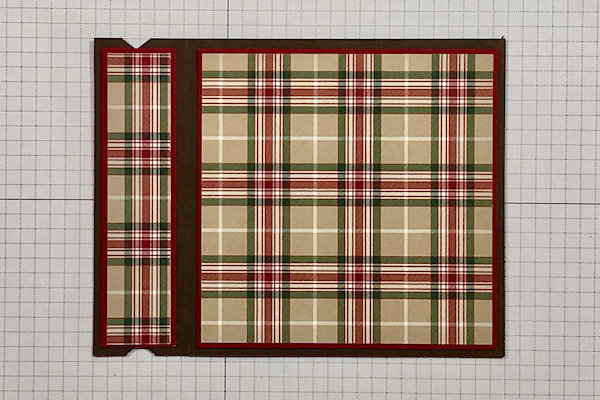
If using a Classic Label punch, slide the cardstock in from the back of the punch. -
Adhere layering panels to the card front.
-
Step 6
Place a Glue Dot in the middle of the smaller panel. Starting and ending at the Glue Dot, wrap narrow trim twice around the card, inside the notches.
-
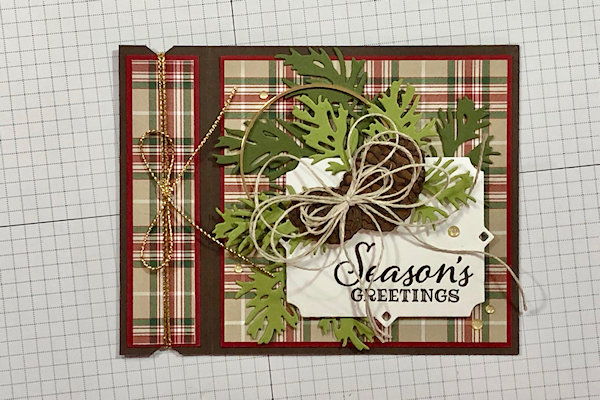
Step 7
Decorate the card front as desired. Add a bow to cover the glue dot.
-
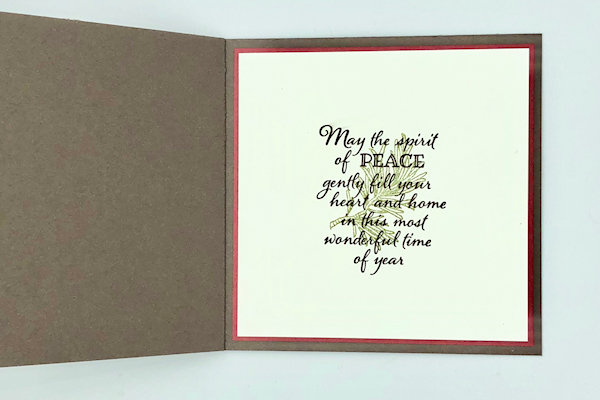
Step 8
Decorate the inside panel as desired. Panels for the sample are 4” x 4” and 3 7/8” x 3 7/8”.
-
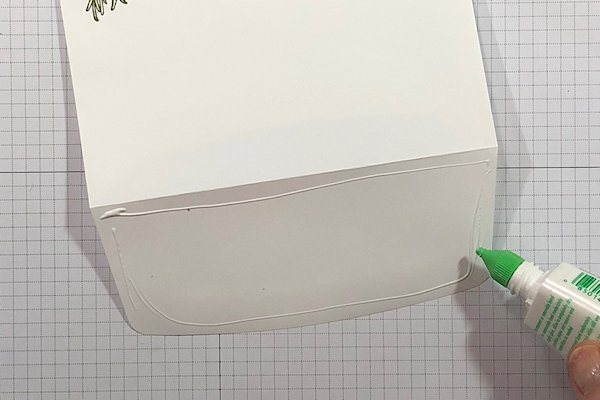
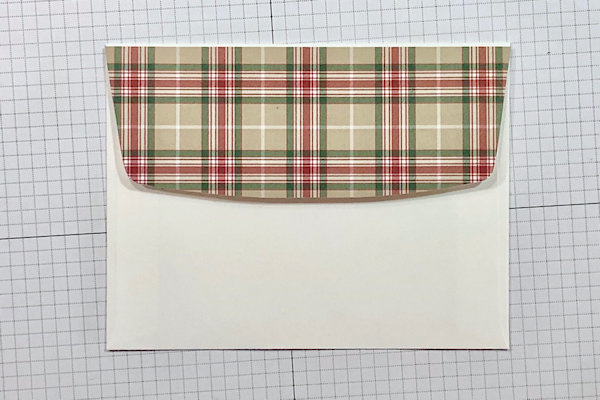
Step 9
Create a coordinating envelope. Lay a 3” x 6” piece of patterned paper over the flap and rub it lightly to ensure it’s stuck down.
-
Use scissors to cut off the excess paper.
-
Step 10
Complete the project.

Video!
Your Turn
You've seen the tutorial, now you try it! We've got a section of the gallery set aside for Side Fold Card. Try this technique, then upload your artwork to the gallery. Show us your creations!
***Please note - Internet Explorer/Edge is not a supported browser, and will not allow you to see the videos. Please use Chrome, Firefox or Safari to view our tutorial videos.

Questions and Comments
We'd love to get your feedback or questions. Leave your comment below.
Shirl
Page 1 of 1 pages