School Bus Card
by Heather Pulvirenti
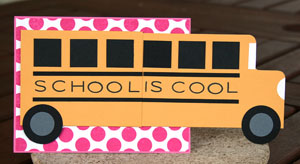
Send your favorite student a bus-shaped card for back-to-school.
Supplies

- One 4 1/4" x 5 1/2" piece of Cardstock for card base
- One 4 1/8" x 5 3/8" piece of Cardstock for layering onto card base
- One 3 3/4" x 3 5/8" piece of Cardstock for the bus body sleeve
- One 5" x 5 7/8" piece of Cardstock for the bus body
- Black, Gray, and White Cardstock Scraps for windows, bus trim, and lights
- Paper Trimmer and scoring blade
- 3/4" and 1 1/4" circle punches
- Corner Rounder
- Stamps for decorating bus and background
- Adhesive
Step-by-Step
-
Step 1
Score the 3 3/4" x 3 5/8" piece of cardstock at 5/16" and 3 5/16" on the 3 5/8" edge.
This will be the sleeve for your school bus card.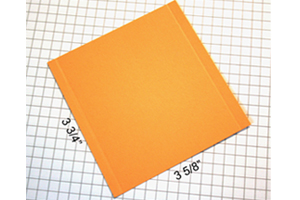
-
Step 2
Score the 5" x 5 7/8" piece of cardstock at 2 15/16" along the 5 7/8" edge.
Fold in half.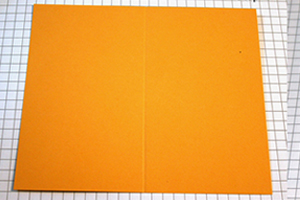
-
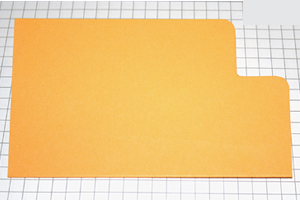
Step 3
With the folded edge on the bottom, cut a 1" square from the upper right corner and round the corners with a corner rounder.
-
Step 4
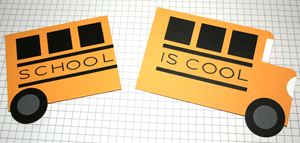
Cut or punch out the various bus elements:
- six 7/8" black squares (for windows),
- two 1/8" x 11" strips of black card stock (for the bus trim),
- two 1 1/4" black circles (for the wheels),
- two 3/4" gray circles (for the wheel hubs),
- one 3/4" white circle (use half of the circle for the bus light),
- a small strip of white card stock for the front bus window.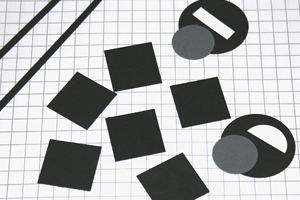
-
Step 5
Decorate the two halves of the bus using the elements you cut out in step 4.
-
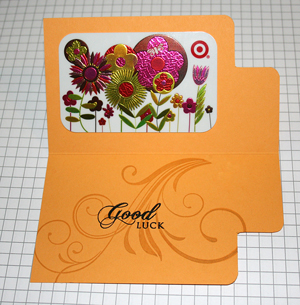
Embellish the inside of the bus body with your sentiment.
-
Step 6
Stamp a background on the 4 1/8" x 5 3/8" piece of cardstock and attach it to the card base.

-
Complete project by adhering the bus body sleeve (putting adhesive on the small tabs and placing with score lines parallel to the card bottom) to the card base and sliding in the body.

Questions and Comments
We'd love to get your feedback or questions. Leave your comment below.
Hugs and smiles
Page 1 of 1 pages