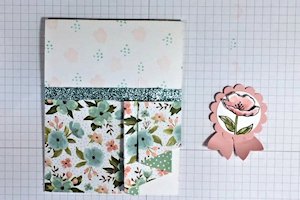
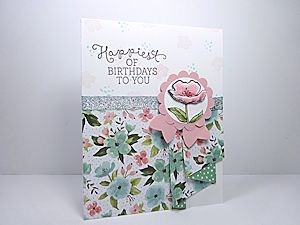
Pleated Skirt Fold

by Becky Roberts

Add a girly pleated fold feature to a card front.

Supplies
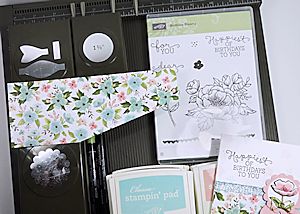
  • Double sided paper (Stampin’ Up!® Birthday Bouquet Designer Series Paper used here)
  • Scoring tool
  • Adhesive (Snail adhesive used here)
  • Scissors
  • Pencil
  • Paper trimmer
  • Other supplies as needed to complete the project (Stampin’ Up! products used: Birthday Blooms stamp set; Archival Basic Black, Pool Party, Blushing Bride, Watermelon Wonder, Old Olive and Early Espresso inks; Whisper White and Blushing Bride cardstock, punches (1-3/8” Circle, 1-3/4” Scallop Circle, Bow Builder) Aqua Painter, Pear Pizzazz Stampin’ Write Marker, Stampin’ Dimensionals, Pool Party Glitter Ribbon)

Step-by-Step

  1. Step 1

    Cut patterned paper to 7 3/4" x 3". On the right side of the paper make a tick mark 1 1/4" down from the top corner with a pencil. Along the bottom of the DSP make a tick mark 3" from the left corner.
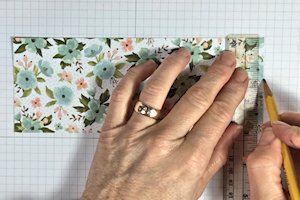
  2. For an additional guide, connect those two tick marks with a pencil line. Cut from point to point with a trimmer to create the angle.
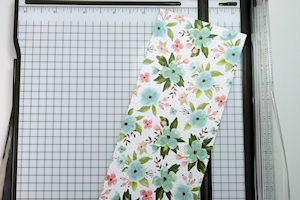
  3. Step 2

    Score at 3", 3 1/2", 5" and 6 1/8" along the long (uncut) side.
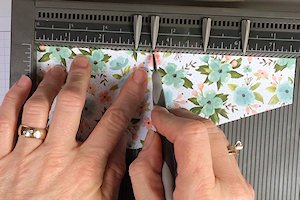
  4. Step 3

    Fold accordion style on the score lines, back and forth.
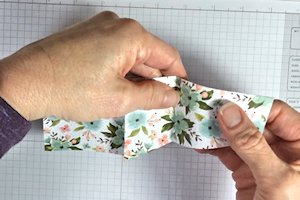
  5. The finished folded piece should look like this.
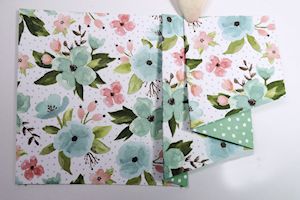
  6. Step 4

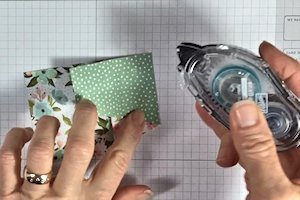
    Add some adhesive to the back of each pleat to hold the folds in place.
  7. Step 5

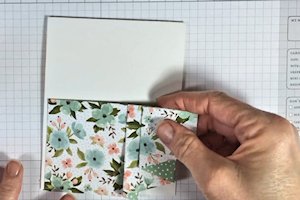
    Add some adhesive to the back of each pleat to hold the folds in place.
  8. Step 6

    Decorate the card as desired.

  9. Step 7

    Complete the project.

Video!

Your Turn

You've seen the tutorial, now you try it! We've got a section of the gallery set aside for Pleated Skirt Fold. Try this technique, then upload your artwork to the gallery. Show us your creations!

***Please note - Internet Explorer/Edge is not a supported browser, and will not allow you to see the videos. Please use Chrome, Firefox or Safari to view our tutorial videos.

Questions and Comments

We'd love to get your feedback or questions. Leave your comment below.

Just wondering what size the white card base is.
Deanna M  |  Wed Feb 3, 2016 at 4:38 PM
I posted a pleated skirt fold card about a week before the tutorial was published. How do I get it into the new gallery? I edited my post by doing what I though was required but did not add it to the same "Pleated Skirt Fold" mentioned above. I am not alone - there is one other person who has posted her card next to mine so there are just the two of us lost in Cyberspace... smile
Melanie  |  Thu Feb 4, 2016 at 7:59 AM
I loved making this card. Thank you so much.
millie droste  |  Thu Feb 4, 2016 at 9:41 AM
Becky! Nice tutorial and great job - said you might have been nervous but didn't show on this end. Loved the card and your choices. Will be happy to give it a try.
Lura  |  Thu Feb 4, 2016 at 8:20 PM
Love the kick pleat! Great tutorial!
Lori  |  Fri Feb 5, 2016 at 5:43 AM
Thank you for the fun tutorial. I love this look.
Daria  |  Fri Feb 5, 2016 at 11:56 AM
Love the pleat! Thanks for sharing!
Susanne Gleason  |  Sun Feb 7, 2016 at 9:17 PM
Great tutorial. Love this pleated look.

Here's the card I created!!
http://www.splitcoaststampers.com/gallery/photo/2700011?&cat=500&ppuser=201319
shelia  |  Mon Feb 8, 2016 at 10:44 AM
Love the card - can't wait to try the pleat - thanks for posting the tutorial!
Bev Thompson  |  Tue Feb 9, 2016 at 2:31 PM
Very cute card! Thanks for sharing this technique!
Pam  |  Sun Feb 14, 2016 at 6:41 AM
Thanks everyone for your nice comments!
Becky Roberts  |  Sun Feb 14, 2016 at 10:09 AM
I made this card yesterday, actually four of them! Love it! However that being said, I had a small issue with the DSP kind of cracking on the fold. I used Stampin Up paper, so it is a good quality DSP. I tried not to push too hard with the stylus, but it cracked anyway. Any suggestions?
Sylvia Detty  |  Wed Feb 24, 2016 at 7:11 AM
Sylvia,

I'm really not sure, I've had that happen occasionally as well. I usually use my scoring blade on my paper cutter for DSP and not the scoring board. I've found that helps.
Becky Roberts  |  Wed Feb 24, 2016 at 7:39 AM
Thanks, Becky. I will try that. I am going to make a few more today. This really makes a beautiful card! Thanks for sharing your talent with us.
Sylvia Detty  |  Wed Feb 24, 2016 at 12:20 PM
Beautiful card & wonderful directions!! Thank you soooo much for sharing!!
J F  |  Fri Mar 11, 2016 at 2:18 PM
Very cute card! Thanks for the tutorial!
Fran Sabad  |  Tue Mar 15, 2016 at 6:33 PM
I really loved making this card. Thanks for sharing.
Virginia  |  Sun Mar 27, 2016 at 7:58 PM
Loved your card so I used your measurements in Cricut Design Space. I prepped 21 cards for my card making club. Made it in some spring papers, some glitter tape and they loved it.
Vesta  |  Tue Jul 19, 2016 at 1:28 AM

Page 2 of 2 pages  <  1 2

You need to be logged in to comment

GET OUR NEWSLETTER


Splitcoaststampers's privacy policy