Pinwheel Fun Fold

by Dawn Olchefske

Fold this card up to reveal a fun pinwheel design.

Supplies
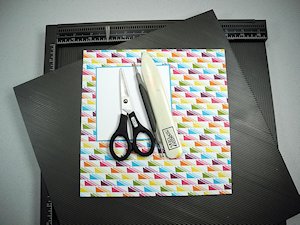
  • Double-sided paper, 8" square (Stampin' Up! Sweet Taffy Designer Series Paper used here)
  • Scoring board
  • Simply Scored Diagonal Plate (optional)
  • Bone folder
  • Scissors
  • Other supplies as needed to complete the project (Stampin' Up! products used: Amazing Birthday Stamp Set, Tempting Turquoise Classic Stampin' Pad, Tempting Turquoise and Melon Mambo Stampin' Write Markers, 1-1/4" and 1-3/8" Circle Punch, 1-3/4" Scallop Circle Punch, Whisper White Cardstock (4" x 4") Tempting Turquoise Cardstock (4-1/8" x 4-1/4")

Step-by-Step

  1. Step 1

    Place diagonal plate onto scoring board and place an 8" square of patterned paper on the board with the "pinwheel" pattern side down (this will also be the "inside" of the card). Score diagonally at 3". Repeat for all four sides.
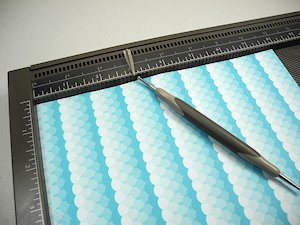
  2. If not using a diagonal plate, mark the paper at 3" from each corner. Align square panel on scoring board with opposite points up and down. Score down from each 3" mark, using a ruler to ensure alignment with the groove.
  3. Step 2

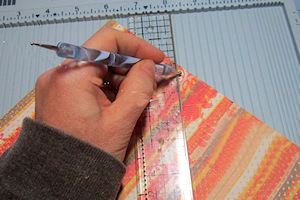
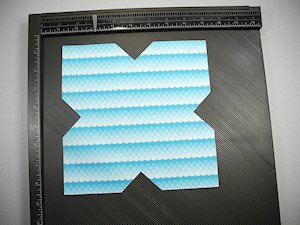
    Cut away "triangles" where score lines intersect. Repeat for all four sides.
  4. Step 3

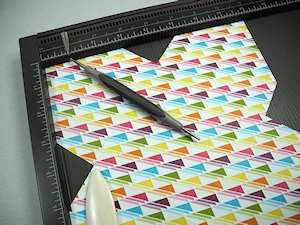
    Remove diagonal plate from scoring board and turn paper over so the "pinwheel" pattern is up. Score at 1" from top to the half way point/triangle. Repeat for all four sides.
  5. Step 4

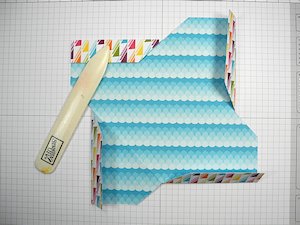
    Fold at the 1" score lines (away from the "groove"). Repeat for all four sides.
  6. Step 5

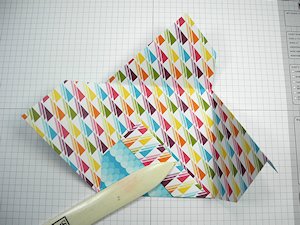
    Fold at the 3" score lines in the opposite direction. Repeat for all four sides.
  7. Step 6

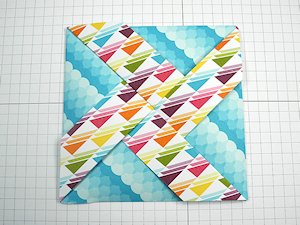
    To create the Pinwheel Fold: Fold up bottom flap, then fold over the flap to the left (clockwise); repeat with 3rd flap (continuing clockwise).
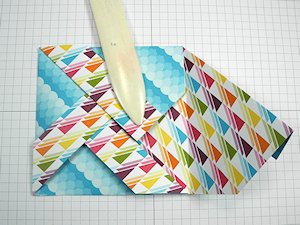
  8. Fold over the last flap and tuck under the first flap (like folding a box).
  9. Step 7

    Decorate and complete the card.

    Inside layering panels are 4" square (white) and 4-1/8" square (turquoise).
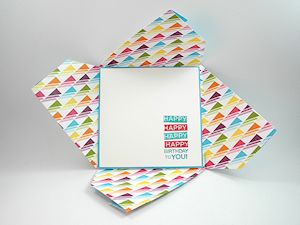
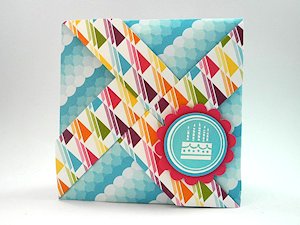
  10. If decorating the outside, be aware of where embellishments will be adhered so the card can still open and close without any interference.

    Finished card size is 4-1/4" square and will fit in an A2 envelope.
Video!

Your Turn

You've seen the tutorial, now you try it! We've got a section of the gallery set aside for Pinwheel Fun Fold. Try this technique, then upload your artwork to the gallery. Show us your creations!

***Please note - Internet Explorer/Edge is not a supported browser, and will not allow you to see the videos. Please use Chrome, Firefox or Safari to view our tutorial videos.

Questions and Comments

We'd love to get your feedback or questions. Leave your comment below.

Love the fold can't wait to try it!
Lana Stadler  |  Wed Apr 22, 2015 at 3:59 AM
This is such a creative fold! I really like your cards and am looking forward to giving it a try!
Gail Paradise  |  Wed Apr 22, 2015 at 5:22 AM
What a fun card and your video is perfect! Excellent instructions. Thank you!
judi  |  Wed Apr 22, 2015 at 5:47 AM
Love the challenge of this fold! I don't have the diagonal plate, but should be able to handle placement on my MS score board (I hope!). Glad to read that it will fit in an A2 envelope. Thanks!
Diane aka ciocidy  |  Wed Apr 22, 2015 at 7:20 AM
Great idea, love this tutorial!
Julie Heyer  |  Wed Apr 22, 2015 at 8:05 AM
Oh, Dawn, what a fun card, and I loved our video! Your personality and enthusiasm shines through, and it was a fun watch! Thank you so much! Hugs!
CherylQuilts  |  Wed Apr 22, 2015 at 8:30 AM
Dawn, as always, your video is wonderful. Thanks, too, for the tutorial. All the examples were fun! I didn't know you could attach a piece to the front.
kab  |  Wed Apr 22, 2015 at 8:43 AM
Diane, I shared on my blog how I did the diagonal lines without the plate: http://mamadinis.blogspot.com/2015/04/splitcoast-tutorial-pinwheel-fun-fold.html
dina  |  Wed Apr 22, 2015 at 9:24 AM
Thank you everyone! Glad you enjoyed the tutorial. Someone also suggested trying the envelope punch board. If you try it - let me know if it works.
Dawn (dostamping)  |  Wed Apr 22, 2015 at 9:27 AM
Thank you for the fun fold! Can't wait to try it. I don't have the diagonal plate so I hope someone can show how to do it with the punch board. It looks like a gift card can be placed inside!
rachel rodriguez  |  Wed Apr 22, 2015 at 10:07 AM
Dawn--great tutorial-clear, easy to follow, helpful hints and explanations for doing each step. Plus I'm always glad to see how a pro like you can fix an "oops"!
Desert Deb  |  Wed Apr 22, 2015 at 11:18 AM
Desert Deb - I'm the master of fixing mistakes, as I make them all the time!
Dawn (dostamping)  |  Wed Apr 22, 2015 at 11:22 AM
Love it! Thank you!
MaryJo Marshall  |  Wed Apr 22, 2015 at 12:39 PM
Dina - thanks for the scoring revision! Such an easy fix to mark at 3: and place the paper diagonally on the board to catch the correct scoring line-up. I can now try this fun card! Diane
Diane aka ciocidi  |  Wed Apr 22, 2015 at 1:52 PM
Dina - thanks for the scoring revision! Such an easy fix to mark at 3" and place the paper diagonally on the board to catch the correct scoring line-up. I can now try this fun card! Diane
Diane aka ciocidi  |  Wed Apr 22, 2015 at 1:53 PM
Thanks for adding the alternative method of diagonal scoring without the diagonal plate!
Dawn (dostamping)  |  Wed Apr 22, 2015 at 2:00 PM
Thank you so much for this great tutorial! The cards are adorable. And I did use my envelope punch board. Instead of 3", do your initial scoring at 3-3/8" on all 4 sides of your 8" square. You can then proceed with the 1" scoring as you show in your tutorial.

Again, thanks for sharing your awesome talent with us all!!
Barb  |  Wed Apr 22, 2015 at 4:24 PM
Barb! Thank you, thank you so munch for the directions using envelope punch board...I've been tearing my hair out trying to get this to work! And, can I just say that math is not always my friend...
hahaha
DonnaD  |  Wed Apr 22, 2015 at 6:16 PM
Thank you Barb! I just tried it. Works perfectly for the diagonal scored lines at the 3-3/8" mark for the envelope punch board.
Dawn (dostamping)  |  Wed Apr 22, 2015 at 7:01 PM
I love this! So quick and easy...I already made a couple before bedtime smile You are AWESOME!
Jennifer Arent  |  Wed Apr 22, 2015 at 10:27 PM

Page 1 of 2 pages  1 2 >

You need to be logged in to comment

GET OUR NEWSLETTER


Splitcoaststampers's privacy policy