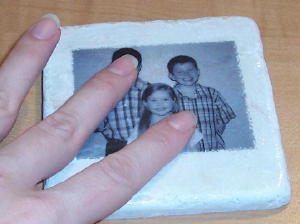
Photo Tiles

by Maria Williams

Created custom keepsake coasters.

Supplies
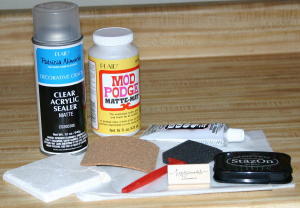
  • 4" x 4" Tumbled Tile (Wipe down with a damp cloth to remove any dust and let dry completely)
  • Tissue Paper
  • Mod Podge®
  • Tape
  • Foam brush
  • 4” x 4” Cork
  • Permanent glue
  • Stamp (optional)
  • StazOn®
  • Acrylic Sealer

Step-by-Step

  1. Step 1

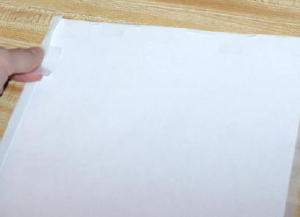
    Cut a piece of tissue paper and tape it to a regular sheet of paper. (This way it will feed through the printer.)
  2. Step 2

    Print picture on tissue paper and trim to fit tile.
  3. Step 3

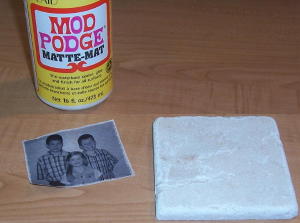
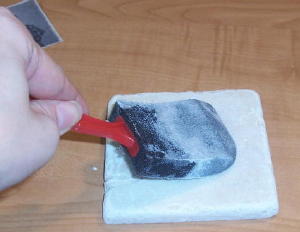
    Apply a thin coat of Mod Podge™ to tile.
  4. Step 4

    Place picture on the tile.

  5. Step 5

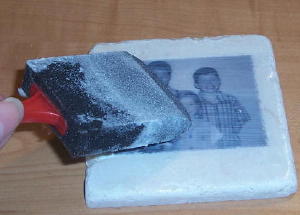
    Apply another thin coat of Mod Podge™ over picture and then let dry.
  6. Step 6

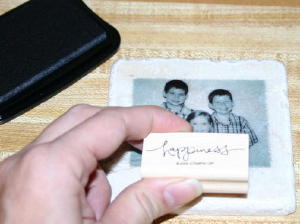
    Ink stamp with Stazon™, and stamp on tile. Let dry, then cover entire tile with another layer of Mod Podge.
  7. Step 7

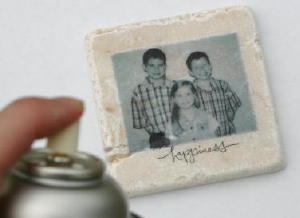
    After letting the Mod Podge™ dry completely, spray with acrylic spray, following directions on can.
  8. Step 8

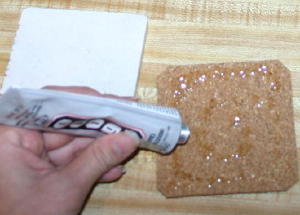
    After tile is completely dry, turn it over and apply permanent glue to one side of the cork square.
  9. Step 9

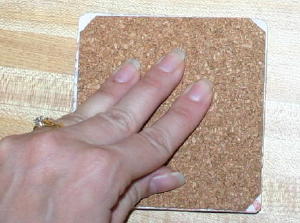
    Attach cork glue side down to the back of the tile and press down firmly.
  10. Step 10

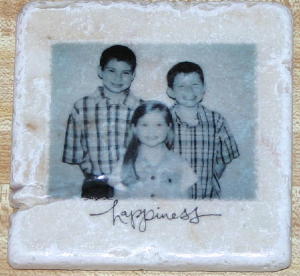
    Let the glue dry and enjoy your coaster!
Your Turn

You've seen the tutorial, now you try it! We've got a section of the gallery set aside for Photo Tiles. Try this technique, then upload your artwork to the gallery. Show us your creations!

***Please note - Internet Explorer/Edge is not a supported browser, and will not allow you to see the videos. Please use Chrome, Firefox or Safari to view our tutorial videos.

Questions and Comments

We'd love to get your feedback or questions. Leave your comment below.

thanks everyone for the help I did do it with the tissue paper.. I liked it alot..now I am going to try it with a regular photo just for fun.. I will let you know what happens ... Tracy
Tracy  |  Mon Dec 8, 2008 at 1:59 PM
I tried this with a thin black and white photo that I printed on my ink jet printer. The photo changed from pink to green and finally it has a blue green tent. I also used the smooth tiles. I will go tomorrow and get the other ones and see if the photo reacts the same way. It looks really cute but the baby has blue lips and that just isn't working for me.
Jessica Lunt  |  Sun Dec 14, 2008 at 7:12 PM
I did it with a photo .. I cut the photo down to 3 x 3 then did the modgepodge 2 layers... it does have a little bit of a lip but it is the perfect size to place a glass on ... anyways I did 3 layers of the spay matte finish as the modge podge is shiney... you do see the lines from the paint brush but these are a joke gift so I don't mind. I used reg photos too. no streaking at all picture is exact
Tracy Gritke  |  Mon Dec 15, 2008 at 6:59 AM
I would like to know what kind of tissue paper are your talking about.
the one you use for gifts or is there another type of picture. Thanks.
mana  |  Fri Jan 9, 2009 at 7:38 AM
Mana - I used just regular tissue paper - the kind you wrap presents with. Be sure to print on the dull side of it (not the shiny side).
Maria Williams  |  Fri Jan 9, 2009 at 8:31 AM
Several of us were thrilled to see this project but were unable to get our printers to work; they all jammed....
Any suggestions?
Jamie McWatters  |  Tue Apr 21, 2009 at 11:01 AM
Jamie,
Did you click on printable copy before starting the printing. I just tried and the tutorial printed perfectly for me.
Beate  |  Tue Apr 21, 2009 at 12:01 PM
Jamie - The tissue paper is so thin that you need to tape it onto a regular piece of paper and then feed it into your printer.
Be sure you tape all the side down and that the tissue paper is flat.
Another tip that might help is if your printer has a tray where you can feed your paper into, use that tray instead of loading it into the paper tray with the other paper.

Hope this works!
Maria smile
Maria Williams  |  Tue Apr 21, 2009 at 12:44 PM
These are neat. Could you use pre-printed tissue paper first as a frame and then adhere the tissue picture? These would be great for gifts! Thank you so much for sharing.
Cathy Sue  |  Fri Jun 12, 2009 at 4:02 AM
I'm not sure how that would turn out. Since the tissue paper is so thin, it may conflict with the picture. I have not done this, but don't see why it wouldn't work. Let us know!

Maria smile
Maria Williams  |  Fri Jun 12, 2009 at 4:08 PM
what is really a tumbled tile, what is it made offf?
nina  |  Sun Jun 14, 2009 at 10:18 AM
Hi Everyone,
I just made one with a color photo from my ink jet and it looks amazing. I'm even running out of toner and it looks beautiful. smile I can't wait to start selling custom photo tiles.
Thanks for the idea.
Lauren
Lauren Potoky  |  Sun Aug 30, 2009 at 4:29 PM
Can you explain to me..are you printing the photo on the tissue paper? and then removing the printer paper before you attach it to the tile? or attaching both papers to the tile??? Thank you
Carol  |  Sat Sep 5, 2009 at 7:35 PM
To get a black/white picture, are you printing in "black" or "greyscale"? I tried to print in black, but it's too dark on the tile.
Linda  |  Sun Sep 13, 2009 at 1:46 PM
I made my first one of these today and love the way it came out! I printed it using an ink jet printer last night then put it together today just to make sure it was dry. The only "problem" I'm having with my printer is that the tissue paper seems to be cleaning my printer on its way through because it comes out with black streaks all over; I've tried taping it to printer paper and cardstock-the cardstock seems to work better.
Kristin  |  Fri Sep 18, 2009 at 8:06 PM
Can you tell me if after sealing if the coasters are still absorbant? We live in a humid climant and glasses sweat a lot in the summer.
neva  |  Tue Sep 22, 2009 at 9:18 PM
I use the tiles and get them from Lowe's in the tile department... I believe 6 or 8 to a box. If I go again I'll get the number for everyone.
I still am having problems getting the tissue paper to go through my printer without jamming. I have a Canon MX310.
JAMIE McWATTERS  |  Wed Sep 23, 2009 at 3:14 PM
You can print your picture on typing paper and it will work just fine. And I alter my photos to Sephia tone. This way if the ink smears a bit it's not really noticeable and also the colors look better on the tiles.

Hope this helps all with questions,

Melody
Melody Steiner  |  Mon Oct 5, 2009 at 9:50 AM
I did this technique exactly as explained by Maria and they turned out great!...Except for the fact that the coasters I chose had too many holes and cracks in them (travertine) and there were open holes under where I placed the photo...won't be too long before the photo will likely rip through. I just bought marble tiles today and will be attempting this again tomorrow. To see my originals (with photos and stamping), check out the link to my blog: http://livingorganizedchaos.blogspot.com/2009/09/altered-marble-coasters-with-photos-and.html
Lori Coughlin  |  Fri Oct 16, 2009 at 9:13 PM
After you seal the tiles, will they absorb condensation?
Donna  |  Fri Oct 23, 2009 at 3:14 PM

Page 2 of 4 pages  <  1 2 3 4 >

You need to be logged in to comment

GET OUR NEWSLETTER


Splitcoaststampers's privacy policy