Petal Card
by Beate Johns
Create a petal card out of four cardstock circles.
Supplies
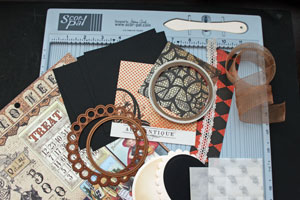
- Four squares of cardstock
- Two squares of patterned paper
- Circle Dies (Beaded and Classic Circle Nestabilities dies used here)
- Scor-Pal™, or other scoring tool
- Glue Dots and other adhesive
- Additional cardstock and patterned paper, for the inside and front of card
- Ribbon and other embellishments
Step-by-Step
-
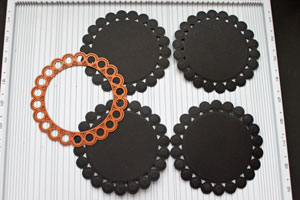
Step 1
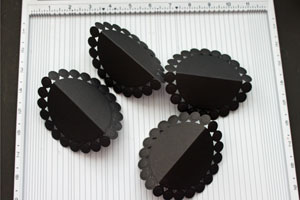
Cut four circles out of your cardstock with dies of your choice. Here the largest of the Beaded Circle Nestabilities were used.
-
Step 2
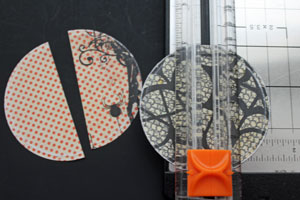
Cut your patterned paper with a smaller circle die to create a layer for your cardstock.
-
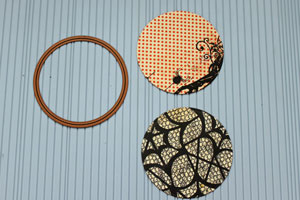
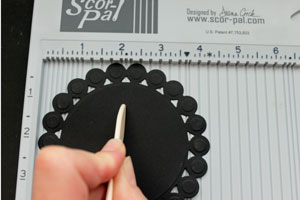
Step 3
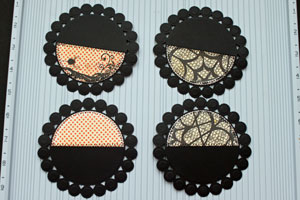
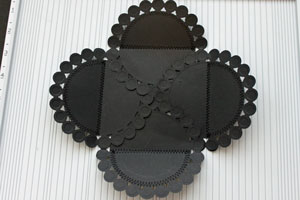
Score your cardstock circles in half.
-
-
Step 4
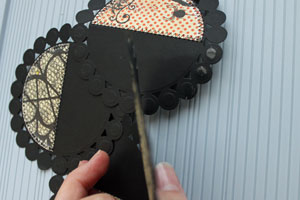
Cut your patterned paper circles in half.
-
Adhere half circles to your cardstock circles.
-
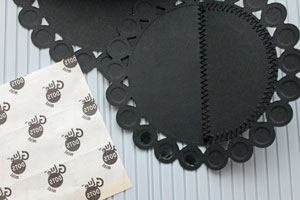
Step 5
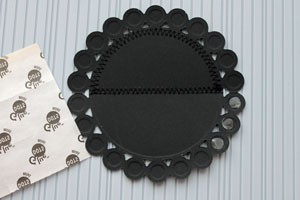
Add a few glue dots on the right side of the back side of the first circle under the score line.
-
Use the score lines as a guide and adhere a second cardstock circle to the first. Create a 90 degree angle with your score line as shown in the picture.

-
Step 6
To make sure you lined up your circles at a straight 90 degree angle, use your scoring tool edge as a guide.
Hint:
Repeat this step each time after adding a new circle.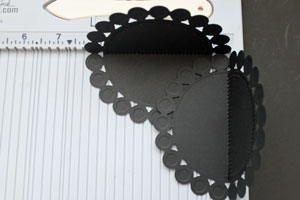
-
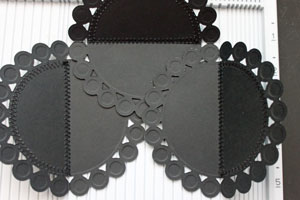
Step 7
Add glue dots to your second circle.
-
Adhere your third circle.
-
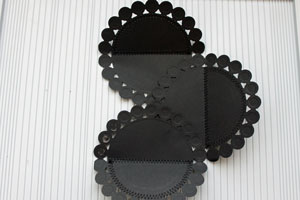
Step 8
Add adhesive to your third circle.
-
Adhere your last circle over your third circle and slide the other edge under the first circle.
-
Step 9
Flip your card over, add more glue dots under the other side of your last circle and adhere.
-
Slide your last circle under the third one so it sits over your first (top) circle and under the third one (bottom in this picture).
-
Step 10
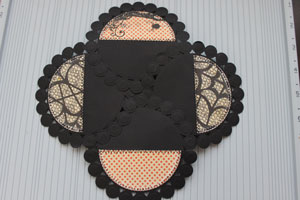
Decorate the inside of your card.
-
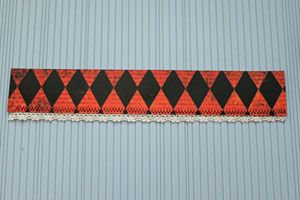
Step 11
Decorate your patterned paper strip.
-
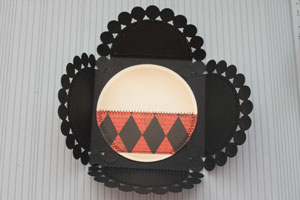
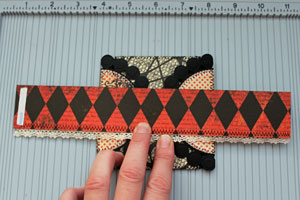
Step 12
Fold card shut and center paper strip over it. Add adhesive to one end.
-
Bend around your card and adhere to a band on the back of the card.
-
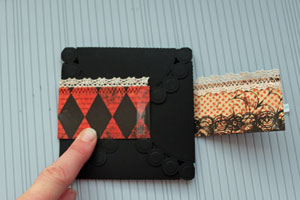
Step 13
Decorate front to finish card.
Hint:
Adhere your main image to the card band. This way the card will be easy to open. Just slide the band along with all the decoration off.
Video!
Variations
Multicolor
Try using two or even four different colors for your cardstock.
Loose the Band
Tie the card shut with ribbon. Or add a smaller image slightly over your main image to keep the card shut (check the Joy Fold Card Tutorial for a sample of that closure).
Your Turn
You've seen the tutorial, now you try it! We've got a section of the gallery set aside for Petal Card. Try this technique, then upload your artwork to the gallery. Show us your creations!
***Please note - Internet Explorer/Edge is not a supported browser, and will not allow you to see the videos. Please use Chrome, Firefox or Safari to view our tutorial videos.
 *
*
Questions and Comments
We'd love to get your feedback or questions. Leave your comment below.
Is it big enough to fit a gift card inside?
Shirley
BTW~~I hope you and your family are alright after the horrible weather Oklahoma has endured.
Page 2 of 2 pages < 1 2