No Line Watercolor
by Jenn Shurkus
Stamp a light image then watercolor for a handpainted look.
Supplies
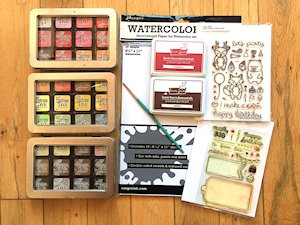
- Dye-based inks or other watercolor medium (Antique Linen, Vintage Photo, Tea Dye, Hickory Smoke, and Worn Lipstick Distress Inks used here)
- Outline stamps (Lawn Fawn Party Animals clear set used here)
- Watercolor cardstock (Ranger Distress Watercolor Cardstock used here)
- Small paint brush (#2 brush used for sample)
- Heat tool
- Other supplies as needed to complete the project (Lawn Fawn products used here: Birthday Tags stamp set, Tag You're It die set, 4 Bar Stitched Rectangle die, Wild Rose and Walnut ink, 6x6 Paper Pad: Petite Mon Amie, Stamp Shammy)
Step-by-Step
-
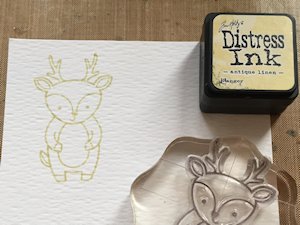
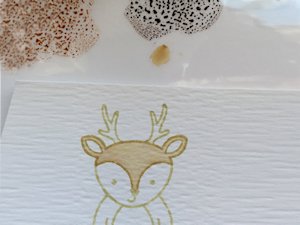
Step 1
Stamp an outline image in a light colored ink onto watercolor cardstock. Antique Linen Distress Ink was used here.
-
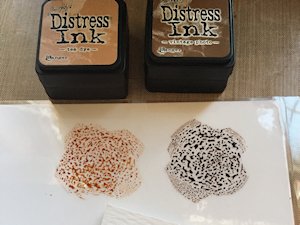
Step 2
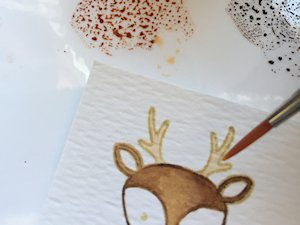
Create a palette of the colors you are going to use. This can be done by “smooshing” the inkpad onto a non-porous surface (a laminated piece of cardstock is used here).
-
TIP:
With watercoloring the trick is to build up layers of color. Water down a bit of the ink so you will have a very light version of it.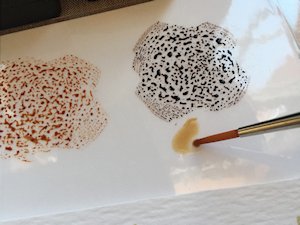
-
Step 3
Use a paintbrush to color in the image all over. The light ink used to stamp the image will take on the color that you are painting with. (Vintage Photo Distress Ink used here.)
-
HINT:
Between layers of color, heat the cardstock with a heat tool so the color won’t run.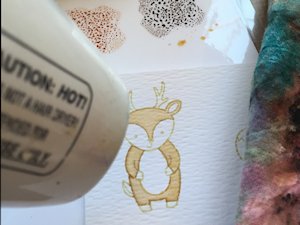
-
Step 4
Using the same ink color, but no added water, paint in the area where you would like to add shading.
-
While the ink is still wet, use a clean paintbrush with clear water and blend in between the shaded areas and light areas to blend out the line.

-
Step 5
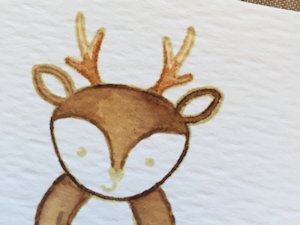
If you have any outlines you need to fill in, do so with undiluted ink on your brush, gently tracing the lines.
-
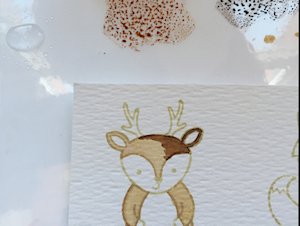
Step 6
After finishing with one color area, follow the same steps with the next color. (The next color for the sample is watered down Tea Dye Distress Ink.)
-
Again, go in with undiluted ink to add the shading. Blend out the shading with clear water.
-
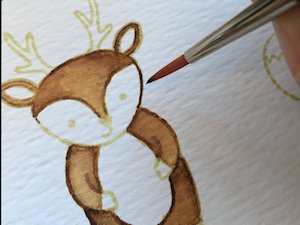
Step 7
Smaller details can be filled in without adding shading.
-
TIP:
For more precise details, use a liner pen or marker, or add small touches with a fine detail brush.
-
Step 8
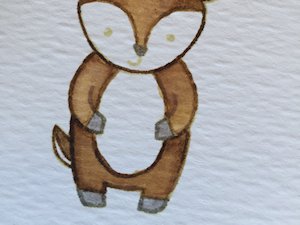
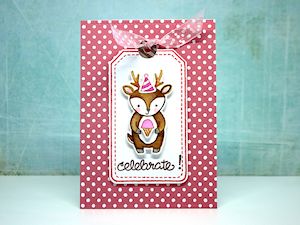
Use the painted image to complete a card or other project.
Video!
Your Turn
You've seen the tutorial, now you try it! We've got a section of the gallery set aside for No Line Watercolor. Try this technique, then upload your artwork to the gallery. Show us your creations!
***Please note - Internet Explorer/Edge is not a supported browser, and will not allow you to see the videos. Please use Chrome, Firefox or Safari to view our tutorial videos.

Questions and Comments
We'd love to get your feedback or questions. Leave your comment below.
Page 2 of 2 pages < 1 2