Mini Magazine Holder
by Deb Valder
Cut and fold cardstock into a decorative notecard holder.
Supplies
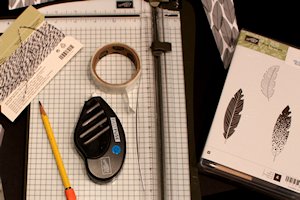
- 12" x 12" Cardstock for holder base
- Paper trimmer
- Scoring tool
- Bone folder
- Pencil and ruler
- Adhesive
- Other supplies as needed to complete the project (Stampin’ Up! products used here: Four Feathers stamp set, Feathers Framelits Die, Big Shot, Fast Fuse, Basic Black Baker's Twine, Whisper White cardstock, Back to Black Designer Series Paper, Whisper White envelopes)
Step-by-Step
-
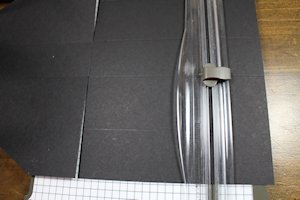
Step 1
Trim 12" x 12" cardstock to 9" x 12".
Score at 3 3/4" and 5 1/4" along the 9" side.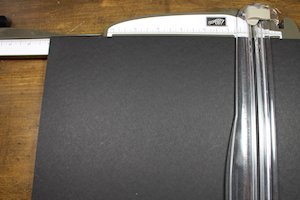
-
Step 2
Rotate cardstock and score at 2" and 6 1/2" along the 12" side.
-
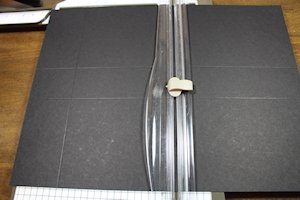
Step 3
With the 9" side at the top, score at 1 3/4", only between the 2 horizontal score lines.
Turn 180 degrees and repeat on the other side. The middle section should have 4 vertical score lines across.
-
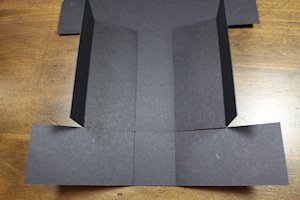
Step 4
Measure up 1 3/4" from the first horizontal score line and make a small pencil mark.
Measure over 2 1/2" from the left upper corner and make a pencil mark. Using a paper trimmer, line up the blade guide with the two marks and cut along the line to remove a triangular section from the corner. Repeat on the opposite side.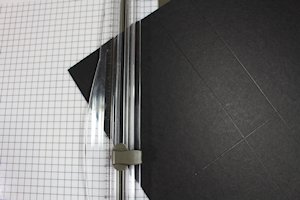
-
Step 5
Cut in on both horizontal lines to the middle score lines - this middle section will be the spine of the holder.
-
Step 6
Press down on all the folds with a bone folder to ensure clean crisp folds.
-
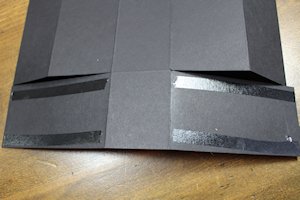
Step 7
To assemble the holder, start with the bottom piece. Apply adhesive to the back side then fold up and in.
-
Taking the middle section, add adhesive on the front, then fold OVER the bottom layer. This makes the base nice and strong.
-
Step 8
Put adhesive on the lower part of the upper triangle section and adhere that to the base.
TIP:
Fold up the bottom portion of the box and make a pencil line for best placement of adhesive.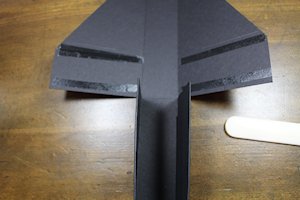
-
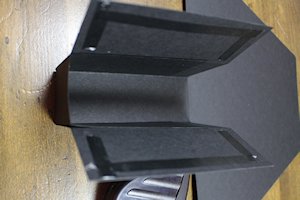
The assembled holder should look like this.

-
Step 9
Embellish the holder as desired to complete the project. Fill with A2 cards and envelopes for a thoughtful gift.
These measurements were used in the sample to layer on lower panels:
2 pieces of Whisper White 2" x 4 1/2"
2 pieces of Basic Black 1 3/4" x 4 1/4"
2 pieces of Back to Black Designer Series Paper 1 1/2" x 4"
1 piece of Whisper White 1 1/2" x 2"
1 piece of Basic Black 1 1/4" x 1 3/4"
1 piece of Back to Black Designer Series Paper 1" x 1 1/2"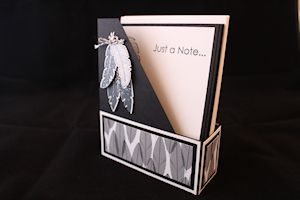
Video!
Your Turn
You've seen the tutorial, now you try it! We've got a section of the gallery set aside for Mini Magazine Holder. Try this technique, then upload your artwork to the gallery. Show us your creations!
***Please note - Internet Explorer/Edge is not a supported browser, and will not allow you to see the videos. Please use Chrome, Firefox or Safari to view our tutorial videos.

Questions and Comments
We'd love to get your feedback or questions. Leave your comment below.
This idea is great and easy to make. I have one question? How would you wrap this if you were to give this to someone or sell them so people can see what is inside. I made this card holder for some Christmas cards that I am selling, but I am stumped as to how I should wrap them. Any suggestions would be appreciated.
Marie
Page 2 of 2 pages < 1 2