Mini File Box
by Chris Slogar
Make a mini file box to package handmade tags.
Supplies
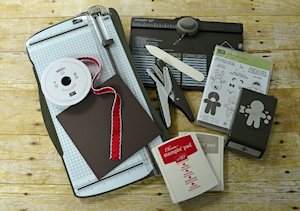
- Cardstock (Stampin’ Up!® Early Espresso used here)
- Envelope Punch Board
- Paper trimmer
- Bone folder
- Stapler
- Adhesive (Stampin’ Up! Fast Fuse and Dimensionals used here)
- Scissors
- Other supplies as needed to complete the project (Stampin’ Up! supplies used here: Real Red 3/4” Stitched Ribbon, Cookie Cutter Christmas stamp set, Cookie Cutter Builder Punch, Whisper White Cardstock, Crumb Cake and Real Red inks. Tags: Candy Cane Lane designer series paper; Candy Cane Lane Baker’s Twine; Kraft Rope Trim; Mini Pompom Trim; Candy Cane Christmas and Tin of Tags stamp sets; Real Red, Early Espresso and Versamark inks; various circle punches and white embossing powder)
Step-by-Step
-
Step 1
Cut cardstock to 6” x 6”.
Place cardstock on Envelope Punch Board. Punch and score at 2” and 4”. Rotate cardstock 180 degrees and punch and score opposite side at 2” and 4”.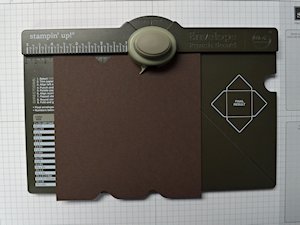
-
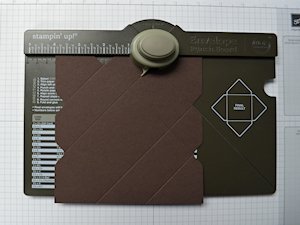
Step 2
Rotate the cardstock 90 degrees. Line up the scoring guide with each score line. Punch and score at each score line.
-
Step 3
Rotate the cardstock 180 degrees to the fourth side. Line up the scoring guide with each score line, but this time PUNCH ONLY at each score line – do not add score lines on this last side. The corner that is not scored will become the top of the file box, and there is a section of it that will be cut off in the next step.
Round corners if desired.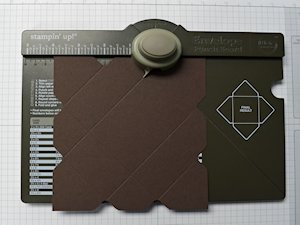
-
Step 4
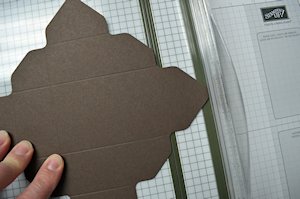
Align notches with the groove in the trimmer track as shown, and cut off the corner that is not scored.
-
Step 5
Holding the cardstock as shown in the picture, snip along two vertical score lines between horizontal score lines to create flaps for the box bottom.
Burnish all score lines.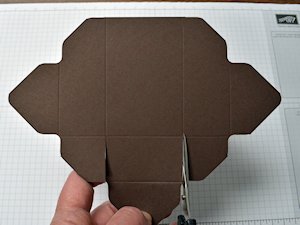
-
Step 6
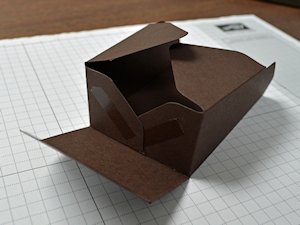
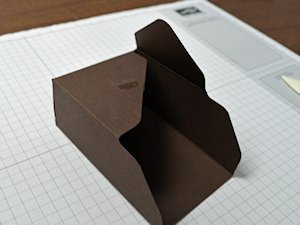
Add adhesive to the box bottom flaps and carefully form the box bottom.
-
Step 7
Add adhesive to one of the overlapping flaps at the front of the box and complete the box front.
-
Step 8
Attach the end of a 9” length of ribbon to the box front with a stapler, catching all layers of cardstock to secure. Staple so that the flat side of staple is inside the box.
Wrap ribbon around the box and staple again to secure the end. Trim excess ribbon.
NOTE:
A strip of designer paper can be used instead of ribbon.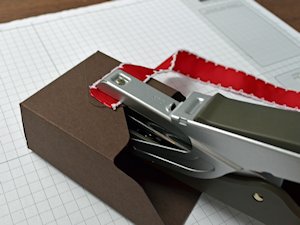
-
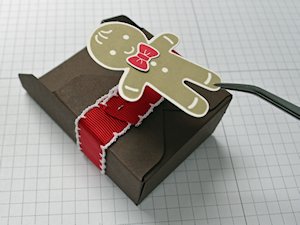
Step 9
Add desired embellishments to hide the ribbon ends and staples.
-
Step 10
Cut 2" x 4 1/4" strips of cardstock for tags. Use a tag topper punch (Stampin’ Up! Scalloped Tag Topper used here) or hole punch to create a hole for ribbon. Decorate each tag as desired.

-
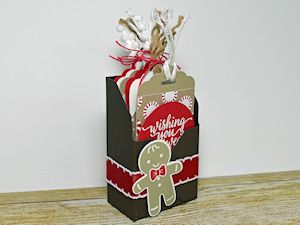
Complete the project, filling the box with tags or other treats.
Video!
Your Turn
You've seen the tutorial, now you try it! We've got a section of the gallery set aside for Mini File Box. Try this technique, then upload your artwork to the gallery. Show us your creations!
***Please note - Internet Explorer/Edge is not a supported browser, and will not allow you to see the videos. Please use Chrome, Firefox or Safari to view our tutorial videos.

Questions and Comments
We'd love to get your feedback or questions. Leave your comment below.
Thankyou
LL
Thank you for sharing!
Thank you,
Carolyn
I have seen similar projects made with the gift box punch board, but I am afraid I do not have directions. I designed this for my envelope punch board because I don't own the gift box punch board. Chris
Page 1 of 1 pages