Mini Album 6” x 6”
by Anne Patterson
Accordion spine, flag pages. Fun album!
Supplies
- Two 6" x 6" pieces of thin cardboard
- Two 12" x 12" pieces of cardstock for spine
- Assorted 6" x 6" cardstock for pages
- Two 8" x 8" pieces of patterned paper plus scraps
- Strong adhesive
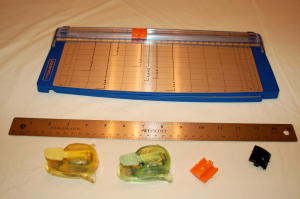
- Paper cutter with scoring blade
- Ruler
- Embellishments
Step-by-Step
-
Step 1
Mark 1" margins on wrong side of 8" x 8" cover papers to create a 6" x 6" square in the center. Measure 1 7/8" from each corner. Draw line to create a triangle just outside the square.

-
Step 2
Apply adhesive to the wrong side of the 6" square and adhere the 6" x 6" cardboard. Flip over, and cut across triangle.
Mitering the corners prevents "bunching" of extra paper.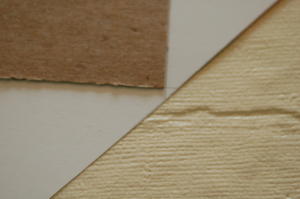
-
Step 3
Fold edges of patterned paper toward center of cardboard and adhere. Spend time on the corners to get them nice and crisp. The paper's edges (on the wrong side of the cover) do not have to be exact. The cardboard backing will be covered later.
Repeat Steps 1 through 3 for back cover, and set both aside.
-
Step 4
Cut three 6" x 12" strips from 12" x 12" paper. Score each at 3", 6", and 9". These strips will be used to create the book's spine.
Fold accordion style. It is very important that the edges are straight after folding to avoid having a crooked spine.
Flip the second piece and adhere. Adhere the third strip, remembering not to overlap the folds.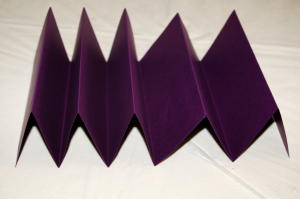
-
Step 5
To assemble to cover and spine, adhere the spine so the folded ends are 1/16" from the cover's edge. The top and bottom edges exactly align with the cover's edge. Repeat for back cover. When the album is closed, it should still be straight and aligned. It is the most dimensionally critical aspect of the book.
Tip: This step may take a bit of practice. If you're not sure, try repositionable tape.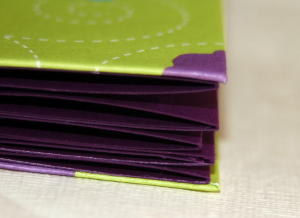
-
Step 6
The inside cover pieces are made from the same paper as the spine. Cut two 5 7/8" x 5 7/8" pieces to allow a glimpse of the patterned paper edges once layered.
Adhere to inside covers.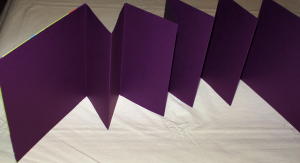
-
Step 7
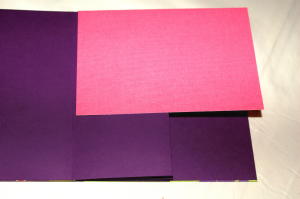
Cut a 4"x 6" piece of card stock. Align the top edge of the spine with the long edge of the card stock and adhere to the top of the first fold.
-
Step 8
Turn the page. On the back side of the same fold, adhere a 2" x 6" piece of card stock. Line up the long, bottom edge with the binding. Be sure to leave a 1/16" gap between the first and second pieces of card stock to allow the pieces to cross when the book is opened.

-
Step 9
Close the album and make sure the pages don't extend beyond the covers. If pages do extend, gently reposition until they don't.
-
Step 10
Repeat steps 7 through 9 until all folds have pages adhered. Only apply adhesive on the cardstock that adheres to the binding.
Tip: Use a T-ruler and draw line at 2 7/8" on the wrong side of the cardstock. Only apply adhesive to the smaller section.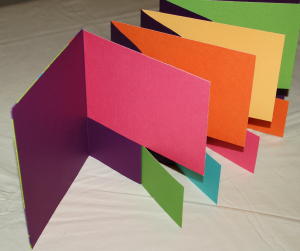
-
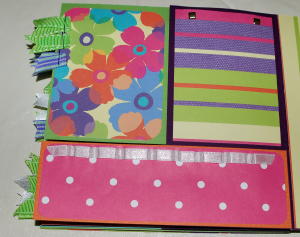
Step 11
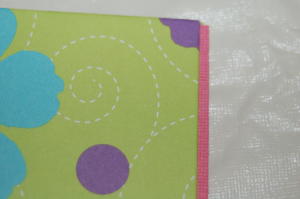
Add strips of patterned paper, ribbon, punches, and accessories, then fill pages with memories.
Your Turn
You've seen the tutorial, now you try it! We've got a section of the gallery set aside for Mini Album 6” x 6”. Try this technique, then upload your artwork to the gallery. Show us your creations!
***Please note - Internet Explorer/Edge is not a supported browser, and will not allow you to see the videos. Please use Chrome, Firefox or Safari to view our tutorial videos.

Questions and Comments
We'd love to get your feedback or questions. Leave your comment below.
Page 1 of 1 pages