Microscope Slide Ornament

by Sharon Harnist

Dazzle your friends and family with microscope slide ornaments.

Supplies

  • Microscope Slides or Memory Glass – sizes vary: 1” x 3”, 1-1/2” x 1-1/2”, 2” x 2”, 2” x 3”
  • ¼” Sticky Strip (red liner double-sided tape)
  • Adhesive
  • Cardstock and Ink for stamping images
  • Rubber Stamps
  • Cord, ribbon or wire for ornament hanger
  • Microbeads, glitter or ribbon to edge and seal slides
  • Optional: Memory Glass Frames

Step-by-Step

  1. Step 1

    To position stamped image, draw a pencil line around the microscope slide and stamp within the lines.

    Color image.

    Note: This microscope slide glass measures 2” x 3”.
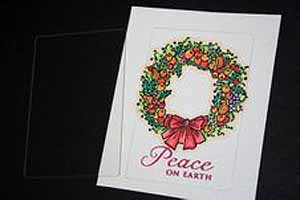
  2. Step 2

    Cut just inside pencil lines so image will fit perfectly beneath the slide.

    Don’t forget to either stamp another image or add decorative paper on the back side of the ornament.
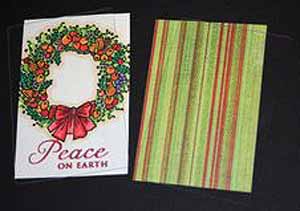
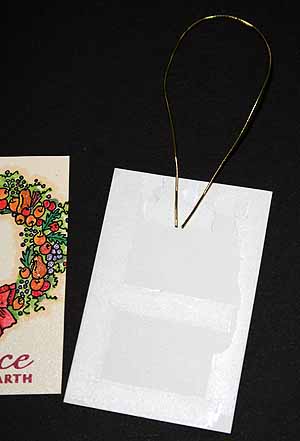
  3. Step 3

    Apply adhesive to the back side of the ornament backing and place cord in a loop, making sure it is well secured with the adhesive.

  4. Step 4

    Place main image on top of the backing, sandwiching the cord in the middle.

  5. Step 5

    Place a microscope slide on top and bottom of the sandwiched images and apply double-sided tape to the edges of the slides, centering the tape so some will wrap around the sides, sealing the slides together.

    Peel off red protective film.
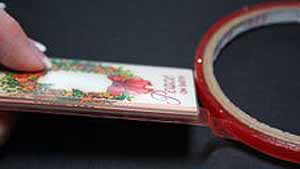
  6. Step 6

    Cover the exposed tape with micro beads or glitter. Memory Glass Frames may be used to hold your stamped images and slides.

    Variation: Instead of sandwiching cord between the slides for a hanger, place ribbon all around the tape in this step, tying it in a loop/bow at the top for a hanger.
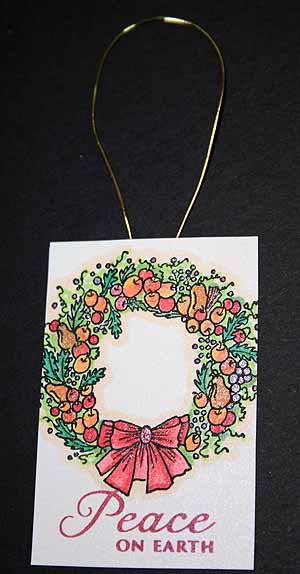
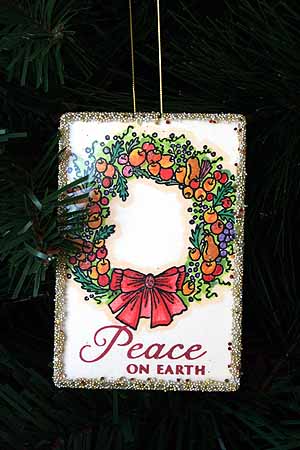
  7. Step 7

    Finished Ornament.

Video!

Variations

  1. Turn it into a shaker ornament.

    1. Apply two layers of 1/4-inch red liner tape, folded in half, to the inside of the top microscope slide. Leave red plastic on the last layer of tape and put shaker material (micro beads, glitter, plastic snow, etc.) in the middle of the slide (liner on the tape prevents shaker material from adhering to tape).

    2. Gently peel liner off tape (try not to disturb shaker material) and place stamped image face down on top of tape, sealing the edges well.

    3. Continue with Step 3 above.
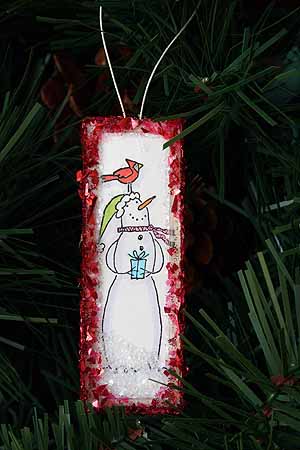
  2. Try sideways
    Experiment with slide orientation -- they can also be turned horizontally.

    Metal loop hanger
    If using Memory Glass Frames, tie ribbon through the provided metal loop to serve as a hanger, and your ornament is finished.

    Wear it
    Leave the ribbon/cord off and make it into a pin.

Your Turn

You've seen the tutorial, now you try it! We've got a section of the gallery set aside for Microscope Slide Ornament. Try this technique, then upload your artwork to the gallery. Show us your creations!

***Please note - Internet Explorer/Edge is not a supported browser, and will not allow you to see the videos. Please use Chrome, Firefox or Safari to view our tutorial videos.

Questions and Comments

We'd love to get your feedback or questions. Leave your comment below.

Gorgeous project and wonderful tutorial! Thanks, Sharon!
Rose Ann Reynolds  |  Mon Nov 19, 2007 at 7:51 AM
Where do you get microscope slides? Awesome Idea, thanks for the tutorial--easy to understand. Love the Shaker Slide.
Robbie Stockton  |  Mon Nov 19, 2007 at 7:51 AM
These are SO beautiful!! Thanks for sharing the tutorial.
sleepyinseattle  |  Mon Nov 19, 2007 at 8:08 AM
Wow! Your ornaments are gorgeous, Sharon!
Love all your samples and thanks for the wonderful tutorial!
genescrapper  |  Mon Nov 19, 2007 at 8:21 AM
Sharon,

Wow, these are beautiful! Thanks for a great tutorial.
cardsbyjo  |  Mon Nov 19, 2007 at 8:44 AM
Thanks for the great idea! Just wondering where you got the the microscope slides?
Jessie Roorda  |  Mon Nov 19, 2007 at 10:37 AM
Love this idea. Where did you get your 2x3 slides? I've been surfing the internet and can only find the 1x3s.
DRStamper  |  Mon Nov 19, 2007 at 11:17 AM
These are beautiful, Sharon! Great tutorial! Linda
Linda Bullard  |  Mon Nov 19, 2007 at 10:36 PM
We do not have the slides in Turkey. I was thinking of using an acetate sheet instead. Has anyone tried that? Is there something else that would work in place of the slide? I love this tutorial and would really like to find something that would be appropriate to use in place of the slides.
Karen Schreiber  |  Tue Nov 20, 2007 at 5:54 AM
I've been wondering what to do with all those slides I "had" to get last year.
Sandra  |  Wed Nov 21, 2007 at 12:39 PM
Great project, but where do you get the slides?
Marie Merwin  |  Wed Nov 21, 2007 at 1:20 PM
Love it! Very cute, great as a beginner class. But where can I get the slides?
bwinda  |  Fri Nov 30, 2007 at 11:31 AM
I don't have access to slides but I was going to try the glass ornaments that you can get at Michael's and AcMoore's. They already have the hanger in them just need to punch a hole in your paper.
Karen  |  Wed Dec 5, 2007 at 6:53 AM
I recently found the slides and now all I need to find is the metalic (looks like solder) tape I need to wrap around the sides of the slides once I stamp and layer them up. Can you help locate somewhere I can order this from???
Myrna  |  Thu Jan 31, 2008 at 12:42 PM
Stamping up sells the tape and the micro beads.
bwinda  |  Thu Jan 31, 2008 at 3:59 PM
2x2 and 1x3 memory glass or slides are at paperwishes.com in 24 packs so you could make a dozen!
jckid  |  Thu Jul 10, 2008 at 6:48 PM
where cAN I find 2"x3" slides..I like that size and the ones I saw on the gallery are just beautiful
TiggyPince  |  Sat Jan 17, 2009 at 7:08 PM
you can buy plain microscope slides from ebay!
Jane Hunter  |  Tue Oct 6, 2009 at 9:26 AM
You can get the slides at Oriental Trading Company. You can go to their website and check it out...orientaltrading.com
Caryn Swann  |  Wed Oct 21, 2009 at 8:32 AM
how would acetate paper work with this project? and has anyone tried it with this paper? thanks...smile
Kimberli lewis  |  Thu Nov 5, 2009 at 1:16 PM

Page 1 of 2 pages  1 2 >

You need to be logged in to comment

GET OUR NEWSLETTER


Splitcoaststampers's privacy policy