Marbled Smooch™

by Lydia Fiedler

Create a marbled background with Smooch and water.

Supplies
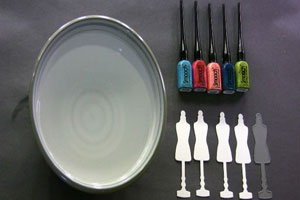
  • Colored Smooch™ Pearlized Accent Ink

  • Bowl of water

  • Watercolor paper

Step-by-Step

  1. Step 1

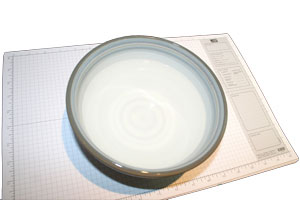
    Fill a bowl or container with tap water.
  2. Step 2

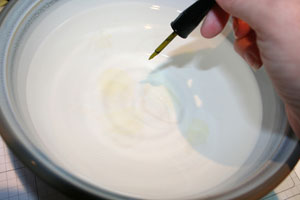
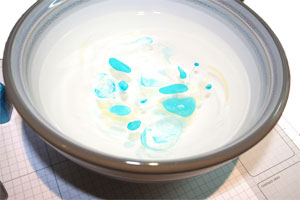
    With a light color of Smooch Pearlized Accent Ink, touch the applicator to the water's surface to create circles of pigment.
  3. Step 3

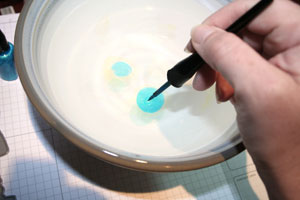
    With a bolder color of smooch, touch applicator to the water's surface, both inside and outside the circles of lighter pigment. The longer you hold the brush in the water, the larger your circle will be.
  4. Step 4

    Fill up an area larger than the shape you intend to marbleize with Smooch in a pattern you like.
  5. Step 5

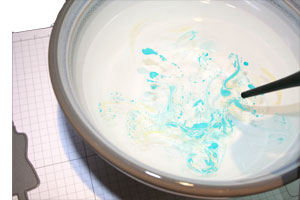
    Close the Smooch and use the lid of the container to swirl the pigments into a marbled pattern.
  6. Step 6

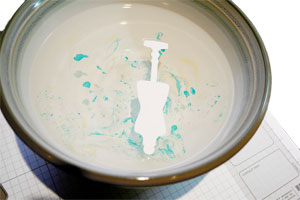
    Place a piece of die cut watercolor paper face down onto the surface of the water.
  7. Step 7

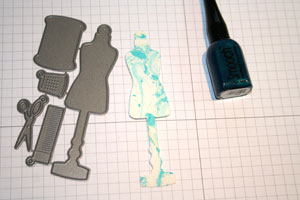
    Immediately remove paper and set on mat to dry - do not blot.
  8. Step 8

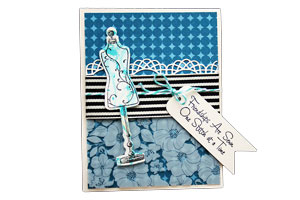
    Use marbled paper on finished project
Video!

Your Turn

You've seen the tutorial, now you try it! We've got a section of the gallery set aside for Marbled Smooch™. Try this technique, then upload your artwork to the gallery. Show us your creations!

***Please note - Internet Explorer/Edge is not a supported browser, and will not allow you to see the videos. Please use Chrome, Firefox or Safari to view our tutorial videos.

Questions and Comments

We'd love to get your feedback or questions. Leave your comment below.

I done the shaving cream and regular ink refills and works great. Now...can the re-inkers be used in water instead of the Smooch Pearlized Ink? I have re-inkers in my stash that I am going to try..and I mentioned make sure the project is completely dry b/4 adding adhesive to it. I agree with that comment...I've been impatient, glued the project to card base, and have had to reglue or use glue dots and than I have a mess! Thank you.
Carolyn M Smith  |  Wed Mar 14, 2012 at 9:02 AM
Going to try the marble effect with my ink refills. Believe it will have the same effect as the Smoochies. But will have to wait to get watercolor paper..online with Hobby Lobby, here I come!!
Carolyn M. Smith  |  Wed Mar 14, 2012 at 9:15 AM
Hi Carolyn - The reinkers I have are Stampin' Up! - which are waterbased. Distress inks are waterbased as well. Water based reinkers will not work with this technique because they are water soluble so they just blend with the water rather than sitting on top of it, as the pigment from the Smooch does. The pigment from the Smooch ink forms a layer that floats on top of the water and allows you to make patterns and pick them up with paper. Hope that helps! smile
Lydia Fiedler  |  Wed Mar 14, 2012 at 9:23 AM
Thanks for the tut! I just bought a bunch of smooch on sale and will hhave fun playing with this technique!
Sharon H  |  Wed Mar 14, 2012 at 9:38 AM
I would like to know the brand of the dies that you used...I couldn't find that resource...thanks !!!
LouAnn Crill  |  Wed Mar 14, 2012 at 9:42 AM
Hi LouAnn - if you click through to the gallery, you will see all my supplies listed - the die I used is the Sew Nifty set from My Favorite Things smile
lydia  |  Wed Mar 14, 2012 at 9:45 AM
thank you for sharing. I sure like this.
Judy Stewart  |  Wed Mar 14, 2012 at 11:53 AM
I love this look! Wonderful tutorial, Lydia!!
Rose Ann  |  Wed Mar 14, 2012 at 2:10 PM
Your tutorial was so helpful and thorough. Thank you so much for showing a wonderful new way of using all those Smooch colors I have!!
Cheryl O  |  Wed Mar 14, 2012 at 7:18 PM
What a lovely idea. Great tutorial!
Stef Perry  |  Wed Mar 14, 2012 at 11:32 PM
Great tutorial! I will try this with the Smooch I received from my Secret Sister! Thanks!
Susanne  |  Thu Mar 15, 2012 at 6:59 AM
Great technique! What is the die for the doily shape in the background? MFT has a similar one but it's 4.25" and the one pictured is smaller.
Sue P  |  Thu Mar 15, 2012 at 8:49 AM
Hi Sue! That is MFTs dizzy border die - I just cut it smile
Lydia  |  Thu Mar 15, 2012 at 8:56 AM
The video was great, but the sound was VERY faint- until the end when the music came on. I had my sound as high as it would go...
chocolate rose  |  Thu Mar 15, 2012 at 12:37 PM
I bought Smooch as well and never could figure out anything interesting to do with it. I really appreciate stamping teachers who come up with such amazing ideas!
Shala  |  Fri Mar 16, 2012 at 1:01 PM
I can not WAIT to try this! I am always looking for new ideas to use what I have! Thanks for sharing.
Cindy  |  Sat Mar 17, 2012 at 6:11 PM
Is Smooch ink or acrylic paint?
Mary Hansen  |  Sun Mar 18, 2012 at 12:12 AM
Hi Mary - It's called "pearlized accent ink" - it's a very smooth, somewhat translucent, shimmery pigment ink. You can paint with the fine brush tip on detailed images, but it is not acrylic paint.
Lydia  |  Sun Mar 18, 2012 at 6:38 AM
I had never heard of this but love it I will be
looking for the pattern and smooch
Sue Gatewood  |  Mon Mar 19, 2012 at 10:59 AM
Great isnight. Relieved I'm on the same side as you.
Belle  |  Sat May 26, 2012 at 4:36 AM

Page 2 of 3 pages  <  1 2 3 >

You need to be logged in to comment

GET OUR NEWSLETTER


Splitcoaststampers's privacy policy