Kraft Bag Gift Card
by Beverly Gerard
With a few simple folds, a gift bag becomes a gift card holder.
Supplies
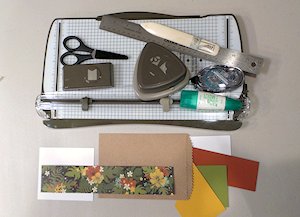
- Kraft Bag, 4 3/4” X 7” (Stampin’ Up!® Kraft Tag a Bag Gift Bag used here)
- Patterned paper, cut to 2” X 10 1/2” (Stampin' Up! Botanical Gardens DSP used here)
- White or neutral cardstock, 3 3/4” X 4 1/4” (Stampin' Up! Whisper White cardstock used here)
- Scoring tool
- Bone folder
- Corner rounder (optional - Stampin' Up! Curvy Corner Trio punch used here)
- Adhesives
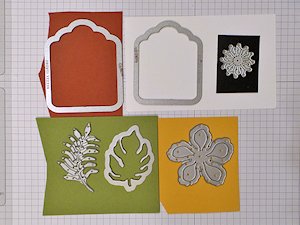
- Other supplies as needed to complete the project (Stampin' Up! products used: Birthday Blooms stamp set; Crushed Curry and Archival Basic Black inks; scraps of Basic Black, Cajun Craze, Crushed Curry and Old Olive cardstock; Tags and Labels and Botanical Builder Framelits dies; Banner punch; Gold Metallic Baker's Twine, Basic Jewels Rhinestones
Step-by-Step
-
Step 1
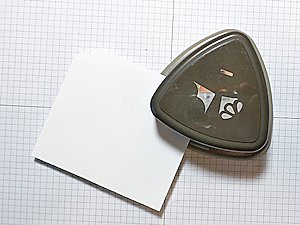
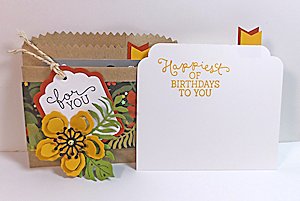
Cut plain cardstock to 3 3/4" X 4 1/4" for the insert. Punch the top two corners with a corner rounder, if desired.
-
Step 2
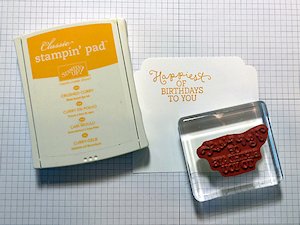
Stamp a greeting on the insert card.
-
Step 3
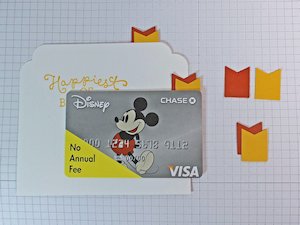
Create pull tabs for the card insert and gift card using dies or punches. Adhere to the backs of the insert and gift card.
-
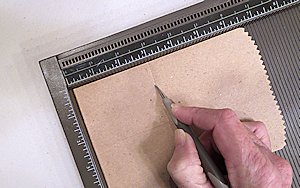
Step 4
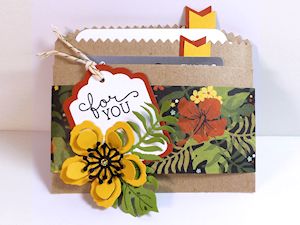
Score 3" up from the bottom of the kraft bag.
-
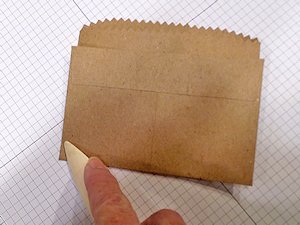
Fold the bottom of bag upward, and crease on the fold line with a bone folder.
-
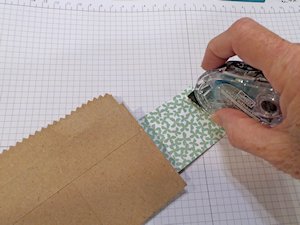
Step 5
Lay the folded bag atop the strip of patterned paper. Apply adhesive to one end of the paper.
-
Fold the patterned paper around on each side of the bag to create the belt or belly band. Adhere.
TIP:
Offset the seam a bit if needed to hide it behind the tag or other front treatment.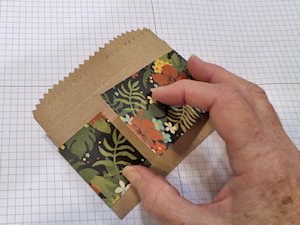
-
Step 6
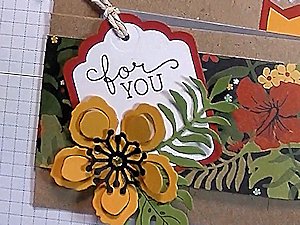
Create a tag or other treatment for the front.
-
Stamp a greeting on the tag and embellish as desired. For the sample, a dimensional blossom coordinates with the patterned paper.
-
Step 7
Complete the project and tuck in a gift card, cash or tickets for gift-giving.
-
The gift card holder will fit in a standard A2 envelope if the tabs are not too high.
Video!
Your Turn
You've seen the tutorial, now you try it! We've got a section of the gallery set aside for Kraft Bag Gift Card. Try this technique, then upload your artwork to the gallery. Show us your creations!
***Please note - Internet Explorer/Edge is not a supported browser, and will not allow you to see the videos. Please use Chrome, Firefox or Safari to view our tutorial videos.

Questions and Comments
We'd love to get your feedback or questions. Leave your comment below.
Love It!!
Page 2 of 2 pages < 1 2