Joy Fold Card

by Beate Johns

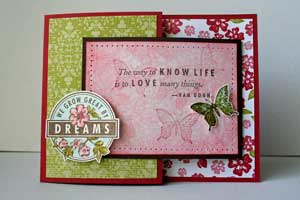
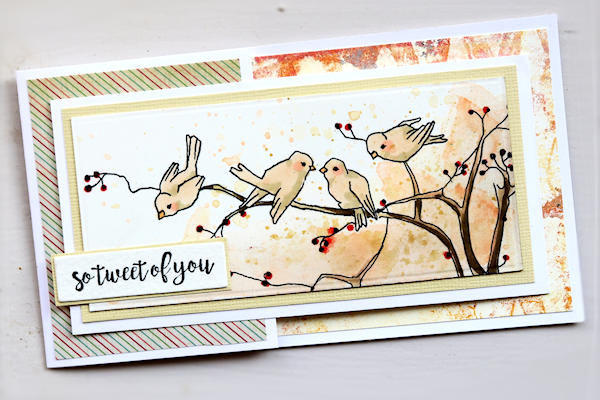
Create this unique opening card with two pieces of cardstock.

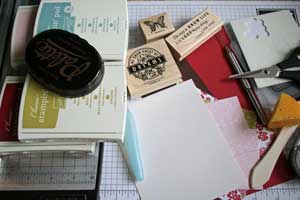
Supplies
  • One 4 1/4" x 8 1/2" piece of cardstock
  • One 3" x 8" piece of cardstock
  • Two 2 3/4" x 4" pieces of cardstock or designer paper (optional)
  • One 4" x 5 1/4" piece of of cardstock or designer paper (optional)
  • One 2 3/4" x 4" piece of cardstock or designer paper (optional)
  • Additional cardstock
  • Scoring tool
  • Adhesive
  • Stamps
  • Ink

Step-by-Step

  1. Step 1

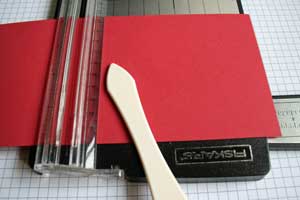
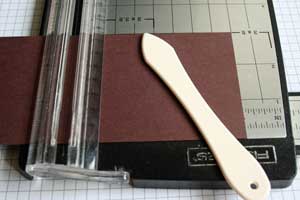
    Score your 4 1/4" x 8 1/2" piece of cardstock at 5 1/2".
  2. Step 2

    Score your 3" x 8" piece of cardstock at 4".
  3. Step 3

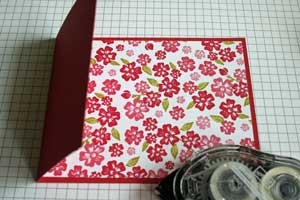
    Adhere your 4" x 5 1/4" piece of designer paper on the inside of the card.
  4. Step 4

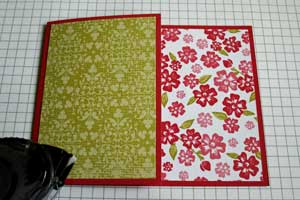
    Adhere your 2 3/4" x 4" piece of designer paper to the card front.
  5. Step 5

    Stamp your 2 3/4" x 3 3/4" pieces of designer paper if needed and adhere them to the inside and outside of your smaller folded cardstock piece.
  6. Step 6

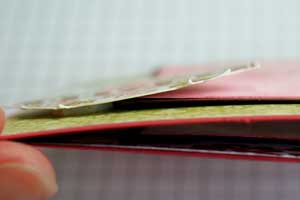
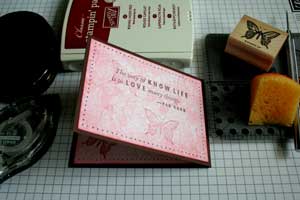
    Add adhesive to the back of your smaller flap and tape it to the inside of the card. Make sure the fold of the smaller flap is pointing to the right.
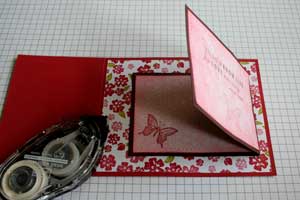
  7. Step 7 (Optional)

    If you want to secure the flap from opening, stamp a complimentary image and adhere it with dimensionals to slightly over the edge of the smaller flap to keep it closed.
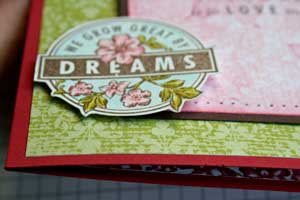
  8. Step 8

    Finish your card.

Video!

Variations

  1. Try a flap on top instead.
    Make the card base a 5 1/2" x 7 1/4" piece of cardstock scored at 4 1/4".

    Create a flap from a 4 1/4" x 5 1/2" piece of cardstock scored at 2 3/4".
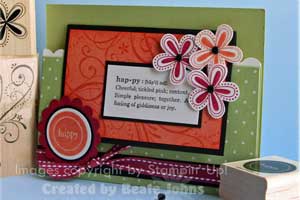
  2. Make it a square.
    Create your square card base by scoring a 4 1/4" x 6 1/4" piece of cardstock at 4 1/4". Score a 3" x 6" piece of cardstock at 3" to create your insert.


    Make a mini-slimline card.
    Make the card base 3 1/2" x 9" and score at 2 3/4". Cut a second piece at 2 3/4" x 11" for the insert, scoring at 5 1/2". The finished card is 3 1/2" x 6 1/4" and will fit in a #6-3/4 envelope (small business size).

    Inside layering panel: 3 1/4" x 6"
    Left layering panel: 2 1/2" x 3 1/4"
    Insert layering panel: 2 1/2" x 5 1/4", focal panel 2 1/4" x 5"

Your Turn

You've seen the tutorial, now you try it! We've got a section of the gallery set aside for Joy Fold Card. Try this technique, then upload your artwork to the gallery. Show us your creations!

***Please note - Internet Explorer/Edge is not a supported browser, and will not allow you to see the videos. Please use Chrome, Firefox or Safari to view our tutorial videos.
Questions and Comments

We'd love to get your feedback or questions. Leave your comment below.

What a neat card. I can't wait to try this. It seemed confusing at first. I don't follow directions easily, but by the third time I do think I have it by jove. Your photos really help. Just a beautiful card!
Kathy in Michigan  |  Sun Jul 27, 2008 at 6:50 PM
WOW
My first log on and what do I find a very inspirational card to create
Than k you so much
Krafty kamp  |  Mon Jul 28, 2008 at 4:57 PM
Preciosa postal, me encanta, enhorabuena por este trabajo.
Monika  |  Tue Jul 29, 2008 at 3:11 AM
this is wonderful, I made one for a wedding shower out of black, red, and white and the bride absolutely loved it. Thanks for the inspiration.
Mbcards  |  Tue Jul 29, 2008 at 3:24 AM
What would we ever do without you? I am so thankful for this web site and all the wonderful woman that are so creative and helpful when we have a question or dilema! Bless you all!
Lisa M Nickerson  |  Mon Aug 4, 2008 at 5:41 PM
beautiful
Kimberly  |  Mon Aug 11, 2008 at 2:02 PM
Thanks for the tutorial... I made my own based on pics from another blog - not realizing there was a tutorial! But, this rocks! Thanks for making this available!
Lori  |  Fri Aug 29, 2008 at 3:16 PM
What a neat technique! I've been making Step Cards out of wall paper for the past week and missed all the hubbub on this card. Thanks to your tutorial, I see why it is so popular. Can't wait to try it (with wall paper... lol). TFS
Susan Ford  |  Tue May 26, 2009 at 4:51 PM
This is the neatest card and so versitle.
I know I am going to enjoy it. Got to go try one. Thank you
Janice perry  |  Mon Jun 8, 2009 at 4:20 PM
I saw this card splashed all over the Cricut Message board - this is GORGEOUS ! Beate, you are such a genius ! Thank you for sharing all your wonderful tutorials with us !
Lori  |  Mon Jun 8, 2009 at 5:26 PM
Fantastic....directions very clear cannot wait to get started thank you
Janet  |  Tue Jun 9, 2009 at 7:46 AM
Thank you for sharing this lovely card with us, I'm always lookig for great new card!
Lidy
Lidy Mulder  |  Tue Jun 9, 2009 at 10:42 AM
I am soing invitations for my husband's Grandmothers 75th birthday. We have picked the color scheme of black, white, and riding hood red (SU). I have the hugs and wishes stamp. I need a really good idea for a card, the one I picked out was using the Doodle This (SU) and after doing it, I did not like it very well. I have to do 30-40 invitations, I would like to do something that is just breathe taking, elegant, and some what easy (I am the only on doing them). Please Help.
Lara Gunnells  |  Thu Jun 11, 2009 at 9:43 PM
This is a beautiful card - very popular on cricut MB right now! I'm having a hard time, however, I think the 'designer paper' for the smaller card should be 2 3/4" x 3 3/4" inch rather than 2 3/4 x 4... otherwise there is not an even amount around the edges (or I'm doing something wrong!). Thanks so much for doing this tutorial - your designs are simply amazing!
Denise  |  Mon Jun 15, 2009 at 6:09 PM
wow what a great card, thanks
marcelle baldwin  |  Thu Jun 18, 2009 at 12:51 AM
What a delightful card! I have shared your directions ( giving FULL credit, I might add) with several of my weekly scrapping friends at Memories for the Making, our local scrapbook store. They all said to thank you....
Kahtleen
Kathleen Tachella  |  Sun Aug 2, 2009 at 7:25 AM
Uh... that last message would be from
Kathleen in Lodi, CA
( I DO know how to spell my name!
Kathleen Tachella  |  Sun Aug 2, 2009 at 7:26 AM
This is my favorite card to make! Thanks for the tutorial!
Sharon  |  Wed Aug 26, 2009 at 6:42 AM
Bello!!!!!!
Olga  |  Wed Nov 11, 2009 at 3:05 PM
These are beautiful. Love them! Thank you.
Rosemary  |  Wed Nov 11, 2009 at 4:12 PM

Page 3 of 4 pages  <  1 2 3 4 >

You need to be logged in to comment

GET OUR NEWSLETTER


Splitcoaststampers's privacy policy