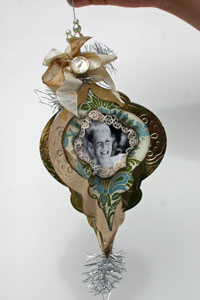
Heirloom Photo Ornament
by Julie Overby
Create a 3d ornament with Spellbinders Ornament dies.
Supplies
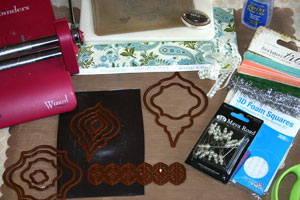
- Wizard™, or other die cutting machine
- Heirloom Ornament Nestabilities™
- Label 13 Nestabilities™
- Fair Isle Borderabilities™
- Gold foil cardstock
- Patterned paper
- Adhesive
- Embellishments
Step-by-Step
-
Step 1
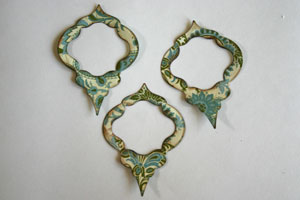
Use gold foil cardstock to cut and emboss Heirloom Ornament #5 (#1 is the smallest.) Cut three Ornaments.
-
Step 2
Emboss Fair Isle Borderabilities™ across all three gold ornaments.
-
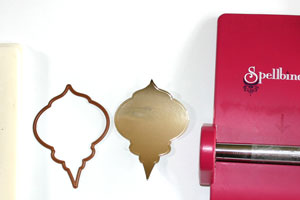
Step 3
Center Label 13 template (#3) over the foil and the flip it so the cut side is facing up.
Hint:
The die is shown here facing down so you can see where to center it. Place a tiny piece of tape to be sure it stays in the right spot when I flip it over.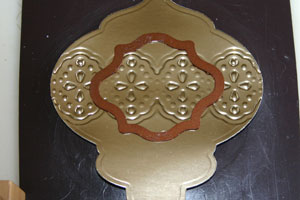
-
Step 4
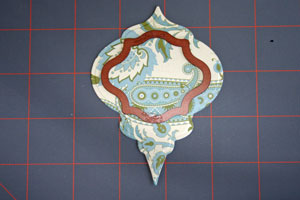
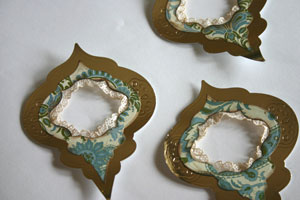
Cut and emboss a #4 Heirloom Ornament out of patterned paper three times.
-
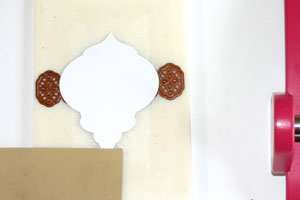
Step 5
Once again, center Labels Thirteen #3 on the patterned paper, and after lining it up, cut and emboss it.
-
Step 6
After sponging the edges of the patterned paper, layer them on the gold foil ornaments and adhere trim to the edge of window.
-
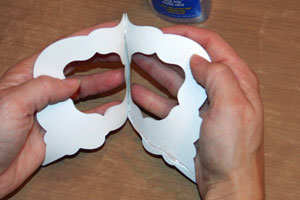
Step 7
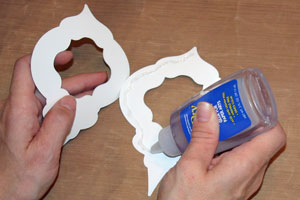
Apply liquid adhesive to one side of the ornament.
-
and adhere the matching side of the second ornament. Hold in place until set.
-
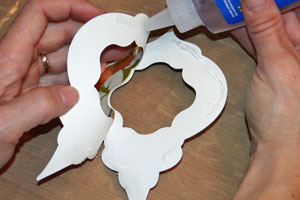
Step 8
Add liquid adhesive to the opposite side and adhere the third ornament to it. Hold until set.
-
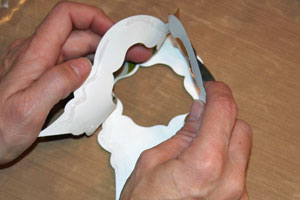
Apply adhesive to the last side to connect the last two ornaments
-
Step 9
Sew a piece of thread through the top and add bow, buttons and tinsel to embellish.
Video!
Your Turn
You've seen the tutorial, now you try it! We've got a section of the gallery set aside for Heirloom Photo Ornament. Try this technique, then upload your artwork to the gallery. Show us your creations!
***Please note - Internet Explorer/Edge is not a supported browser, and will not allow you to see the videos. Please use Chrome, Firefox or Safari to view our tutorial videos.

 *
*
Questions and Comments
We'd love to get your feedback or questions. Leave your comment below.
superbe md
Thanks!
It's called a Blending Tool from Rangers. I LOVE it and have one for each color group.
Page 1 of 1 pages