Glass Etching - Embossing Resist
by Vickie Maduzia
There are two ways to do glass etching: Stencil Etching, and Emboss Resist Etching. Big thanks to my sweet friend Colleen Kidder for teaching me glass etching 3 years ago.
Supplies
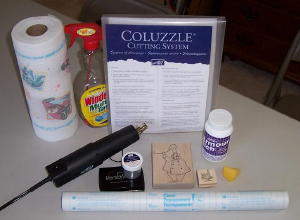
- 9 1/2" glass dessert plate or other flat surfaced glass
- 1/4" circle punched from dark cardstock
- Scotch™ Tape
- Coluzzle© cutting system
- Adhesive-backed (Contact™ ) shelving paper
- Glass cleaner spray
- Paper towels
- Embossing Buddy™
- Rubber stamp(s)
- Versamark™ pad
- Embossing powder (any color)
- Embossing heat tool
- Rubber or latex gloves
- Armour Etch Cream™ available at local craft stores [buy it]
- Sponge wedge or foam brush
- Scraping tool of some sort
- Kitchen timer or clock Note: Although etched glass is food safe when complete, it looks nicer to put the image on the backside of the plate.
Step-by-Step
-
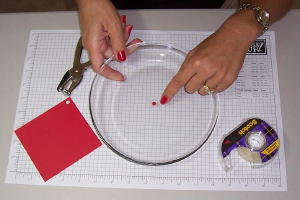
Step 1
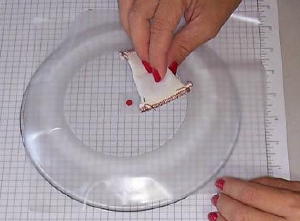
Attach the 1/4" cardstock circle to the center of the plate's eating surface with Scotch™ tape. There's no need to measure to find the exact center. This dot will be removed later; it is a guideline for stamp placement.
-
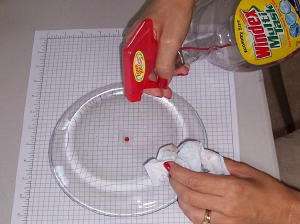
Step 2
Clean the back side of the plate thoroughly with glass cleaner and a paper towel. Any fingerprints are a glass etcher's biggest challenge so keep the etching surface as clean as possible.
-
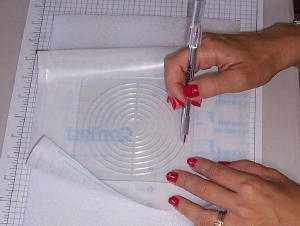
Step 3
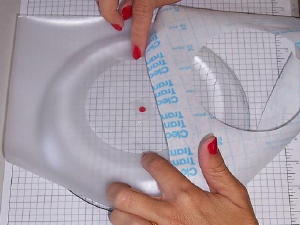
Using the Coluzzle™ circle cutter, create a frame from a piece of Contact shelving paper, using the largest cutting ring of the circle template. Discard the center piece.
-
Step 4
Affix the frame to the back side of the plate, using the dot as a centering point. The glass etching cream will be applied inside this framed area, make sure it's pressed down well with no gaps or air bubbles along the edges by running a finger around the inside edges of the frame.
-
Step 5
Gently clean the area inside the frame with glass cleaner and a paper towel to remove any fingerprints.
-
Step 6
Swipe the Embossing Buddy™ across the framed area to reduce static and the slippery-ness of the glass when you stamp.
-
Step 7
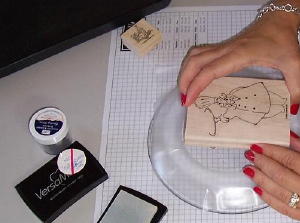
Ink the stamp of your choice with Versamark™and carefully stamp in the center of the framed area using the taped dot as your guide. Glass is slippery, so use a steady hand.
Tip: If a mistake is made, repeat steps 5 and 6.
-
Step 8
Apply any color embossing powder to the stamped image. The color does not matter as it will get scraped away at the end.

-
Step 9
Remove excess powder with a small paintbrush if necessary.
-
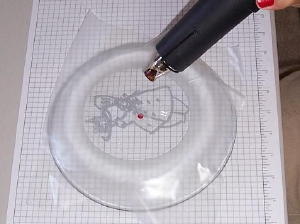
Step 10
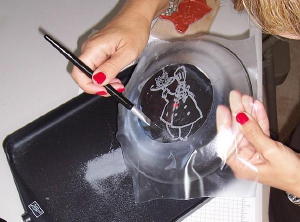
Use the embossing heat tool until the embossing powder is set and shiny. This takes a while to heat set because glass is much thicker than cardstock. If you're not sure it's done, heat some more.
Caution: Take care and avoid scorching the edges of the frame. Do not hold the plate while heating; the glass gets very hot.
Tip: If a mistake is made, repeat steps 5-10.
-
Step 11
Pour a large blob of etching cream into the center of the contact paper circle frame.
Caution: Armour&trade: Etching Cream is caustic to skin so wear latex or rubber gloves just to be safe. The cream smells like rotten eggs, so work in a well-ventilated area.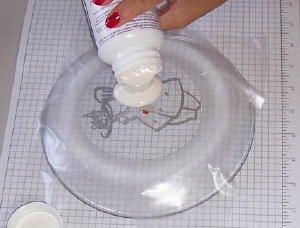
-
Step 12
Using your sponge wedge or foam applicator, lightly brush the cream right to left, and then up and down to ensure even coverage.
THICK coverage is key, and you can go over the inside edges of the frame. If you make a mistake, wipe it away quickly with a damp cloth. This cream begins etching very quickly!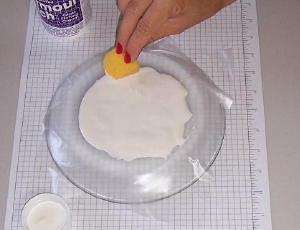
-
Step 13
Set a timer for 5 minutes.
-
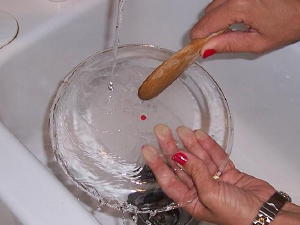
Step 14
When the timer goes off, go to the sink. Rinse the plate very thoroughly with warm water, rubbing slightly with a gloved hand or a clean sponge. Keep rinsing until no white cream remains. Discard the frame. Remove gloves rinse a little more, making sure no residue is left on either side of the plate. Scrape embossed image with a fingernail, wooden spoon or a plastic scraper.
-
Step 15
Remove tape dot and dry with a clean cotton towel.
Any unetched areas can be touched up by applying a small dab of etching cream with a toothpick, waiting 5 minutes and rinsing again.
Note: Etching cannot be reversed. If there was cream in places where it shouldn't have been, it can't be repaired.
-
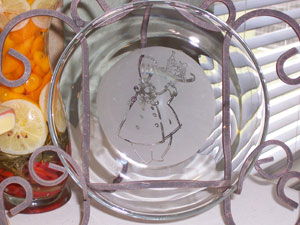
Step 16
Completed project.
Video!
Variations
Hint:
You can get Armour™ Etch Cream at most craft stores. Open the bottle before your purchase and look inside. It should be milky white with no chunks. If it is yellowy or chunky looking, put it back and ask the store manager to order some more.
You can etch on any size container but it's much easier to work with nice, flat surfaces. Rounded vases and hurricanes are pretty but can be very tricky because of the curve. I have chosen a 9 1/2" dessert plate, but any square vase or votive holder would work nicely.
Your Turn
You've seen the tutorial, now you try it! We've got a section of the gallery set aside for Glass Etching - Embossing Resist. Try this technique, then upload your artwork to the gallery. Show us your creations!
***Please note - Internet Explorer/Edge is not a supported browser, and will not allow you to see the videos. Please use Chrome, Firefox or Safari to view our tutorial videos.

 *
*
Questions and Comments
We'd love to get your feedback or questions. Leave your comment below.
Good luck, let me know how this works out for you.
Plastic embossed appliqu� border. Wish to
Remove to have mirror plain again.
How can I remove the appliqu�s??
Tried razor edge will not budge.
Gloria. 612 710 5059
Find an alphabet die cut you like and cut the initials into contact paper. Next tape the paper over the glass. Add etching cream over the cut out initials. Let set for 5 minutes. Rinse and peel tape.
Hugs and smiles
Page 1 of 1 pages