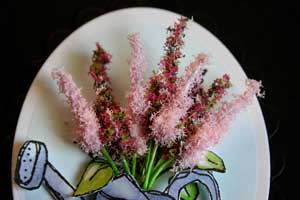
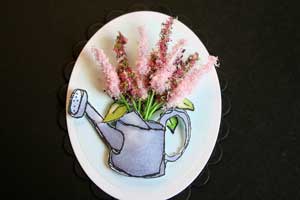
Flower Soft Bouquet
by Beate Johns
Create flowers out of wire and Flower Soft.
Supplies

- Stamped Image, Our Craft Lounge Growing Gratitude used here
- Flower Soft®, Baby Pink and Spring Mix used here
- Flower Soft Wire
- Flower Soft PVA Glue (Aleene's® Tacky Glue)
- Styrofoam Block
- Powder Tray
- Wire Cutters, or strong scissors
- Tape, or thin thread to tie your bouquet
- Green Marker (optional)
Step-by-Step
-
Step 1
Use wire cutters to cut 2" pieces from Flower Soft Wires.
Hint:
You can also use strong scissors.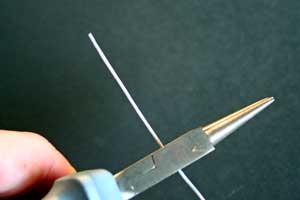
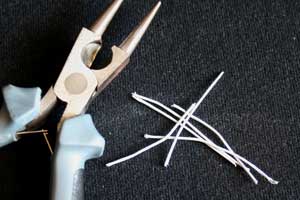
-
Cut as many wire pieces as needed for the bouquet.
-
Step 2
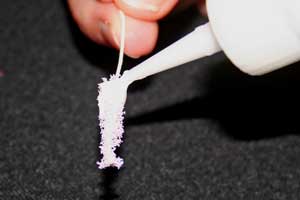
Add Flower Soft Glue to the top part of the wire, turning the wire and coating the entire wire top with adhesive.
Hint:
Flower Soft Glue is the same as Aleene's Tacky Glue, but packaged in bottle with a tiny applicator tip. Any strong liquid adhesive will do, but this works best.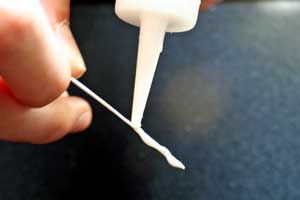
-
Step 3
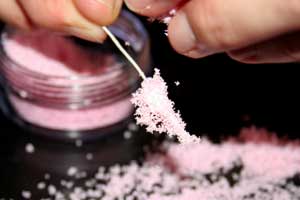
Take some of the Flower Soft that you want to use out of the container. I used a Powder Tray, but you can also use a sheet of paper to catch the extra Flower Soft.
Hint:
Flower Soft is very compressed in the original container. For best results, take it all out, put it in a bigger container and fluff it up.
It won't go back into the original container, so have some resealable containers handy.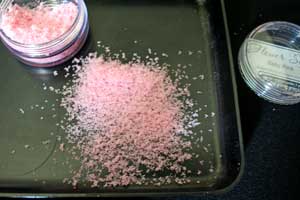
-
Step 4
Hold your wire over the pile of Flower Soft with one hand and then sprinkle Flower Soft over the wire with the other.
Turn the wire and continue to sprinkle Flower Soft over it until all of the glue is covered.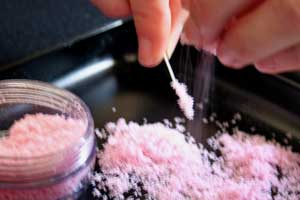
-
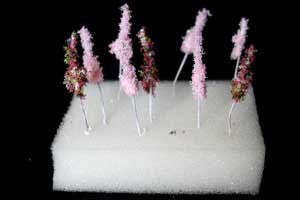
Step 5
Insert the end of the wire into a Styrofoam block to dry, Flower Soft side up.
Allow to dry for 20 to 30 minutes.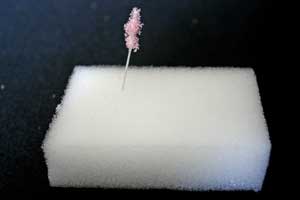
-
Step 6
Once the glue has dried, you can add more glue to part or all of the wire to make a fuller flower.
-
Again, add Flower Soft over the glue as described in Step 4.
-
Step 7
Repeat the same process with all your cut wire pieces.
-
Step 8
Take the flower stems and tape them together to form a bouquet. A small piece of Scor-Tape was used here.
Hint:
You can also use some Flower Soft glue to glue the wire stems together; it will just take a little longer to dry.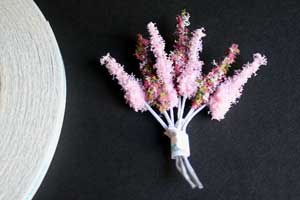
-
Step 9 (Optional)
Color stems with a marker.
(Copic YG05 was used here.)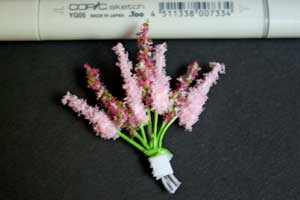
-
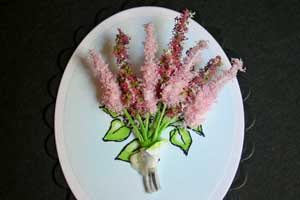
Step 10
Adhere bouquet on your cardstock with tape or Flower Soft glue.
-
Step 11
Add stamped image (or image from Card Toppers) over the bouquet with dimensional adhesive.
-
It will hide the end of your stems.
-
Step 12
Finish your card.

 *
*
Questions and Comments
We'd love to get your feedback or questions. Leave your comment below.
Fantastic tutorial and gorgeous card, Beate!!
Awesome card - the Flower Soft adds so much to your card - I love how it turned out!!!
the prices are very good.
can't wait to try this new inspiration.
thanks for shareing
Where can you buy it?
You can find more information on Flower Soft (including pricing) here on our Product Review page:
http://www.splitcoaststampers.com/resources/products/flower_soft/
We have purchasing links on the right side of the page, and many fellow stampers have responded with additional locations, too. I found mine at my local scrapbook store.
Is it the same as flock?
Well, same concept as flock. It's just. . . fluffier. You'll notice that it's a thicker product. When you touch it - it's more springy than soft in the package, almost sponge-y. When applied, it does give a nice, soft look to your flowers and images.
Is it messy?
Like glitter and flock and embossing powder, it does have the potential to be a little messy, yep. Just work over some scrap paper, and follow the suggestions in the Product Focus and tutorials (work over scrap paper and put the product in a bigger container when fluffing for SURE!), and you'll be fine. Also, it may go without saying, but turn the fan OFF!
Does it mail well?
It sure does, and when you use the right glue (tacky glue like Aleene's, even Crystal Effects works), that stuff is stuck on! We saw many much-handled samples and the product looked beautiful!!
Margaret
Page 1 of 2 pages 1 2 >