Faux Sea Glass

by Sherry Cheever

Alter frosted glass to make it feel and look pitted as if it were rolling around in sand and salt as true sea glass.

Supplies
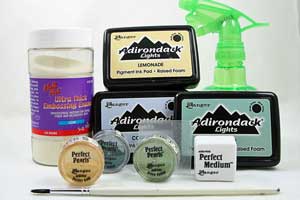
  • Ranger Frosted Memory Glass

  • Light Colored Pigment Inks

  • Ultra Thick Embossing Enamel (UTEE)

  • Ranger Perfect Medium

  • Ranger Perfect Pearls

  • Spray Water Bottle

  • Heat Gun

  • Paper Towel

Step-by-Step

  1. Step 1

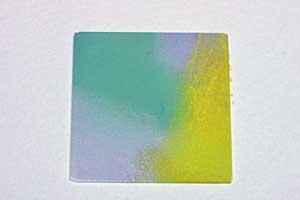
    Apply light colored pigment inks randomly on Frosted Memory Glass, making sure to cover the entire surface
  2. Step 2

    Pour UTEE over the pigment inks
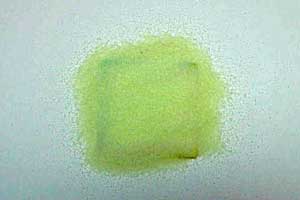
  3. and heat until the UTEE is melted.

  4. Step 3

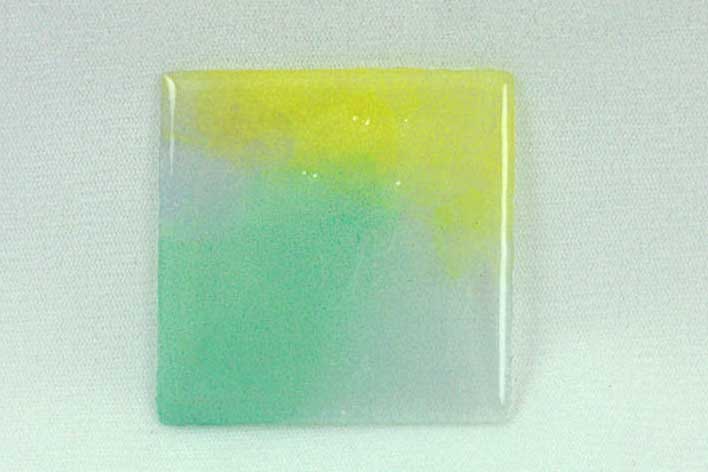
    While the UTEE is still hot pour on a second layer of UTEE and melt. Repeat this process 2 to 3 times to build up a thick layer of UTEE.
  5. Step 4

    Apply Perfect Medium to the glass and brush on a heavy layer of Perfect Pearls.
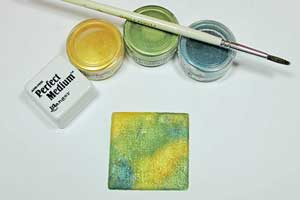
  6. Sprinkle on a layer of UTEE

  7. Step 5

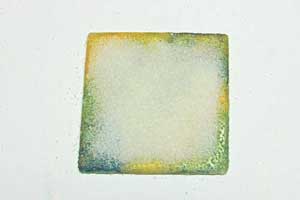
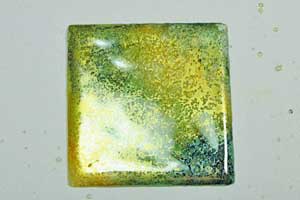
    Starting 12 inches away to keep UTEE from blowing, heat UTEE and Perfect Pearls until melted. Continue working with the heat gun, sprinkle on a pinch of UTEE and melt. This will open up the UTEE to form holes in the surface.
  8. Step 6

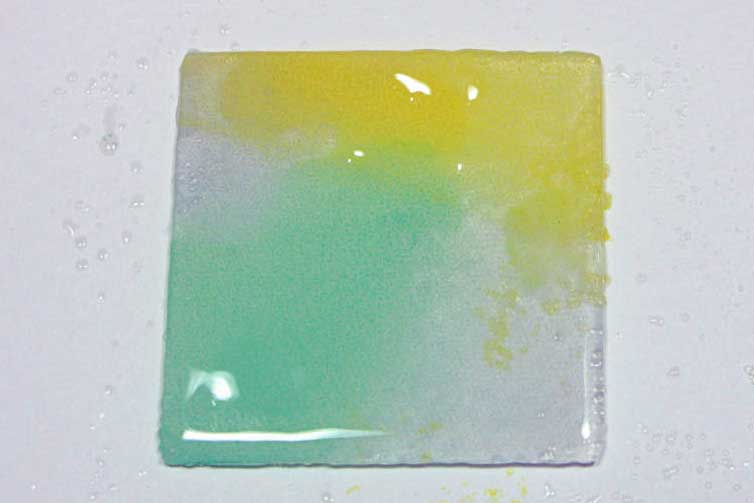
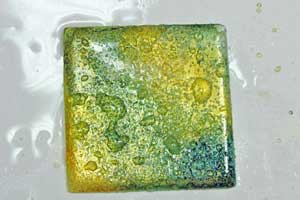
    While the UTEE is still hot, spray the surface with a hard stream of water, which will cause the surface to pit. Clean up the water and dry the glass with paper towel.
  9. Step 7

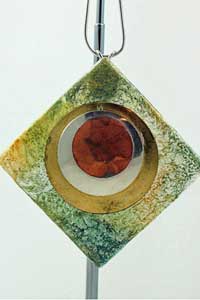
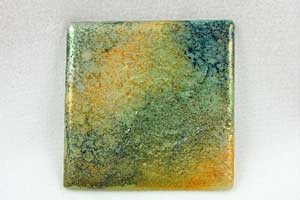
    You now have a piece of sea glass that you can use as an embellishment, make a sun catcher or a piece of wearable jewelry.


    A special thank you to Suze Weinberg and Julia Andrus who shared their Ranger Video which inspired this written tutorial.
Your Turn

You've seen the tutorial, now you try it! We've got a section of the gallery set aside for Faux Sea Glass. Try this technique, then upload your artwork to the gallery. Show us your creations!

***Please note - Internet Explorer/Edge is not a supported browser, and will not allow you to see the videos. Please use Chrome, Firefox or Safari to view our tutorial videos.

Questions and Comments

We'd love to get your feedback or questions. Leave your comment below.

Wow, Sherry! This is fabulous!!!!!!!!!!!!!!! Love your tutorial, and I hope to try this soon.
Holly  |  Wed Mar 11, 2009 at 7:11 AM
This is gorgeous, Sherry!! Thanks for the wonderful tutorial!!
Rose Ann  |  Wed Mar 11, 2009 at 11:22 AM
WOW love it. Where can I get the glass? I really wnt ot try this. Can I use pear ex for this also? Great job
Mary  |  Wed Mar 11, 2009 at 1:01 PM
do you put the inks on the frosted side?
Sarah  |  Wed Mar 11, 2009 at 1:52 PM
Can you use something other than perfect medium and perfect pearls........I don't have either of those.
Carolyn  |  Wed Mar 11, 2009 at 3:28 PM
could someone please tell me where to find the memory glass, this is a very unique project. Can't wait to try it.
Lily  |  Wed Mar 11, 2009 at 3:34 PM
I see that this has been used as a necklace. Is it breakable? Would hate to bump something and have it break while I am wearing it?
Nancy  |  Wed Mar 11, 2009 at 3:38 PM
Hey ladies. The frosted Memory Glass can be found at many online locations. I've not seen it at Hobby Lobby or Mikes at all.

Put the ink on the frosted side.

Perfect Pearls and Pearl Ex are two different products and do not work the same way. Perfect pearls already has the binding agent unlike Pearl Ex. You are welcome to try Pearl Ex, but I have only done this technique with Perfect Pearls.

You are actually making glass, and yes it would be breakable. You could put the glass in a Hinged Memory Frame and that would add some protection.
Sherry Cheever  |  Wed Mar 11, 2009 at 3:51 PM
Thanks for the tutorial smile I have the clear memory glass--so I'm going to try that smile
nancy  |  Wed Mar 11, 2009 at 3:54 PM
Nancy clear is fine. I actually think that is what I used the first time I did this technique
Sherry Cheever  |  Wed Mar 11, 2009 at 3:58 PM
I will have to look for these materials. I have Pearlx. We don't have many craft shops near me so I might have to check online. How did you turn it into a necklace? I was thinking maybe a pin would be awesome.
cookie  |  Wed Mar 11, 2009 at 4:11 PM
Cookie I pin would be awesome and I did think of that. I found an old necklace that the opal had fallen out. I used Glossy Accents and glued the setting at the top on the back. The front is an old earring. I reheated the UTEE and then just dropped the earring into the warm UTEE.
Sherry Cheever  |  Wed Mar 11, 2009 at 4:23 PM
We have the Ranger Perfect Pearls products in our store. Just e-mail us at [email protected] and we can give you prices and colors we have in stock. Just put Lynne in your subject line so the e-mail will be referred to me. Sherry this is a great tutorial - will have to try it soon!
Lynne Zickert  |  Wed Mar 11, 2009 at 4:31 PM
There are alot of stores that carry perfect pearls. Rubbernecker, Ellen Hutson, Eclectic Paperie all have them as well.
Sherry Cheever  |  Wed Mar 11, 2009 at 4:37 PM
This is STUNNING!! I will have to be on the lookout for some of these supplies to try and give this a try!!
Starla  |  Wed Mar 11, 2009 at 5:09 PM
Sherry, this is awesome! You totally rock!
Broni  |  Wed Mar 11, 2009 at 6:04 PM
Your projects are so exciting , sure gets the creative juices flowing . Thank you
Thank you Beatie  |  Wed Mar 11, 2009 at 6:18 PM
What is UTEE ? Where do you get it? Is it used for card making or jewelry making? Thanks Marge
Marge  |  Wed Mar 11, 2009 at 6:32 PM
Marge, UTEE is Ultra Thick Embossing Enamel (pictured above) made by Ranger. It is a very thick embossing powder (most commonly used in cracked glass) and can be found at Hobby Lobby, and other online stores. You can use regular embossing powder, but it takes four layers to equal 1 of UTEE.
Sherry Cheever  |  Wed Mar 11, 2009 at 6:40 PM
As a stained glass artist I have never seen something LIKE THIS!!!! THIS IS AWESOME. Really looking to try it. Thanks for the tip.
Sue  |  Wed Mar 11, 2009 at 6:56 PM

Page 1 of 3 pages  1 2 3 >

You need to be logged in to comment

GET OUR NEWSLETTER


Splitcoaststampers's privacy policy