Faux Patina
by Angie Leach
Create a faux patina look with an embossing folder and ink.
Supplies
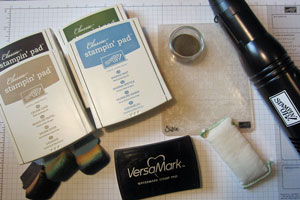
- White cardstock
- Big Shot, or other die cutting machine
- Embossing folder
- One light, neutral color ink (Stampin' Up! Crumb Cake used here)
- Two medium colors of ink (Stampin' Up! Marina Mist & Always Artichoke used here)
- One dark color of ink (Stampin' Up! Early Espresso used here)
- Sponges
- VersaMark™ Ink, or other embossing ink
- Embossing Buddy™
- Heat tool
- Gold or silver embossing powder
Step-by-Step
-
Step 1
Lightly ink one side of the embossing folder with a light, neutral color ink.
(Stampin' Up! Vintage Wallpaper Embossing Folder and Crumb Cake ink used here)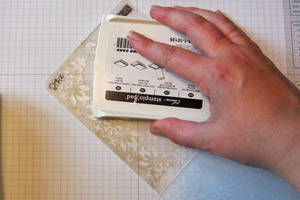
-
Place white card stock inside the inked folder and run it through the Big Shot.
-
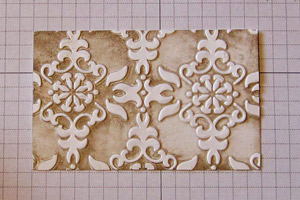
Step 2
Sponge a medium shade of ink over the piece to bring out the embossed details.
(Stampin' Up! Marina Mist used here)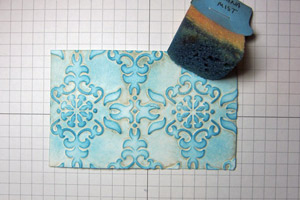
-
Step 3
Sponge on a darker ink to accentuate the embossing even more. Leave some of the in-between areas a little lighter to vary the depth of the colors.
(Stampin' Up! Always Artichoke used here.)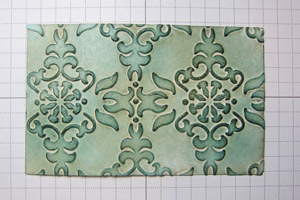
-
Step 4
Sponge on the darkest color ink to bring out the rich, deep tones and textures.
(Stampin' Up! Early Espresso used here,)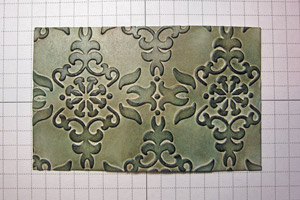
-
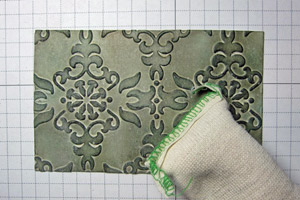
Step 5
Soak up any remaining ink moisture by rubbing an Embossing Buddy over the card stock, or let dry naturally
-
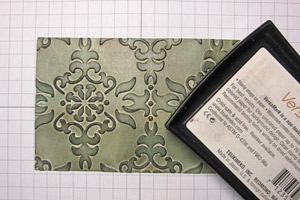
Step 6
Lightly and randomly rub the VersaMark™ Ink Pad over the top of the embossed design.
-
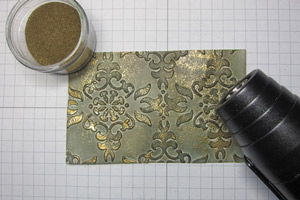
Step 7
Sprinkle on gold embossing powder, then heat set with the heat tool.
-
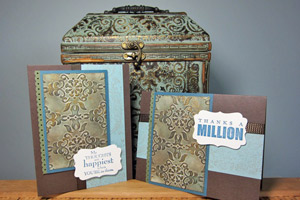
Step 8
Finish Your Card.
Video!
Variations
-
Add some shimmer
For a shimmery variation, try sponging on Shimmer Paint over the whole piece instead of gold embossing.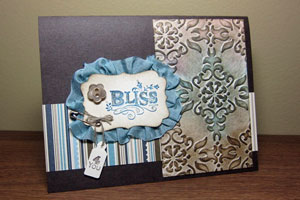
Your Turn
You've seen the tutorial, now you try it! We've got a section of the gallery set aside for Faux Patina. Try this technique, then upload your artwork to the gallery. Show us your creations!
***Please note - Internet Explorer/Edge is not a supported browser, and will not allow you to see the videos. Please use Chrome, Firefox or Safari to view our tutorial videos.

Questions and Comments
We'd love to get your feedback or questions. Leave your comment below.
Jo
Fran Keller
Page 2 of 5 pages < 1 2 3 4 > Last »