Embedded Image
by Holly McMillen
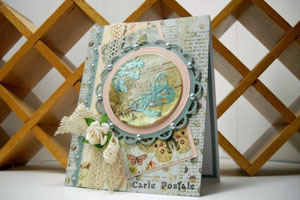
Create a unique look by stamping an embossed image on embossed background.
Supplies
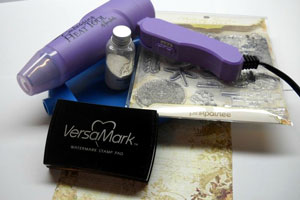
- Cardstock or patterned paper
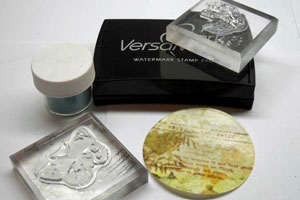
- Versamark™ , or other embossing ink
- Ink (color of your choice)
- Clear Embossing Powder
- Colored Embossing Powder (color of your choice)
- Heat gun
- Stamps (silhouettes tend to work best)
Step-by-Step
-
Step 1
Stamp cardstock or patterned paper with a script or tight patterned background in ink color of your choice.
Hint:
You can skip this step if you are using a patterned paper.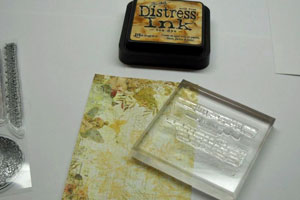
-
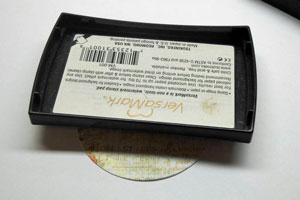
Step 2
If you are going to die cut your image, do that now. With Versamark™ , use the direct to paper technique to apply a layer of ink.
-
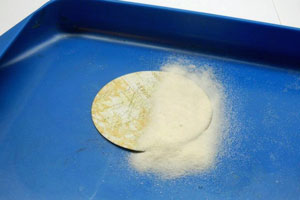
Step 3
Cover the image with clear embossing powder and heat set. Wait 2-3 minutes and then repeat steps 2 and3. Allow image to cool.
-
Step 4
Stamp your main image onto the embossed piece using Versamark™.Cover the area with a contrasting color embossing powder (seafoam green used here). Heat set.
-
Step 5
Create your project using your embedded image!
Video!
Your Turn
You've seen the tutorial, now you try it! We've got a section of the gallery set aside for Embedded Image. Try this technique, then upload your artwork to the gallery. Show us your creations!
***Please note - Internet Explorer/Edge is not a supported browser, and will not allow you to see the videos. Please use Chrome, Firefox or Safari to view our tutorial videos.

Questions and Comments
We'd love to get your feedback or questions. Leave your comment below.
Page 3 of 3 pages < 1 2 3