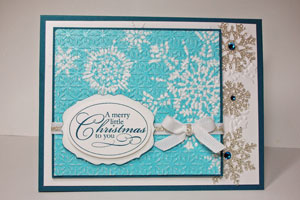
Double Embossed Enamel

by Cindy Elam

Create a unique background by dry and heat embossing with embossing folders

Supplies
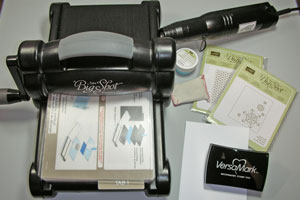
  • White cardstock
  • Big Shot or other die cutting machine
  • Two embossing folders, one should be a simple design
  • Embossing Buddy
  • Embossing ink
  • Heat tool
  • Colored embossing powder

Step-by-Step

  1. Step 1

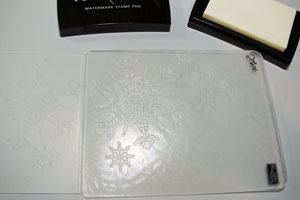
    Tap embossing ink all over the side of the folder with the recessed image, inking it thoroughly.

    Hint:
    Try not to press too hard (you don’t want ink in the recesses).
  2. Step 2

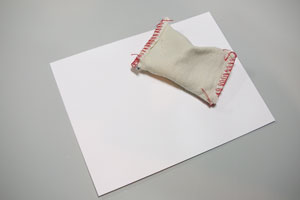
    Rub Embossing Buddy over your white cardstock, and carefully place into embossing folder with “buddied” side facing inked side of folder. Emboss with Big Shot.
  3. Step 3

    Cover inked, embossed cardstock with embossing powder.
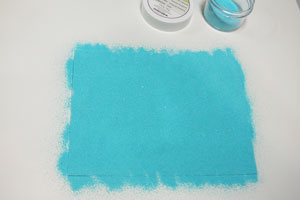
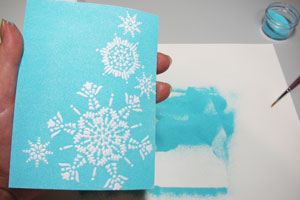
  4. Tap off excess powder.

    Hint:
    A tiny paint brush works for removing Embossing Powder from areas you don’t want embossed.
  5. Step 4

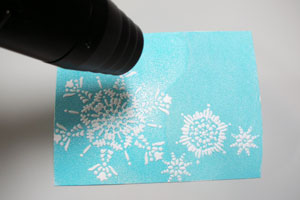
    Heat until shiny with Heat Tool.
  6. Step 5

    Place embossed image into second folder and emboss again in Big Shot.
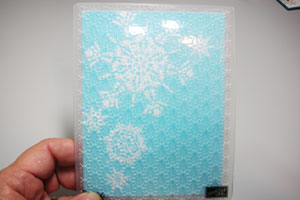
  7. Your double embossed enamel background is done.
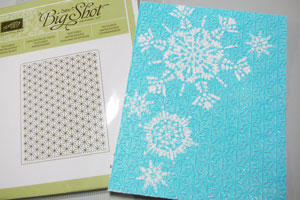
  8. Step 6

    Finish your card.

Video!

Your Turn

You've seen the tutorial, now you try it! We've got a section of the gallery set aside for Double Embossed Enamel. Try this technique, then upload your artwork to the gallery. Show us your creations!

***Please note - Internet Explorer/Edge is not a supported browser, and will not allow you to see the videos. Please use Chrome, Firefox or Safari to view our tutorial videos.

Questions and Comments

We'd love to get your feedback or questions. Leave your comment below.

Thanks Robi

I added some cardstock for shims and now it works. What an awesome technique
Jan
Jan Joyal  |  Sun Dec 18, 2011 at 10:38 AM
do you have a website with other techniques?
barb  |  Tue Dec 20, 2011 at 10:32 PM
That technique is gorgeous. I do have one question though. The embossing folders used are for the 'Big Shot', do they work with the 'Cuttlebug'?
Lindsay  |  Wed Dec 21, 2011 at 5:26 PM
Barb, I do have a blog, and there are a few tutorials on there, but not really "techniques" per se. It's located at heartsdelightcards.blogspot.com.

Lindsay, yes, the Stampin' Up! embossing folders will work in the Cuttlebug, too! I had a Cuttlebug when I first started card making, but upgraded to the Big Shot when I became a demo.
Cindy Elam  |  Thu Dec 22, 2011 at 9:16 AM
wow you are talented!!!! It's gorgeous!!!!!!
JamiG  |  Thu Dec 22, 2011 at 8:26 PM
LOVE this Cindy, very easy to follow too! Can't wait to try it.. .you rock!
Sharon F  |  Mon Dec 26, 2011 at 6:39 AM
Gorgeous card! I would love to try this one in different colors.
DorisS  |  Tue Dec 27, 2011 at 5:32 PM
I really like the snow man video.
I would like the try it.
Edna  |  Fri Dec 30, 2011 at 6:15 PM
I do not have an embossing buddy. I would like to have one.
Edna  |  Fri Dec 30, 2011 at 6:17 PM
Edna, they are available from online sellers like Amazon, 7 Kids College Fund, and even eBay. Just do a Google search for "Embossing Buddy" or "Embossing Magic" (Inkadinkado's brand).
Cindy Elam  |  Fri Dec 30, 2011 at 9:59 PM
Your cards are just lovely. Thank you so much for sharing the technique. Take care. smile
Kim Thomas  |  Wed Apr 25, 2012 at 10:11 AM
Thank you for this well done tutorial. I've never seen this procrss before and can hardly wait to try it. It's just gorgeous.
Mary Ann Huntington  |  Thu Apr 26, 2012 at 12:15 PM
Awesome combination of techniques Cindy! Love the sample you created, too. Gorgeous!
Adriana Benitez  |  Sun Jan 12, 2014 at 9:35 AM
I love this idea but am having difficulty with the final step. When I run the second embossing folder through the Big kick, my snowflake design gets smooched and can hardly be seen. What am I doing wrong? Please advise. I really want to do this technique correctly. Thank you.
Jeannette Taylor  |  Thu Sep 3, 2015 at 6:38 PM

Page 3 of 3 pages  <  1 2 3

You need to be logged in to comment

GET OUR NEWSLETTER


Splitcoaststampers's privacy policy