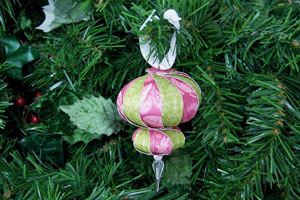
Double Ball Ornament
by Carol Dunstan
Create a gorgeous ornament out of paper strips.
Supplies

- Two 2" x 2" pieces of patterned paper, of contrasting color
- Two 3" x 3" pieces of patterned paper, of contrasting color
- Hat Pin, small pearl bead and clear teardrop bead, from Stampin' Up!'s Pretties Kit
- 1/16" circle hole punch
- Ribbon, about 6" long
Paper Trimmer
Step-by-Step
-
Step 1
Trim 1/2" wide strips from the 2" wide pieces of patterned paper.
You'll have four of each color, eight in total.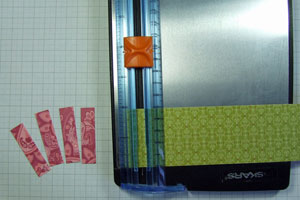
-
Step 2
From the 3" wide pieces of patterned paper trim 1/2" wide strips.
You'll have six of each color, twelve in total.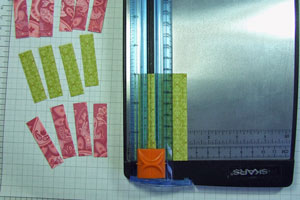
-
Step 3
Take one strip and mark a dot in the middle and 1/4" from the short edge (it will be 1/4" from the three nearest edges).
Repeat on other end.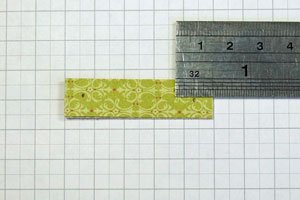
-
Step 4
Stack together the strips of the same colour and punch a hole where the dot is marked at each end.
You can take one strip and use it as a template for the holes on the other pieces, or draw dots and punch those.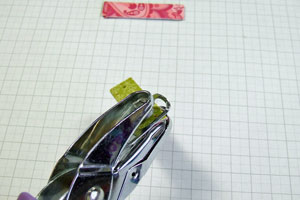
-
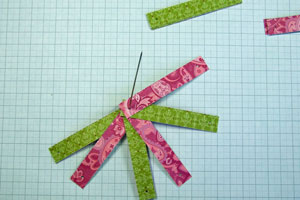
Step 5
Starting with the 3" long strips, thread one end onto the hat pin, alternating the colors.
-
Step 6
Keep threading strips until all twelve 3" strips are on the hatpin.
-
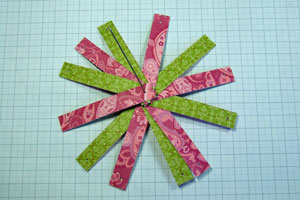
Step 7
Take the strip that is at the bottom of those threaded on the hatpin (ie closest to the loop/furthest from the tip), and thread the loose end onto the hatpin.
Take the next strip (the one right above the one just threaded on) and thread its loose end onto the hatpin.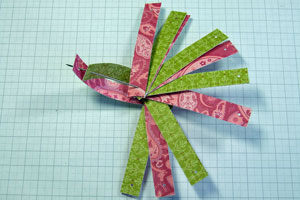
-
Step 8
Continue threading the loose ends onto the hatpin until all are done and you have the basic ball shape.
-
Step 9
Thread the 2" strips onto the hatpin, alternating colors just like in Step 5.
Continue until all eight strips are on.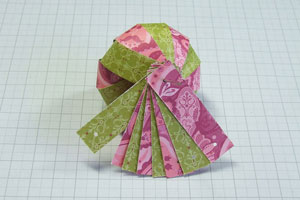
-
Step 10
Take the loose end of the bottom strip (ie the one furthest from the tip) and thread it on.
Repeat with the next strip. You will find you will need to hold these in place with one hand so they don’t slide off the end.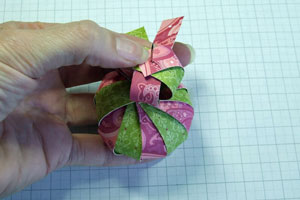
-
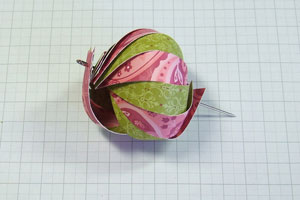
Step 11
When all strips are threaded on, add the beads and replace the cap on the tip of the hat pin.
While you only need the hatpin cap to hold the strips on, the beads help squash them up and give the balls a nice shape.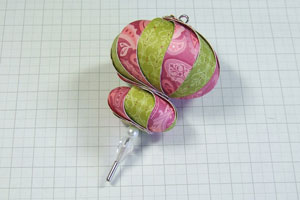
-
Step 12
Place ends of ribbon together and tie a knot in the ribbon, working it so it is pulled tight near the ends.
Push the strips down from the loop of the hatpin so you can slide the ribbon through the gap .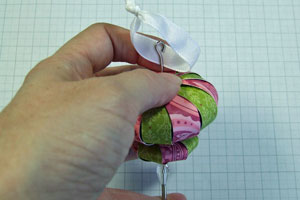
-
Step 13
Hang your ornament!
Video!
Your Turn
You've seen the tutorial, now you try it! We've got a section of the gallery set aside for Double Ball Ornament. Try this technique, then upload your artwork to the gallery. Show us your creations!
***Please note - Internet Explorer/Edge is not a supported browser, and will not allow you to see the videos. Please use Chrome, Firefox or Safari to view our tutorial videos.

Questions and Comments
We'd love to get your feedback or questions. Leave your comment below.
Page 2 of 2 pages < 1 2