Dahlia Fold
by Donna Moore
Add beautiful paper bouquets to your cards, scrapbooks, and other projects.
Supplies
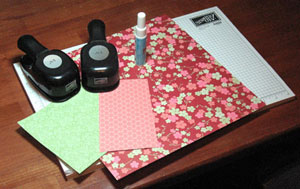
- Circle punches
- Double sided patterned paper
- Cardstock
- Adhesive
- Note: To make folding more visible, a larger 3” circle was used for most of this demonstration.
Step-by-Step
-
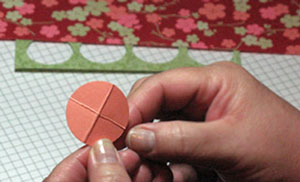
Step 1
Punch one 1 1/4" cardstock circle and fold in fourths. Petals will be mounted on this base.
For a full dahlia flower, punch eight circles from double-sided patterned paper for petals.
-
Step 2
Fold first patterned paper circle in half, trying to only crease the lower half to prevent folds in the upper part of the finished flower.
Fold in half again and open.
Decide which side should be the main background color (here, the red patterns is the main color). Flip over to show back side.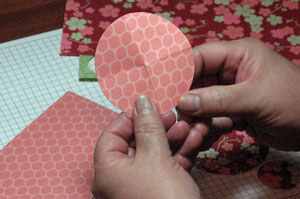
-
Step 3
In the lower two quadrants, fold a small petal shape upward using the fold marks as a guide.
Turn over to the front side.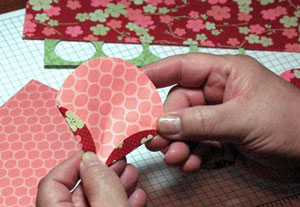
-
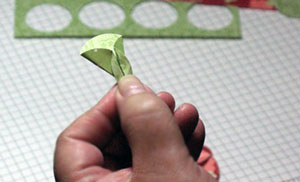
Step 4
Fold petal inward to the center like a paper airplane. (Picture A)
Repeat for the other half. (Picture B)
Repeat steps one through four to create seven more petals. This will make a full dahlia.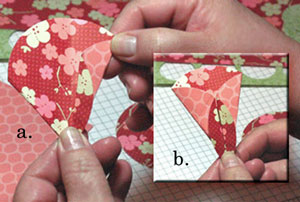
-
Step 5
Using the cardstock base from Step 1 as an evenly spaced mounting guide, adhere the first petal, aligning it at the center and at the fold line.
-
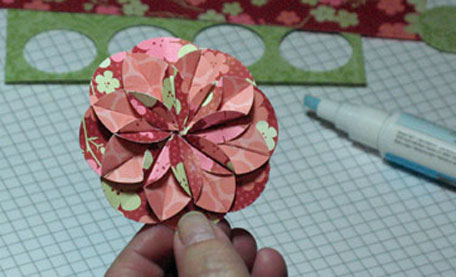
Step 6
Repeat process and adhere all 8 sections for a full dahlia.
-
Step 7
Finished project.
Try creating flowers with one to eight petals.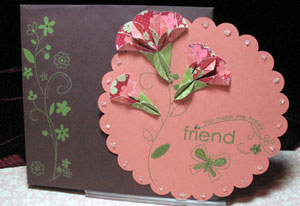
Video!
Variations
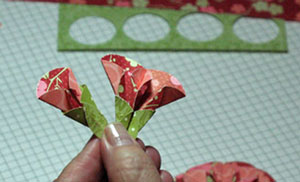
-
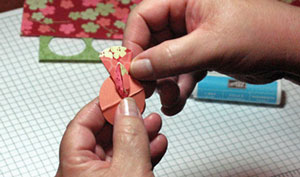
To create a flower bud, use slightly smaller single petals made from green paper for a stem base.
For a frillier flower, use a scallop punch instead of plain circles.
-
Your Turn
You've seen the tutorial, now you try it! We've got a section of the gallery set aside for Dahlia Fold. Try this technique, then upload your artwork to the gallery. Show us your creations!
***Please note - Internet Explorer/Edge is not a supported browser, and will not allow you to see the videos. Please use Chrome, Firefox or Safari to view our tutorial videos.

Questions and Comments
We'd love to get your feedback or questions. Leave your comment below.
I take it that the ones in the gallery with scalloped edges, are just done with a scallop punch instead of a plain circle punch?
Patti
Beautiful card you created - very pretty!!!
~Silke~
It seems to be my first "I´m-tryin´-to get-back-my-fingers-action" after this endless year with that d*** cast on my right hand.
Thank you for sharing it with us!
Greetings from over the ocean,
hühnchen
Thanks so much for the inspiration!
Thanks for the great tutorial. Now I must
give it a try.
Page 1 of 5 pages 1 2 3 > Last »