Cupcake Box
by Caroline Hallett
Tuck a special gift inside this cupcake shaped box.
Supplies
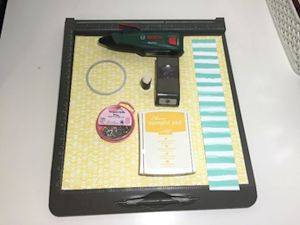
- Polystyrene ball , 70mm diameter
- Small paper drinking cup
- Patterned scrapbook paper, 12" x12"
- Striped scrapbook paper
- Small flower punch or die
- Circle die (same size as polystyrene ball)
- Small sequin pins or Lills pins, about 70
- Scoring tool
- Paper trimmer
- Coordinating ink
- Sponge dauber
- Hot glue gun
- Foam mat
Step-by-Step
-
Step 1
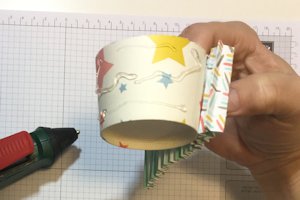
Using scissors, trim a paper cup to just under 2" high. Cut polystyrene ball in half (a kitchen knife is good for this).
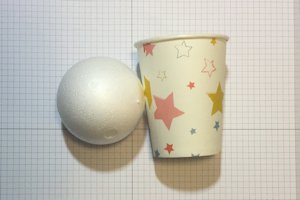
-
These 2 pieces form the basic shape of the box.
-
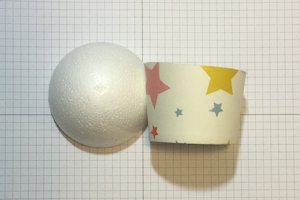
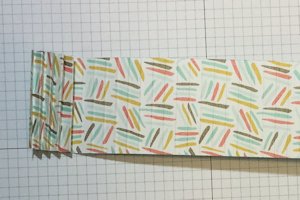
Step 2
Cut a strip of striped paper to 2" x 12". Score the strip on the long side every 1/4", and accordion fold the strip back and forth.
-
Step 3
Using hot glue, adhere folded paper around the paper cup base to cover it.
-
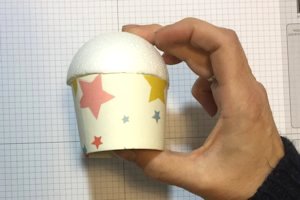
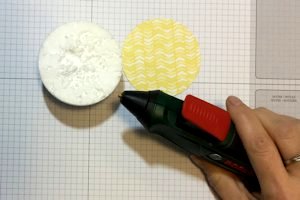
Step 4
Use a die or large circle punch to cut a circle from the patterned scrapbook paper. Use hot glue to attach it to the base of the foam circle.
-
Step 5
Punch out around 70 small flowers from the remaining patterned scrapbook paper.

-
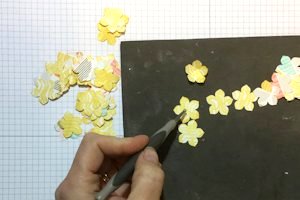
Step 6
Sponge the edge of the flowers with a coordinating ink.
HINT:
Several flowers can be sponged at once.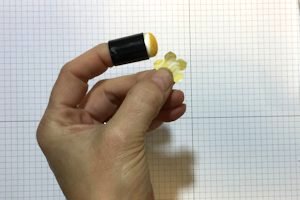
-
Step 7
Using a ball stylus and a foam mat, take around 20 flowers and form to shape by pressing into the center of each one.
-
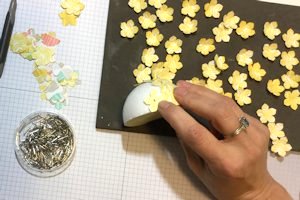
Step 8
Start by attaching the flat flowers to the ball using small pins, making sure you completely cover the half dome with flowers.
-
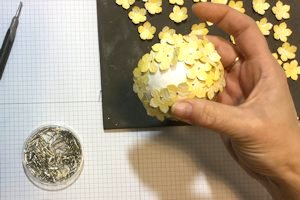
Step 9
Attach the 20 formed flowers to finish.
-
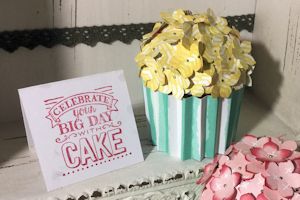
Step 10
Embellish the box if desired, tuck a gift inside, and complete the project.
Video!
Your Turn
You've seen the tutorial, now you try it! We've got a section of the gallery set aside for Cupcake Box. Try this technique, then upload your artwork to the gallery. Show us your creations!
***Please note - Internet Explorer/Edge is not a supported browser, and will not allow you to see the videos. Please use Chrome, Firefox or Safari to view our tutorial videos.

Questions and Comments
We'd love to get your feedback or questions. Leave your comment below.
Its here http://www.amazon.co.uk/Bosch-Lithium-Ion-Cordless-Glue-Pen/dp/B00CI8FDUO
Can thoroughly recommend
C
Barbara
Page 1 of 1 pages