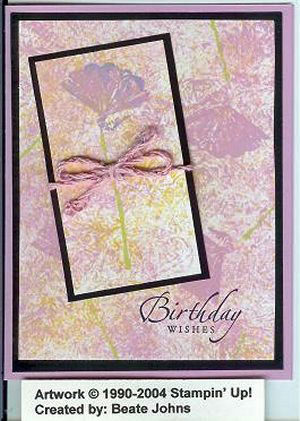
Crinkled Chalk
by Beate Johns
Take your chalk inks and Saran Wrap and create a beautiful background.
Supplies
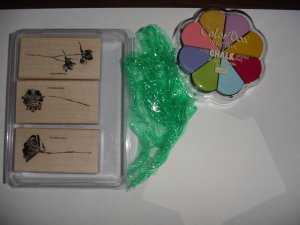
- Matte Cardstock
- Chalk Inks
- Saran Wrap®
Step-by-Step
-
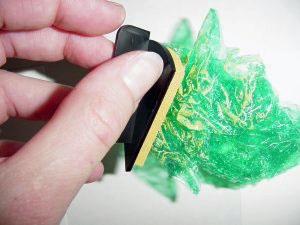
Step 1
Take a piece of Saran Wrap™and bunch it up. Ink it up with a light chalk ink .
-
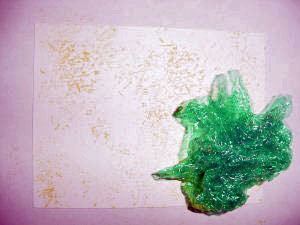
Step 2
Dab the inked up Saran Wrap™ all over the cardstock.
-
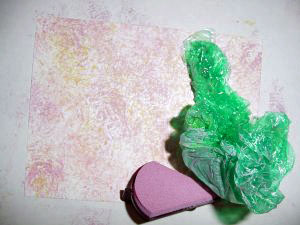
Step 3
Ink up your Saran Wrap™ with a different, slightly darker color and go over your cardstock again.
-
Step 4
Repeat step two with an even darker color.
-
Step 5
Stamp an image on your background or use as is. Finish your card.
Variations
Alternate Inks
Try the same with classic ink pads instead of chalk ink.
Experiment with Colors
Try it on colored cardstock.
Your Turn
You've seen the tutorial, now you try it! We've got a section of the gallery set aside for Crinkled Chalk. Try this technique, then upload your artwork to the gallery. Show us your creations!
***Please note - Internet Explorer/Edge is not a supported browser, and will not allow you to see the videos. Please use Chrome, Firefox or Safari to view our tutorial videos.
Questions and Comments
We'd love to get your feedback or questions. Leave your comment below.
Thanks for your time. -Diana
Thanks for sharing!
Thats a really cute card, and it looks so easy! I can't believe how much I'm learning from this website! Its amazing! =)
You can use regular ink as well. That technique is simply called Saran Wrap technique.
Hugs and smiles
Page 1 of 1 pages