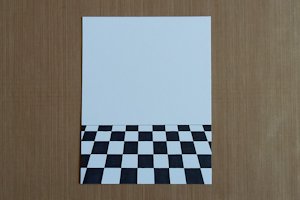
Checkerboard Flooring
by Irene Rhodes
Create a checkerboard floor for your stamped scene.
Supplies
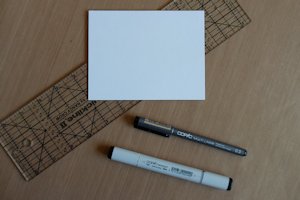
- Cardstock
- Fine black pen (.3 Black Copic multi liner used here)
- Black marker (Copic marker used here)
- Ruler (quilter’s ruler used here)
- Stamps and/or other embellishments as needed to complete a scene
Step-by-Step
-
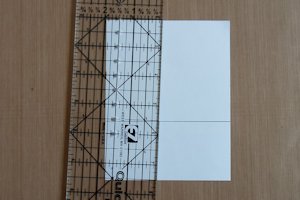
Step 1
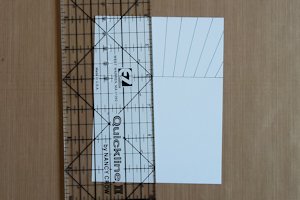
Draw a horizontal line 2” up from the bottom of the cardstock. This will be the top of the floor.

-
Step 2
Place the ruler perpendicular to the first line and just to the left of the center. Slightly angle the bottom of the ruler 1/16“ to the left and draw a line.
-
Step 3
Move the ruler approximately 3/8” to the left, and angle the ruler again to about 1/2" from the bottom of the previous line. Draw another line.
Note:
The lines do not need to be exact. If you struggle to space them correctly, click here for a helpful downloadable template.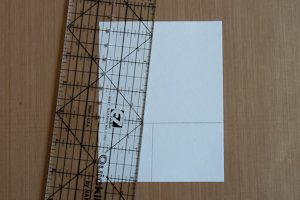
-
Step 4
Continue making lines in the remaining space, keeping the lines approximately the same width apart, 3/8” apart on the top of the floor and 1/2" apart at the bottom.
-
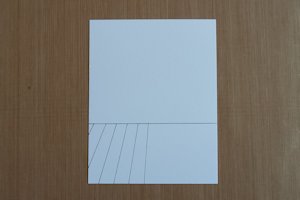
Step 5
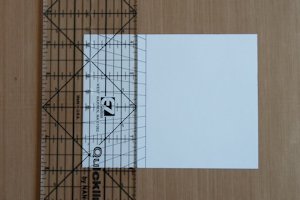
To finish the other side, turn the cardstock upside down. Place the ruler approximately 3/8” to the left of the first line, this time angling the top of the ruler 1/16” to the left, making your line wider at the bottom of the floor. Draw a line.
-
Step 6
Continue making lines in the remaining area, spacing them as before.
-
Step 7
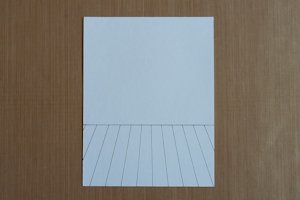
Now it is time to finish the tiles. Draw the first line 1/4" down from the top of the floor.
-
Step 8
Continue drawing lines, adding about 1/16” to the width between each consecutive line. This makes the tiles wider at the bottom of the floor than at the top.
Hint:
If there is a small line at the bottom of the floor, trim this part off before assembling the finished project.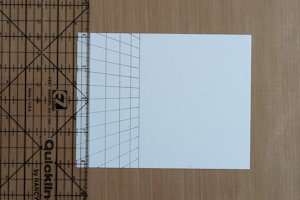
-
Step 9
Color in alternating tiles with a black marker to create a checkerboard pattern.
-
Step 10
Assemble and complete the project.

Video!
Variations
-
Wood Flooring:
Stagger horizontal lines to simulate boards. Stamp with a wood grain background. Draw 2 faux nails at the end of each board, if desired.
-
Sidewalk:
Create a sidewalk by decreasing the height of the first horizontal line and increasing the width of the vertical lines. Only 2-3 vertical lines are needed.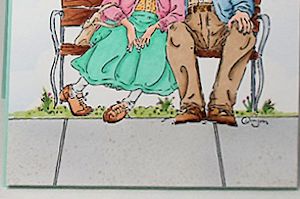
Your Turn
You've seen the tutorial, now you try it! We've got a section of the gallery set aside for Checkerboard Flooring. Try this technique, then upload your artwork to the gallery. Show us your creations!
***Please note - Internet Explorer/Edge is not a supported browser, and will not allow you to see the videos. Please use Chrome, Firefox or Safari to view our tutorial videos.

Questions and Comments
We'd love to get your feedback or questions. Leave your comment below.
I have a question - once you start the 'vertical' lines from the center are the subsequent lines parallel to that one? It appears that way to me.
Thanks!
Page 1 of 2 pages 1 2 >