Center Step Card
by Frances Byrne
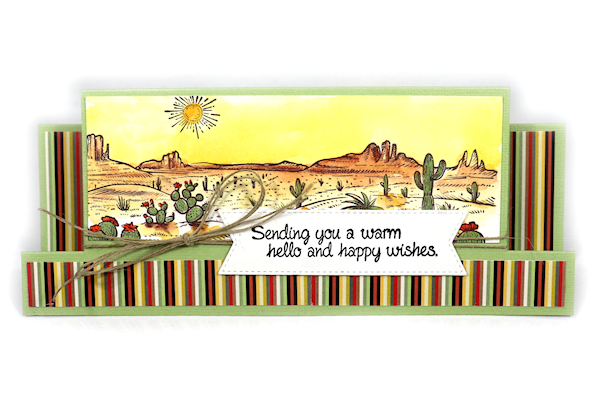
Create a unique card with a few cut and score lines.
Supplies
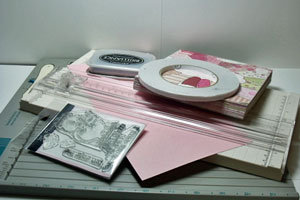
- One 5 1/2" x 11" piece of cardstock for card base
- Scor-Pal™, or other scoring tool
- Paper trimmer
- Adhesive
- Stamps
- Ink
- Additional cardstock, pattern paper and embellishments for decoration
Step-by-Step
-
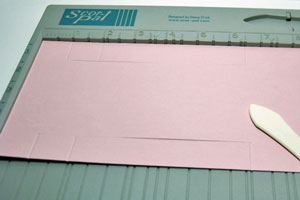
Step 1
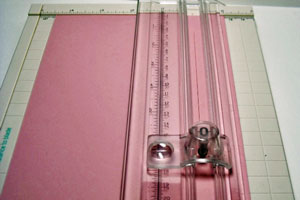
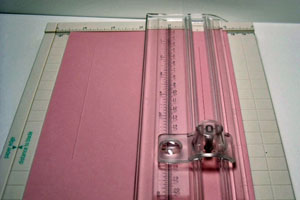
Line cardstock up in paper trimmer so that the edge of the card is at the 1" mark. Position the cutting blade at 1" and cut from 1" to 6.5".
-
Flip card over and do the same on the other side.
-
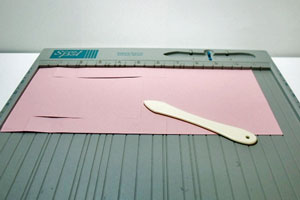
Step 2
Place cardstock onto scoring tool and score along the long side of the card from the edge to the cut line at 1", 2" and 6.5".
-
Step 3
Repeat step 3 on opposite edge of card.
-
Step 4
Score between cut lines at 5 1/2".
-
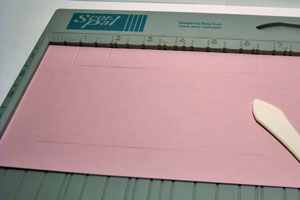
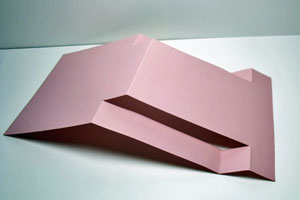
Step 5
Fold at the score lines. The first, third and center score lines are mountain folds. The second score line is a valley fold. Reinforce score lines to make folds crisp.
-

-
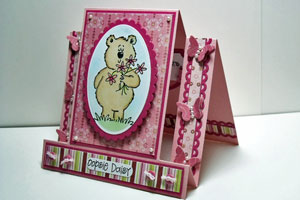
Step 6
Stamp and decorate your card as desired.
Video!
Variations
-
For a slimline version of the card, cut the card base to 8 1/2" x 7". From the 8 1/2" side, follow Step 1, and cut from 1" to 4 1/2", 1" from both sides. For Step 2-3, score at 1", 2", and 4 1/2". For Step 4, score at 3 1/2".
Your Turn
You've seen the tutorial, now you try it! We've got a section of the gallery set aside for Center Step Card. Try this technique, then upload your artwork to the gallery. Show us your creations!
***Please note - Internet Explorer/Edge is not a supported browser, and will not allow you to see the videos. Please use Chrome, Firefox or Safari to view our tutorial videos.

 *
*
Questions and Comments
We'd love to get your feedback or questions. Leave your comment below.
http://creativemomentswithsandy.blogspot.com/2011/03/sweet-stamps-challenge-7-center-step.html
Joy I like the blade in this trimmer. It also has a storage compartment underneath the trimmer where you can store your spare blades & scoring tool which also comes with it.
Thanks for showing how to do this,
Martha.
Thanks for your tutorial, all is very clear.
Can you please tell me where did you buy your paper trimmer?
Jogrybali
I got mine down here in Australia ... but you are probably better off to Google "Martha Stewart Paper Trimmer" and see what comes up with the best price for where you live
Page 2 of 6 pages < 1 2 3 4 > Last »