Carrot Easter Basket
by Brooke Stockman
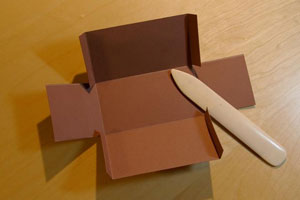
Dress up chocolate carrots with this darling basket.
Supplies
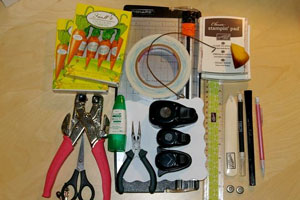
- 2 Boxes of Lindt chocolate carrots
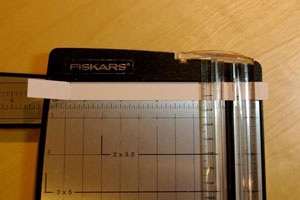
- Paper cutter
- Cardstock
- ½” Score Tape™, or other strong adhesive
- Ruler
- Small paper snips
- Pliers
- Crop-A-Dile™ or other paper puncher/eyelet setter
- Paper punches – 3/4" circle, 1/4" circle, corner rounder
- Multipurpose glue
- Bone folder
- Craft knife
- Large marker
- 2 Large eyelets
- Ink
- Sponge
- 12" length wire
- Self-healing cutting mat
Step-by-Step
-
Step 1
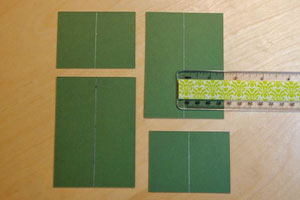
Cut cardstock into the following pieces:
(1) piece of 8 3/4" x 6 3/4"piece of colored cardstock for base of the basket
(1) piece of 5 3/4" x 3 3/4" piece of colored cardstock for dirt insert
(2) pieces of 2 1/4" x 3" colored cardstock for grass
(2) pieces of 4 3/16" x 2 1/4" colored cardstock for grass
(2) pieces of 6 1/2" x 1/2" strip of colored cardstock for fencing
(1) piece of 12" x 2 1/2" pattern paper
(1) piece of 5" x 1 1/2" piece of colored cardstock for the basket handle (not pictured)
Scrap paper for eight 1/2" circles (not pictured.)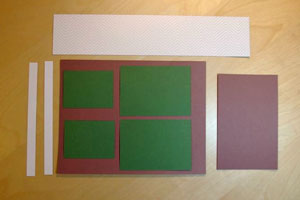
-
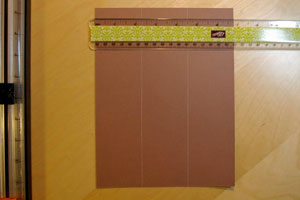
Step 2
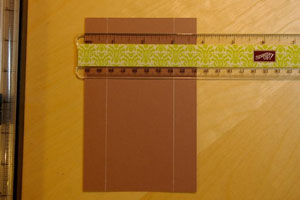
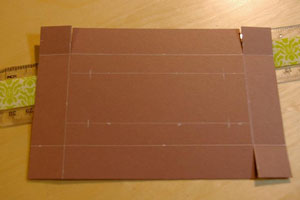
Score the 8 3/4" x 6 3/4" piece of colored cardstock horizontally at 2 1/4" and 4 1/2".
-
Turn a quarter turn and score paper at 13/4", 2 1/4", and 6 1/2".

-
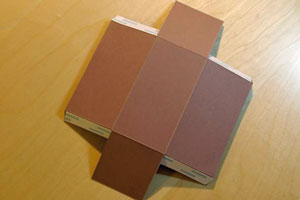
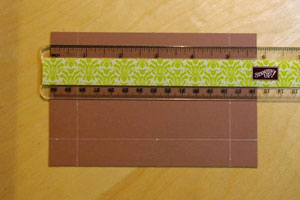
Step 3
Turn paper a quarter turn and cut on the 7" score line from the top of the paper down to the 2 1/4" score line. Without moving paper, lift blade and make another cut from the 4 1/2" score to the bottom of the paper.
Turn paper a half turn and repeat cuts.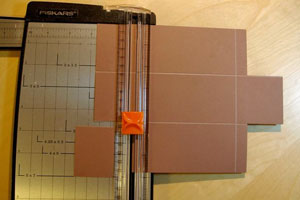
-
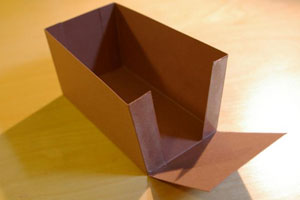
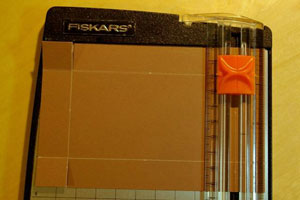
Step 4
Fold all tabs toward the center and press with bone folder.
-
Step 5
Flip paper over and add Scor-Tape™ to smallest side tabs.
-
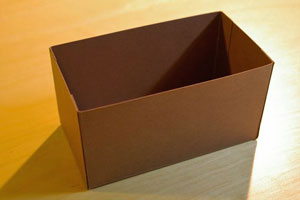
Step 6
Remove adhesive strips and assemble box. Set aside.
-
-
Step 7
Score the 3 3/4" x 5 3/4" piece of card stock horizontally at the 3/4" mark on all four sides.
-
-
Step 8
Without removing paper, use the cutting blade to cut tabs at the 3/4" and 5" marks down to the score line on both sides of the paper.
-
Step 9
Measure 1/4" from the score line and make 3 marks. Draw a line with a light pencil mark to connect marks making a straight line.
Repeat on opposite side.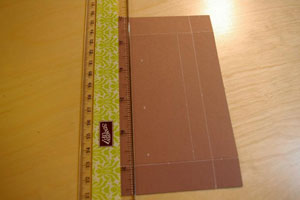
-
Step 10
Measure 1/4" from score line on all four sides.
-
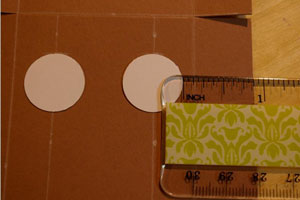
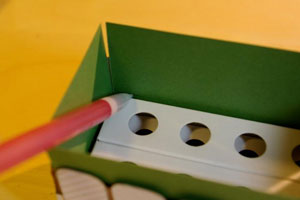
Step 11
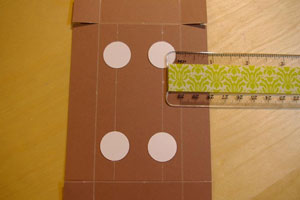
Punch eight circles using the 3/4" circle punch. Place the first four circles on the 1/4" mark you made in step 10.
-
Place the remaining four circles so they are evenly spaced in the row. The circles should be 1/4" from the edge.
-
Step 12
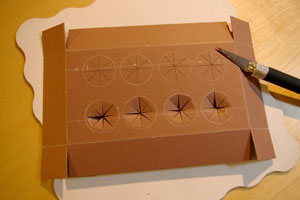
Trace circles with pencil then remove circles.

-
Step 13
Using your craft knife make pie shaped cuts in each circle. Erase pencil marks. With your finger or pencil push cut paper circles to the center.
-
Step 14
Add Scor-Tape™ to tabs.
-
Remove and assemble. Set aside.
-
Step 15
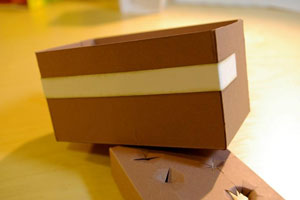
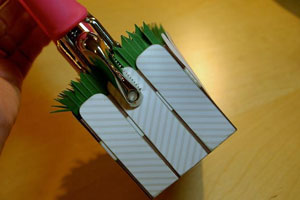
Join the two original carrots stands together with Scor-Tape™.
-
Add Scor-Tape™ o the bottom of the joined box and set aside.
-
Step 16
Score the 1/2" x 6 3/4" strips of card stock at 1 1/4" and 5 1/2".
-
Step 17
Ink the edges of the paper strip.
-
Glue the strip of card stock to box 3/4" of the way up. The short side pieces will not match up perfectly but will be covered by patterned paper in the next step.
-
Step 18
From the 12" x 2 1/2" strip of pattern paper strip cut 3/4" strips.
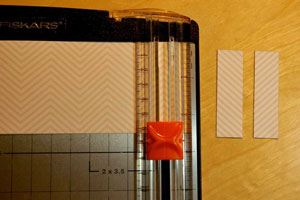
-
Step 19
With six of the paper wooden slats cut an additional 1/8" off the longest sides of each slat.
Distress the edges of the wooden slats with the sponge and ink.
Hint:
Make sure to layout the patter paper slats before cutting if you have a repeating patter you don’t want to disrupt.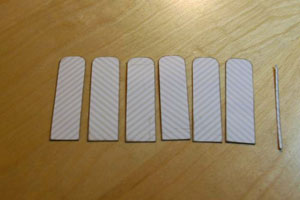
-
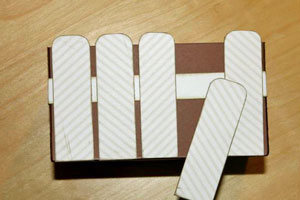
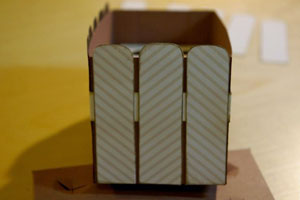
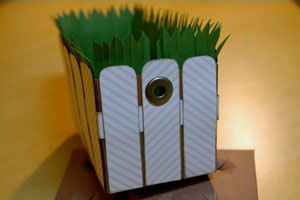
Step 20
Attach slats with adhesive starting with side slats and working toward the center on all 4 sides.
-
-
Step 21
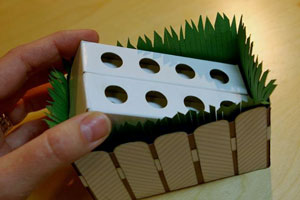
Insert the two pieces of 2 1/4" x 3" colored card stock (grass), and two pieces of 4 3/16" x 2 1/4" colored card stock (grass) make a pencil mark on the card stock just at the top of the pre-made carrot stand. Remove pre-made box and set aside.
-
Step 22
Using the two pieces of 2 1/4" x 3” colored card stock (grass), and two pieces of 4 3/16" x 2 1/4" colored card stock (grass) with a ruler measure your pencil mark from step 21 and make a straight line to give yourself a cutting guide. The measurement used here was 1 1/2" on all sides.
-
Step 23
On all 4 pieces of paper from step 23 make 1/8" cuts to the pencil mark.

-
Step 24
With your paper snips make small snips to create grass blades.
Hint:
You can add in to the grass blades to give depth at this point if you wish.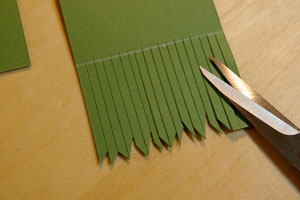
-
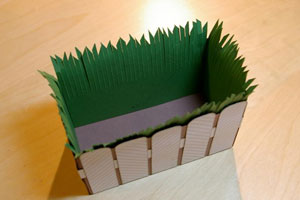
Step 25
Add adhesive to the back side of grass strips then remove backing and attach to the inside of the basket.
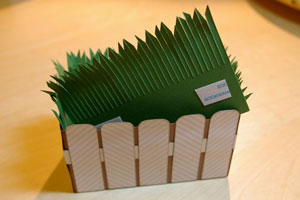
-
Gently pull the grass blades toward the outsides of the box.
-
Step 26
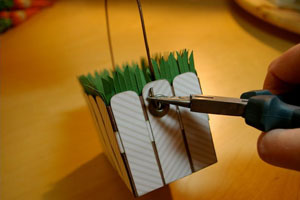
Using the Crop-A-Dile™ punch a hole for the eyelet on both ends of basket.
-
Set large eyelets.
-
Step 27
Remove adhesive and place pre-made carrot stand back in basket.
-
Step 28
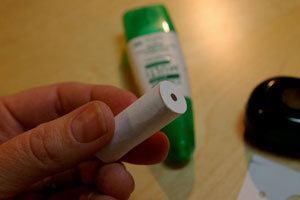
Using the 5" x 1 1/2" strip of card stock add Scor-Tape™ to the 1 1/2" end of the paper strip. Wrap the long end of the paper around a large marker to form a cylinder. Remove tape backing.
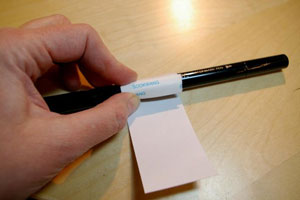
-
Using your small paper snips trim closely along the edge where you added the adhesive and cut off the remaining paper from the cylinder.
-
Step 29
Use remaining paper from the cylinder in step 28 with your Crop-a-dile™ make two small punches leaving at least a 3/4" space between them.
-
Using your 1/2" circle punch a circle around the smaller circles (2 total).

-
Step 30
Add adhesive to the open end of the cylinder and glue one circle to the end. Repeat on other end.
-
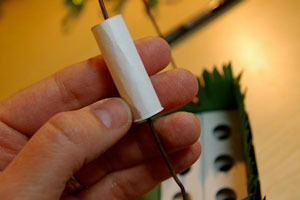
Step 31
Bead newly made handle onto wire handle.
-
Step 32
Using the wire feed wire into each eyelet from the inside of the basket. Curl end of wire to secure handle.
-
Step 33
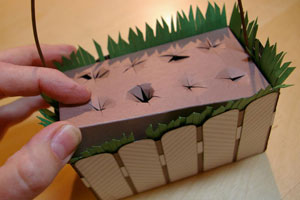
Add dirt layer to the basket.
-
Step 34
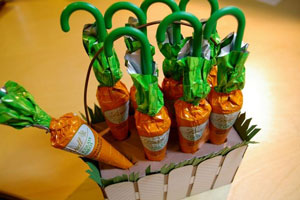
Add carrots to the basket.
Your Turn
You've seen the tutorial, now you try it! We've got a section of the gallery set aside for Carrot Easter Basket. Try this technique, then upload your artwork to the gallery. Show us your creations!
***Please note - Internet Explorer/Edge is not a supported browser, and will not allow you to see the videos. Please use Chrome, Firefox or Safari to view our tutorial videos.

Questions and Comments
We'd love to get your feedback or questions. Leave your comment below.
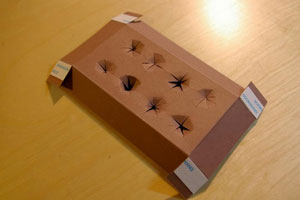
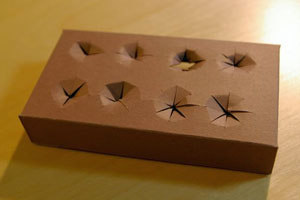
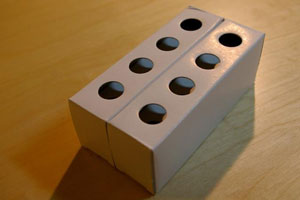
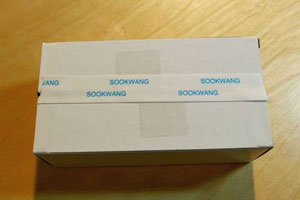
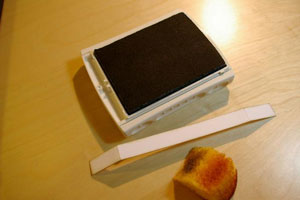
But you lost me on Step 15, where did the "original carrot stand" come from there is no mention of it prior to that step.
@Cyndi, I think the "original carrot stand" comes from the actual Lindt chocolate holders that the carrots come in. I think. Not sure, just guessing from picture at top w/supplies.
but thanks for the idea
Sorry for the confusion. The original stand is the packaging the carrots come in...
ENJOY~
Hugs
Brooke
now I'm on the look out for those darling chocolate carrots.
Simply amazing!!!!
Love your forever Miss Sunshine
George I just a piece of floral wire I had on hand.. What ever gage you use make sure it can support the weight but not so strong that you can't bend it for the handle and curling it on the sides of the basket.
HUGS
BROOKE
All I can say is "W O W"!!!! This is soooo cute! Thanks for sharing your creativity with us! I will feel like Bugs Bunny in search of carrots now!
Page 1 of 2 pages 1 2 >