All-in-One-Box

by Wendy Weixler

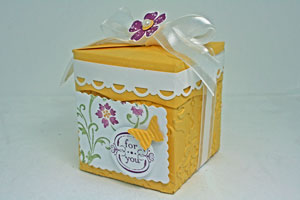
Create a darling gift box out of one sheet of cardstock.

Supplies
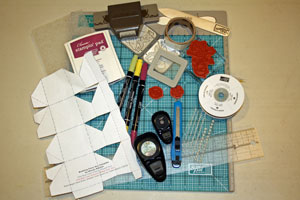
  • Scor-Pal™, or other scoring tool
  • Bone folder
  • Hobby knife
  • Ruler
  • Temporary adhesive
  • Scor-Tape™, or other strong adhesive
  • One 8 1/2" x 11" piece of cardstock
  • Big Shot, or other die cutting machine
  • Embossing folder, Stampin' Up!'s Vintage Wallpaper Impression folder used here
  • Stamps
  • Ink
  • Additional cardstock and embellishments, to decorate your box

Step-by-Step

  1. Step 1

    Print out template.

    All in One Box Template
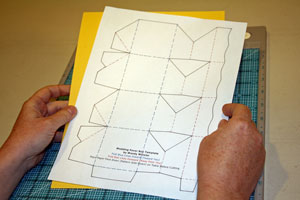
  2. Using a temporary adhesive, adhere template to cardstock and cut with hobby knife and ruler.

    Note:
    If you are using double-sided patterned paper, place the paper face up on the table with the side you would like to be the bottom of the box facing you. The face-down side will make the top of the box.
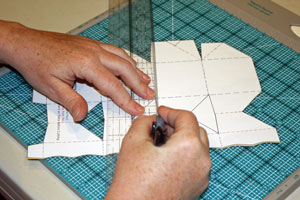
  3. Step 2

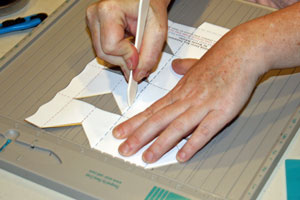
    Score along the dotted lines.

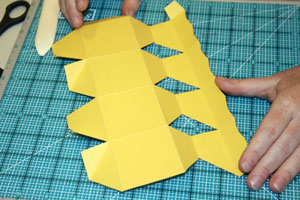
  4. Step 3

    Remove the template from cardstock. Use a bone folder to burnish the score lines – fold all blue dotted lines as mountain folds and all red dotted lines as valley folds.
  5. Step 4 (Optional)

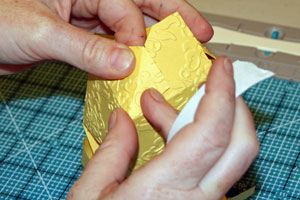
    Emboss the bottom half of the box by running it through the die cutting machine twice (once from each end to cover the length of the entire piece of cardstock). Line the embossing folder up so that the edge of the folder comes to the top edge of the lower half of the box.
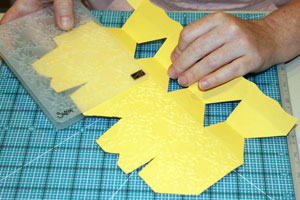
  6. Step 5

    Place adhesive on the tab on the bottom half of the box. Adhere to underside of opposite edge of box, as pictured.
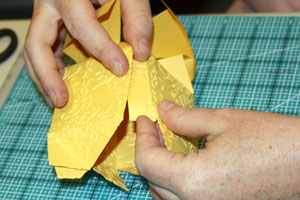
  7. Step 6

    On the bottom of the box there are four flaps – alternating tall and short ones. Place adhesive on the underside of the triangular portion of the tabs on the taller flaps. Line up the score lines on the tall tab with corresponding score lines on the short tab immediately to its right. This creates two bottom flaps.
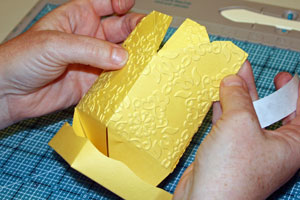
  8. Step 7

    Tuck the flaps over and under one another to close the box.
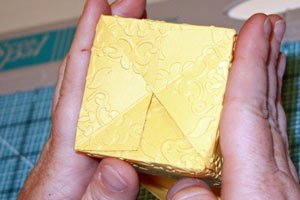
  9. Step 8

    Place adhesive on the top side of the flap on the top of the box. Adhere to underside of opposite edge of box top.
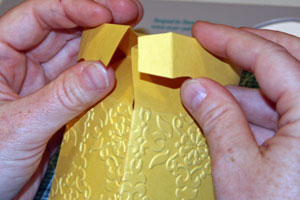
  10. Step 9

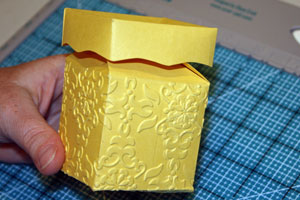
    The all-in-one box is now assembled.
  11. Step 10

    Embellish as desired.

Video!

Your Turn

You've seen the tutorial, now you try it! We've got a section of the gallery set aside for All-in-One-Box. Try this technique, then upload your artwork to the gallery. Show us your creations!

***Please note - Internet Explorer/Edge is not a supported browser, and will not allow you to see the videos. Please use Chrome, Firefox or Safari to view our tutorial videos.

Questions and Comments

We'd love to get your feedback or questions. Leave your comment below.

Excellent! I'm looking forward to trying this out very soon.
Sandra K  |  Wed Jun 23, 2010 at 5:19 AM
Harumph! No mention of your awesome assistant, huh? jk You did a great job on the tutorial Wendy! I love the samples too!
Karen H  |  Wed Jun 23, 2010 at 7:02 AM
Thank you so much. This is wonderful. I will try it.
Linda  |  Wed Jun 23, 2010 at 7:20 AM
I just bought this box at the dollar store. It was in a pack of I think 6.

I thought to myself hmmm how they do that!
And look it's here on SCS. Now Stampin Up needs to make the die for the Big Shot. Way Cool. Thanks for sharing.
Athena Hackett  |  Wed Jun 23, 2010 at 7:55 AM
Thank you for taken time to figure this out....its so adorable.....and for the outline ...
Gloria Westerman  |  Wed Jun 23, 2010 at 8:00 AM
Wendy, I tried to print your template out for the All In One Box but it wouldn't let me. So could you please send it to me. Thanks. Linda
Linda Virts  |  Wed Jun 23, 2010 at 8:41 AM
I appreciate the people on here that submit these tutorials. I love them! Thank you!
cookie1031  |  Wed Jun 23, 2010 at 8:46 AM
Lisa if you go to the resources page which you can click on at the top of this page there is plenty of stamping technique ideas there.....

Please make sure you scoll down a bit since the first few are other box ideas.

Hope you get as much out of this site like the rest of us do.
Athena  |  Wed Jun 23, 2010 at 8:51 AM
What a cute project! Can't wait to try it.
Jackie Topa  |  Wed Jun 23, 2010 at 8:53 AM
What a great tutorial! Thank you so much. I am going to print out the template and make one right now!
Shawn Hanson  |  Wed Jun 23, 2010 at 8:56 AM
I really like this project, and can't wait to download the template. My comment is that I miss the clear video work found with Beate's videos. I learn best by following along in the videos, but when things are out of focus or out of frame, it is much harder. I am thankful for the ingenuity and sharing of this idea overall. I hope the standards for video tutorials are kept high.
Bernadet Rodakowski  |  Wed Jun 23, 2010 at 9:03 AM
I am sorry about the quality of the video ... the original is much better than the one that uploaded to youtube (I used the highest resolution I could, too). For some reason things come out grainier once they have been uploaded to youtube. Overall, everything does remain in frame while I am explaining, and you should be able to see everything I am doing pretty clearly as I go along. Perfect? No, and I am sorry about that ... hopefully it will be able to help you create a little box, though.
Wendy Weixler  |  Wed Jun 23, 2010 at 9:14 AM
Hey Linda ... p/m me with your e-mail address and I will send you the template - not sure of your SCS screen name or I would just p/m YOU smile

Not sure why you couldn't print out the template. I just tried it from the link on the tutorial and it worked for me ... weird ... :S
Wendy Weixler  |  Wed Jun 23, 2010 at 9:17 AM
Thanks for the tutorial! I have an embossing question. Is there a way to use the Cuttlebug to do this? After placing the folder, how would you get it to fit to feed it through the Cuttlebug?
Miss Kitty  |  Wed Jun 23, 2010 at 9:31 AM
Great tute, Wendy friendy!! smile
BevMom/Bev Rousch  |  Wed Jun 23, 2010 at 9:40 AM
I thought I preferred box (3D) projects that didn't require a template - but I literally made this box in minutes! No need to remember cut & score measurements! Super cute, fast and easy! Can't wait to embellish and post. Thanks for such a fun project!
Bernadet Rodakowski  |  Wed Jun 23, 2010 at 9:42 AM
This is great. Has anyone tried this bigger? I suppose it would have to be broken down into being done on two pieces of paper and then seam the two halves together - maybe 12 x 12 paper. . . hmmm. .. I may have to play with this!
Jeanie  |  Wed Jun 23, 2010 at 10:14 AM
FANTASTIC idea. I have to make some favors for my Sister-in-Law for next April- now I know what I am doing for her. Plenty of time to get them made.

Thanks
Margaret Iddon  |  Wed Jun 23, 2010 at 11:01 AM
I love this box! Loved it this first time you showed it on your blog, Wendy and so appreciate your tutorial here on SCS!!
Judy McMullen  |  Wed Jun 23, 2010 at 11:43 AM
This is great, I had received a box like this several years ago for Valentine's day. I also took mine apart to make another one.
Jean  |  Wed Jun 23, 2010 at 12:46 PM

Page 1 of 4 pages  1 2 3 >  Last »

You need to be logged in to comment

GET OUR NEWSLETTER


Splitcoaststampers's privacy policy