Alcohol Markers
by Kate Sanders
Learn to add depth by layering alcohol-based markers.
Supplies
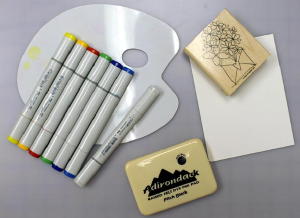
- Stamps
- White Cardstock (Georgia Pacific used)
- Black Dye Ink (Adirondack pitch black/Ranger used)
- Copic Sketch Markers
- Copic Colorless Blender Pen
- Plastic Palette
Step-by-Step
-
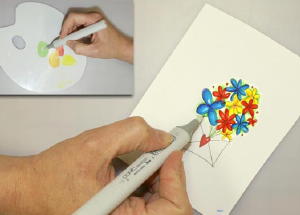
Step 1
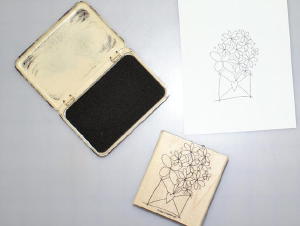
Stamp image using dye ink on cardstock. Be sure ink is completely dry before coloring.
-
Step 2
Apply base coat color to flowers.
Note: Do not fill in completely and leave some random white areas on several petals.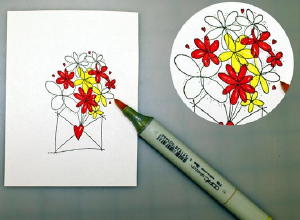
-
Step 3
Using a red marker that is slightly darker than your original base coat marker, outline the edges of the red flower petals.

-
Step 4
Use the chisel end of an orange or red marker to place color on a plastic palette. Using the brush tip of the yellow base coat pen, pick up some of the red/orange color and use this to shade the edges of the yellow flowers. Repeat as necessary.
Tip: Clean any residual color from the tip of the yellow marker by gently dragging it along a paper towel until all the red/org is removed.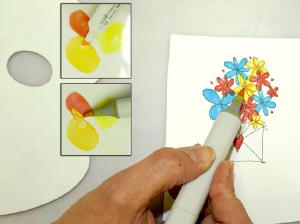
-
Step 5
Using a blue marker that is moderately darker than your original base coat blue color, outline along the edges of the blue flower petals.
Then, using your original, lighter base coat blue marker, immediately color over the juncture of the two colors to fuse them together.
Tip: Colors will fuse better if working quickly while ink is still wet. Therefore, work on one petal at a time. (e.g., do not outline everything first)
-
Step 6
Use the chisel tip of green and blue markers to place color on a plastic palette.
Using the Copic marker blender pen, pick up green color and apply around flowers being careful not to touch flower petals.
Clean blender on paper towel and repeat process using blue color to shade the envelope.
-
Step 7
When I teach I like to use sections of an image to illustrate different techniques. This sample covers three very basic coloring and shading techniques for those new to using alcohol-based marker pens.
-
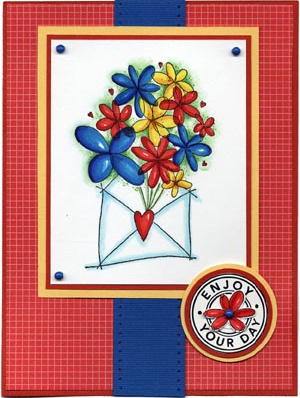
Step 8
Finished Card.

Questions and Comments
We'd love to get your feedback or questions. Leave your comment below.
THANKS SO MUCH
DIANNE
YOUR ARE WORK IS BEAUTIFUL
www.stampimagestudio.com
Read in Step six and look at the picture of step seven to read and see how the green shading is done.
Thanks
Gina K Designs Sells 120# weight luxury white cardstock if worried about copic bleed-thru worry no more!!
I love this stuff.
I have been wanting to learn how to use copics and you have done a wonderful job in your introduction Copic 101 lesson.
Thank you for sharing you talent and technique. Marilyn
Thanks J
Page 1 of 2 pages 1 2 >