Accordion File Folder
by AJ Otto
Turn a file folder in a beautiful tag book.
Supplies

- File Folder (8.5" x 11"), left tab
- Three 3 1/4" x 7" pieces of cardstock, Vanilla Cardstock used here
- One 3 3/4" x 7" piece of cardstock, Vanilla Cardstock used here
- Three 3 1/8" x 6 7/8" pieces of colored cardstock , Burgundy and Sage Cardstock used here
- Patterned papers
- Die cuts (optional)
- Corner Rounder
- Sponge
- Scissors
- Adhesive
- Bone Folder
- Embellishments to decorate
Step-by-Step
-
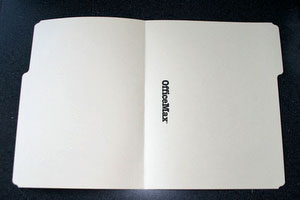
Step 1
Open the file folder so that the tab is in the top right corner. This is important!
-
Step 2
Fold the bottom of the folder up about 4" to create the pockets.
When you fold the bottom up, the left side of the folder must match up with the cut out tab.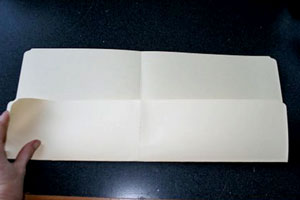
-
Step 3
Fold the left side toward the center until the straight part touches the center line.
Important: The tabbed portion will overlap the center line. It's okay!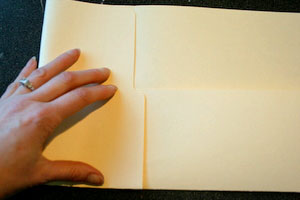
-
It should end up lining up like this.
-
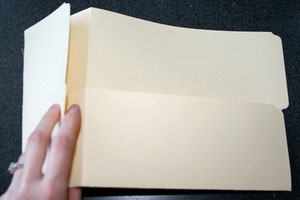
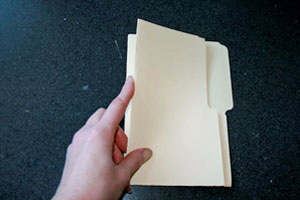
Step 4
Fold right side over to the left side until the "binding" matches up.
It is very important that the binding of the book lines up evenly.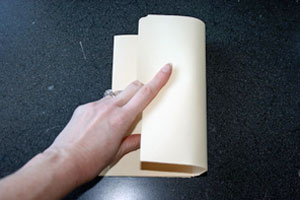
-
This is how the spine or binding should look.
-
Step 5
The folder completed and laid out flat ready to embellish.
Notice the farthest right panel is larger than the others. This is how it should be.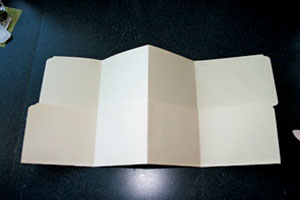
-
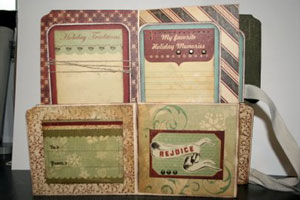
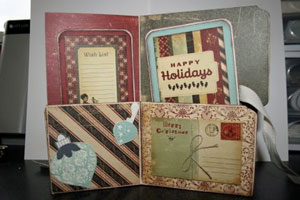
Step 6
Decorate the inner pages.
-
-
Step 7
Decorate front of folder.

Your Turn
You've seen the tutorial, now you try it! We've got a section of the gallery set aside for Accordion File Folder. Try this technique, then upload your artwork to the gallery. Show us your creations!
***Please note - Internet Explorer/Edge is not a supported browser, and will not allow you to see the videos. Please use Chrome, Firefox or Safari to view our tutorial videos.

 *
*
Questions and Comments
We'd love to get your feedback or questions. Leave your comment below.
Hugs and smiles
Check the supply list. AJ listed the measurements for the tags there.
Hugs and smiles
This is on my "must do" list for sure!
(((hugs)))
Bev
in the 2nd step 6 photo, if you look, you can see the ribbon come out from behind the tag- I just sliced a slot with my knife right through the back of the folder. So, you can put the ribbon through, and wrap it around to the front.
HTH!
But I am confused..where is the rest of the tutorial? How do you attached papers and embellisments? Help! lol Linda
One question:
Do you seal each pocket closed on the vertical edges so things don't slide around or is the fold enough to hold the tags where they belong?
You can add adhesive to the sides, you can stitch them shut or you can leave them open. It's up to you and what you want to put into those pockets.
Shawn, what do you need help with? I would start out by measuring the top and bottom section and cutting my patterned paper either the same size, or if you want the folder to show a bit, to cut it down a bit smaller. Then just decorate to your liking.
Page 1 of 2 pages 1 2 >