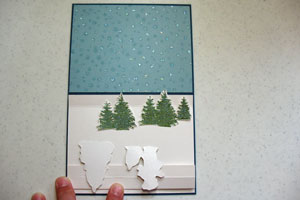
Pop-Up Stage

by Kim Score

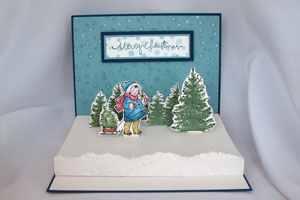
Create a pop-up card with a stage inside.

Supplies
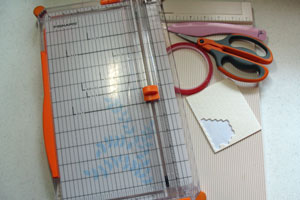
  • Paper cutter
  • Scoring board
  • Bone folder
  • Cutting blade
  • Strong adhesive
  • Dimensionals
  • Scissors
  • Stamps & ink
  • Cardstock , patterned paper and embellishments

Step-by-Step

  1. Step 1

    Cut 5 1/2" x 5" cardstock for stage. On 5" side, score at 1/2", 4” and 4-1/2".
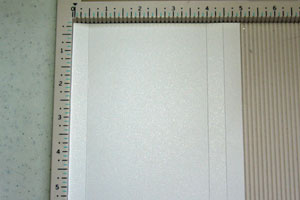
  2. Step 2

    Cut 8 1/2" x 5 1/2" cardstock and fold in half for base.

    Cut two 5 3/8" x 4 1/8" cardstock or print paper for inside decoration (optional) and attach to inside of card base.

    Stamp, color and cut out pop up pieces.
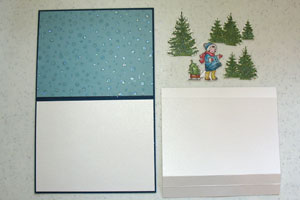
  3. Step 3

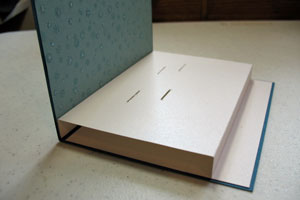
    Flip stage piece to wrong side up. Align edge of stage to card center (end with single 1/2" score). Fold other end at 4" score towards center and hold in place. Lay out pieces where you want them. Flip front pieces forward to make sure they don’t go beyond edge of card. Mark stage at base of each piece with pen.
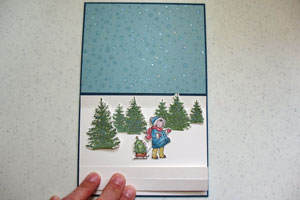
  4. Step 4

    On each of the marks, use paper cutter or craft knife and ruler to cut slots slightly longer than 1/2".
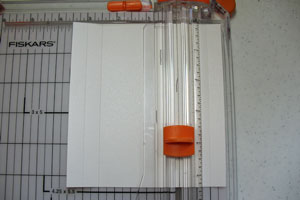
  5. Step 5

    Apply adhesive along 1/2" and 4 1/2" score lines.
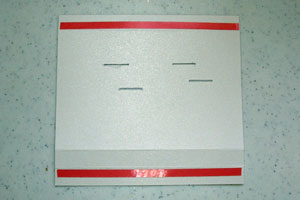
  6. Step 6

    Remove backing from tape. Fold card stock under at 4" score line. Align other end of stage at center of card and press to adhere to card base. Close card and press down at center to adhere tape.
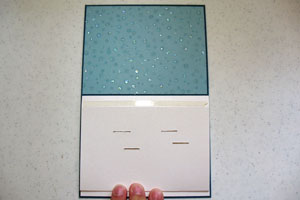
  7. Step 7

    Cut four 1/2" x 2" pieces card stock for pop up tabs. Score each one at 1/2". Add adhesive to tabs.
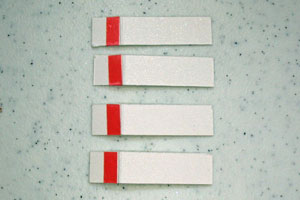
  8. Step 8

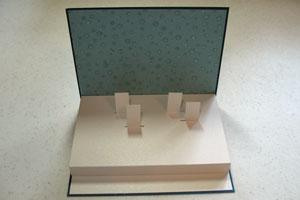
    Sharpen crease and remove backing from adhesive. Carefully slip tab through slot with adhesive facing down and tab pointing towards center of card. Holding card open at 90 degree angle, adhere tab straight up and down to base of card.
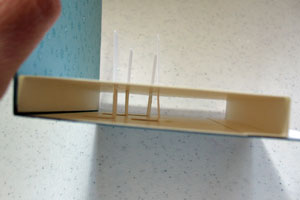
  9. Step 9

    Cut strip of patterned paper 2 1/2" x 12" for belly band. Wrap around card and adhere ends in back. Wrap ribbon around and tie bow.
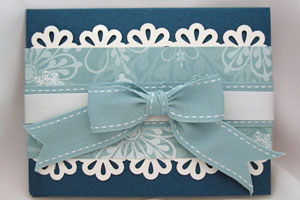
  10. Attach stamped pieces to tabs with dimensionals. Decorate front of stage.
Video!

Your Turn

You've seen the tutorial, now you try it! We've got a section of the gallery set aside for Pop-Up Stage. Try this technique, then upload your artwork to the gallery. Show us your creations!

***Please note - Internet Explorer/Edge is not a supported browser, and will not allow you to see the videos. Please use Chrome, Firefox or Safari to view our tutorial videos.

Questions and Comments

We'd love to get your feedback or questions. Leave your comment below.

I have been playing with interactive cards, so your video is very timely. Thanks for the inspiration.
TheresaMP  |  Sun Jul 17, 2011 at 6:56 AM
Thank you for this wonderful tutorial. I love these cards and now i see i can easily make a card like this myself. Thanx for sharing! smile
Debbie Meijer  |  Tue Jul 19, 2011 at 2:58 AM
I posted a link to this tutorial/video today.

Nancy Ward
PaperFriendly
Nancy Ward  |  Thu Jul 21, 2011 at 6:51 AM
Such a clear tutorial, your voice is so clear and easy to understand. What a beautiful idea, I can't wait to make Christmas cards and birthday cards with this technique - thanks for taking the time to make this tutorial
Regards
Janzjewelz  |  Sat Jul 23, 2011 at 5:46 AM
What is the brand of paper cutter you are using. It looks pretty versatile.
Kathy O'Neal  |  Sun Jul 24, 2011 at 4:03 PM
Thanks for the great tutorial! Can;t wait to try my hnd at this technique!
Cristy Butzen  |  Tue Jul 26, 2011 at 7:01 AM
Thank you so much for the tutorial. I think I'll add some rhinestones to the tress for dew.
Rhinestone Lover  |  Wed Jul 27, 2011 at 7:36 AM
Kathy, I'm using a Fiskars brand cutter.
Kim Score  |  Wed Jul 27, 2011 at 8:37 PM
this is a fab idea, I love pop ups and this one appears so easy to make, so I'm off to my craft room to attempt it!
thanks for the inspiration!
wendy  |  Thu Jul 28, 2011 at 8:35 AM
Thank You for a very clear, instructional on the pop up card. I have done a very simplified version (without stage) before... and I am excited to take it to the next level smile
Carol  |  Mon Aug 8, 2011 at 11:47 AM
Hi Kim - had just one question - after you attached the tabs (thru the "stage" and to the base) I could not see or hear WHERE you put the dimensionals for the pop up images - did you say about a half inch ABOVE the slit in the 'stage', so that it folds freely when the card is closed? This was not shown close up, so I wasn't sure!.

Thanks so much - this tutorial was really clear and easy to follow!
Sue  |  Sun Oct 2, 2011 at 6:14 PM
I have seen this card around but never have I seen a tutorial like the one you did. It was the BEST so thank you so much for the wonderful details in your tutorial.
Now I feel comfortable enough to try to make this wonderful card myself.
Thanks again.
QueenBea  |  Mon Mar 19, 2012 at 3:46 AM
Excelente tuto.
Gracias.
Graciela  |  Mon Jun 4, 2012 at 7:44 AM
You did a great job with your tutorial and card. Thanks so much- I have been looking for a card for my mother in law for her 82nd birthday. You explained it so well and simply. My thanks.
Debbie  |  Fri Aug 31, 2012 at 6:51 PM
this is wonderful! thank you!. I managed to create my own already using this tutorial.
Anya Kapustina  |  Wed Jan 16, 2013 at 12:21 AM

Page 3 of 3 pages  <  1 2 3

You need to be logged in to comment

GET OUR NEWSLETTER


Splitcoaststampers's privacy policy