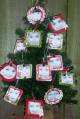
This is the finished product of my classroom tree and ornaments. I have had many requests to share how I made them. This is my attempt to do this. I took the tree in this week and my kids love to come to my desk and find their picture each morning! I am giving each child their ornament to take home on the last day of school before breaK! I am getting many requests to make ornaments for some of the other teachers!! Thanks for looking and for all the wonderful feedback I have recieved!
Merry Christmas to all!!
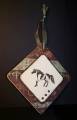
On some of the chipboard I used the direct ink to chipboard method using craft Real Red and Old Olive inks. On the others I applied the Dashing paper to the chipboard by using Modge Podge.
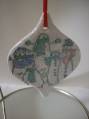
On the scalloped chipboard ornaments I used the Cropadile to punch the holes. I used a large circle and square punch to cut out the photos. I adhered them to a backing piece of cardstock.
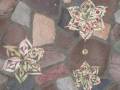
As far as the embellishments, I just used my imagination. The original idea came from the HolidaY mini. I emellished with brads, punch out stars, tiny crystals, and I had some snowflake eyelets that have been sitting in my craft drawer for years! You can do this! It was fun, but time consuming! Well worth it seeing the reactions from my 3 and 4 year old students!
Date: Wednesday, December 12, 2007 GMT Views: 1814
Favorited:25
Additional Info
Stamps: Merry and Bright
Paper: Dashing, Real Red, Old Olive, WW
Ink: Real Red, Old Olive craft
Accessories: On Board Holiday Chipboard, Mini Clips, brads, snowflake eyelets, circle punch, small star punch