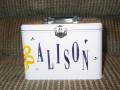
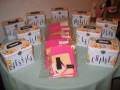
Nine girls including my daughter. All were 4th graders except for one kindergardener. Each girl received a "kit" with the precut supplies for 2 each of 4 simple cards. Their goodie tin included the personalized stamped tin, a stampin spot, a hand-stamped incentive stamp, gel pen, candy necklace and ring pop. They carried their completed cards home in the tins for storage. I enlisted two of the stamper moms to assist with the party. We had a great time!
Info - tins are from oriental trading. I used stazon ink directly on the tins. They were completely dry within 30 minutes, but I let them sit over night.
Just as I do for my adult stamp-a-stacks, each "kit" contained the pre-cut materials for each set of cards including envelopes in a baggie. The stations were set up with a stampin grid page, scrub, bone folder, scissors, stamps, glue stick, litter can and ink. Typically I use mono adhesive for my camps, but felt it would be more cost effective to use glue sticks for this.
I also tried to keep each card very simple with only one or two layers, no more than 2 colors of ink, and no more than 3 stamps. I only put out the stamps from the set that were needed. Some of the girls had stamped before, some not.
I started out with the welcome and what each tool was called and how to use it. Demo'd two of the cards. Half the girls started with the other moms while I demo'd the other two cards for the remaining girls. It worked out pretty well, even if I forgot to take pictures while we were actually stamping!
Pizza, soda, cake & ice cream AFTER all the stamping was complete. Still had time to open presents. Party was 3 hours in duration.
Date: Tuesday, August 1, 2006 GMT Views: 6557
Favorited:66
Art is intended to provoke an emotion from a total stranger. If you�ve succeeded in this, consider yourself an artist. Paper Shanks Blog. Love me or hate me, you are still talking about me