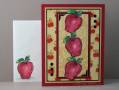
Measurements: these are larger than and more panels than the layout due to the size of the apple image.
A-2 card size 4.25 x 5.5”
Designer paper – 3 ½ x 4 ¾” plus borders - 1/16 and 3/32”
Embossed panel - 3 x 4 ¼” plus borders – 1/16 and 3/32”
--For the Cuttlebug negative effect embossing technique which I used on the solid yellow panel- click here.
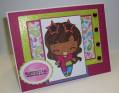
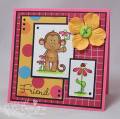
-Prismacolor pencils, baby oil and paper stumps were used to color the image using the Gamsol technique found in the resources section here at SCS. Baby oil replaces the Gamsol.
-The rose red and yellow border panels were ink distressed using the direct to paper technique which just means the paper is directly rubbed onto the ink pad.
-The nailheads are attached with Diamond Glaze (any lacquer product will work). To make the process fast and easy I squeeze a drop of lacquer onto a waxed paper (I repurpose the paper that stickers and labels are purchased on), then touch the end of a large corsage pin to the lacquer then to the back of the gem which picks it up, position it on the image and press down with a finger, there is a little time to slide the gem into position if needed before it sticks tight.
-The area under the corner tabs were flatten with a metal ball stylus so the tabs have an even surface to attach too, it also helps in keeping them attached to have a flat surface.
Tools: Iron Eagle punch for corner tabs, Fiskars - cutting scissors, Provo Crafts: Cuttlebug and Perfectly Paisley embossing folder, metal ball stylus, brayer, corsage pin