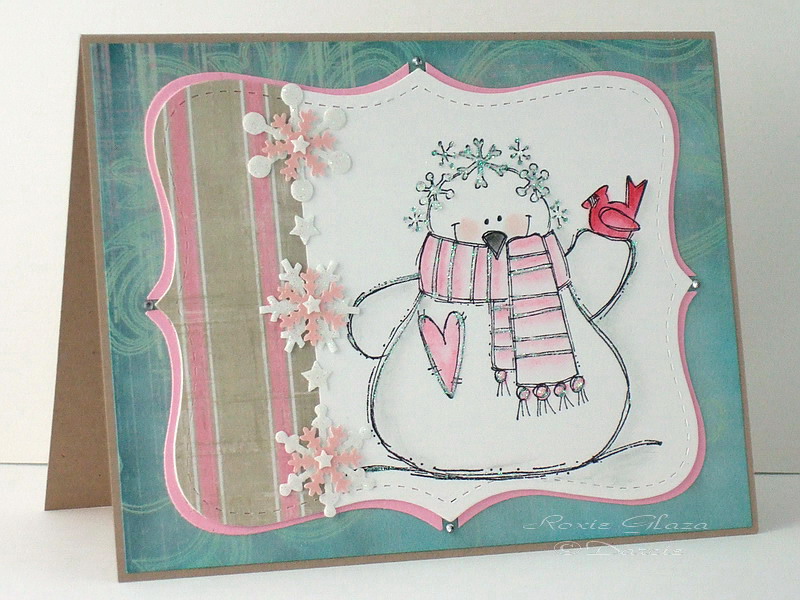
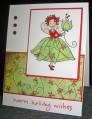
-The white cardstock and striped paper were taped together on the back side before the cut was made.
-For the border around the Top Note panel I cut a second piece of cardstock and cut tip to tip both ways. So youÂ’ll actually be making three cuts, #1 line up two tips on your cutterÂ’s edge and cut, #2 and #3 is easy because you now have a straight edge, place the tip on the cutting edge and make your cut.
Now just place under the main panel and secure, I have about a 1/8” gap between the pink layers on each tip. The border won’t be a perfect width all around.
-White snowflakes and stars are a Cuttlebug die cut named Snowflakes #2; pink portion is a Marvy punch. Its glittered paper so Diamond Glaze worked well to assemble them and AleeneÂ’s tacky glue worked fine to attach to the card.
-The gems were attached with Diamond Glaze.
-Prismacolor pencils were used to color the image.
-Art Glitter adhesive was used to apply the glitter to the snow girl image.
-Ink distressing was done on the teal designer paper.
Date: Tuesday, December 8, 2009 GMT Views: 2635
Favorited:27
Accessories: Stampin Up: top note die cut, Cuttlebug: Snowflakes #2 die cut, Marvy: snowflake punch, Diamond Glaze, Art Glitter adhesive, glitter, AleeneÂ’s tacky glue, Prismacolor pencils, baby oil and paper stumps for blending, gems
Techniques: Prismacolor, ink distressing, die cuts, glittering
Registered: February 10, 2006 Location: Mid-Atlantic Posts: 13089
Sun, Dec 13, 2009 @ 4:22 AM
Love the pink snowflakes .... thank you for always sharing all your clever design details with us!
~ Rita
------------------------------ Rita
God demonstrated His love toward us, in that, while we were yet sinners, Christ died for us ... being now justified by His blood, we shall be saved from wrath through Him. Romans 5:8 & 9